Monday, February 18, 2013

You have to engage

Smoked ham hock rillettes 
"We're sensorily deprived right now in modern life. Our eyes are engaged--sometimes our ears--but our bodies? Not so much. These aren't just bags of bones we're carrying around." -- Michael Pollan in Lucky Peach no. 6.
Smoked ham hock rillettes. This one might be a hard sell, not because making a few jars is particularly difficult but because--there's no point in trying to hide it--it's messy and time-consuming, a real process as far as a recipe goes. You cannot but get your hands (and your kitchen) dirty. But that's also what I enjoy about making them.
You might roll your eyes. Grad student. Too much time on her hands. But that's not what this comes down to. On weeknights, I'm all for ease and convenience, for meals that practically cook themselves and hardly leave a trace. But those aren't the meals that draw me to the kitchen. They're not the reason I cook. I cook to engage myself, to use my hands, to make messes and learn a thing or two in the midst of making them. These aren't, of course, the most basic reasons for being in the kitchen, but they are the ones that make cooking a pleasure, whatever night of the week it may be. And it's good, I think, to remind ourselves of this once in a while and cook something demanding, something that draws us in. And these rillettes, they do that.
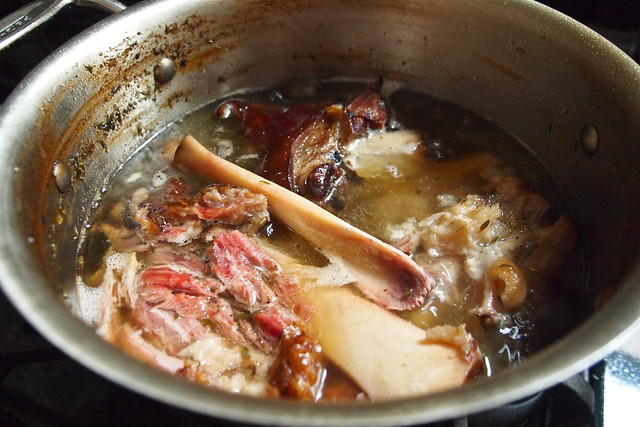
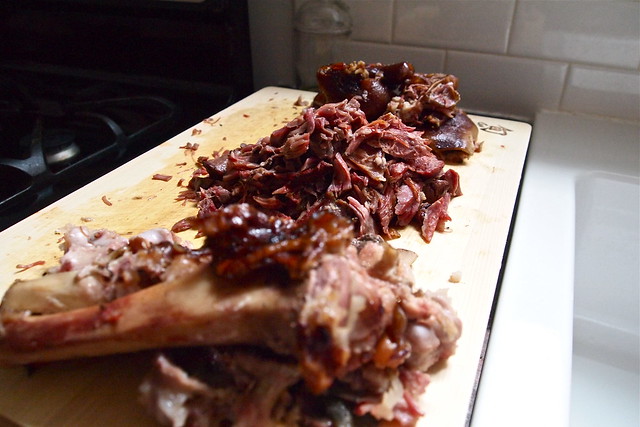
Smoked ham hocks Ham hocks near the end of cooking Ham hocks broken down
Rillettes traditionally are a coarse-textured, rich spread made from a fatty cut of pork, duck, or goose. The meat is gently braised, finely shredded, and then mixed with fresh herbs, spices, and the flavourful liquid in which it was braised. Pretty straightforward. The result is something like pâté but less fussy. These particular rillettes, however,  come from the good people at Mission Street Food and so, unsurprisingly, part with tradition. 
The hock is pretty lean as far as cuts of pork go. In fact, it's mostly skin, bone, and connective tissue. So that's where things start to get messy with these rillettes. Once the hocks have been cooked, you need to get at what little meat there is. And there's no getting around this, you need to use your hands. Bits of  meat are often tangled up with connective tissue and hard to spot, so what you need to do is break down the hocks by hand and feel your way through them, pulling soft tissue from bone, picking out the meat as you go.
But why use smoked hocks in the first place, why go through all that trouble for so little? Because what smoked hocks lack in flesh and fat they make up for in flavour and collagen. Remember all of that skin, that sticky connective tissue? Even after four hours of simmering, these are still steeped through with woodsy, smoky flavour. And just as important, they're rich in collagen. Collagen is all about texture. It's basically what gelatin is made out of. It's the stuff that gives homemade stocks their satiny, rich mouth-feel. So, naturally, that skin and connective tissue don't go to waste here. You whirl them in the blender with a splash of stock from cooking the hocks and push that through a sieve. And there you have it, smoky gelatin purée.
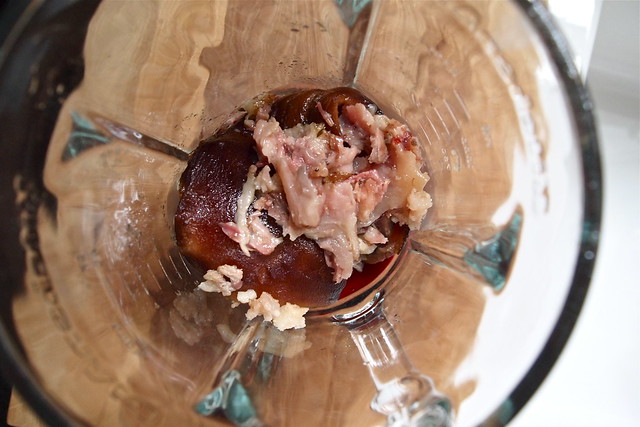
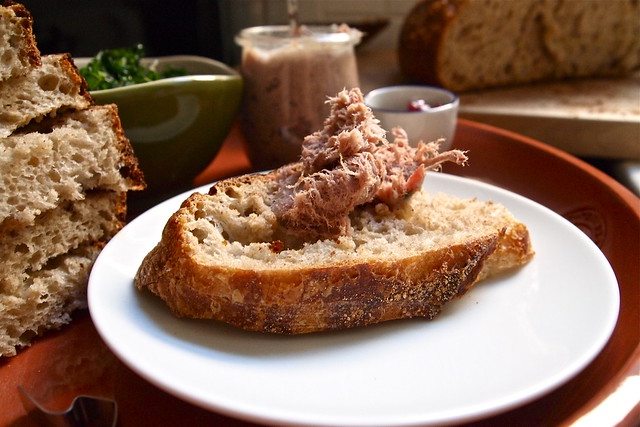
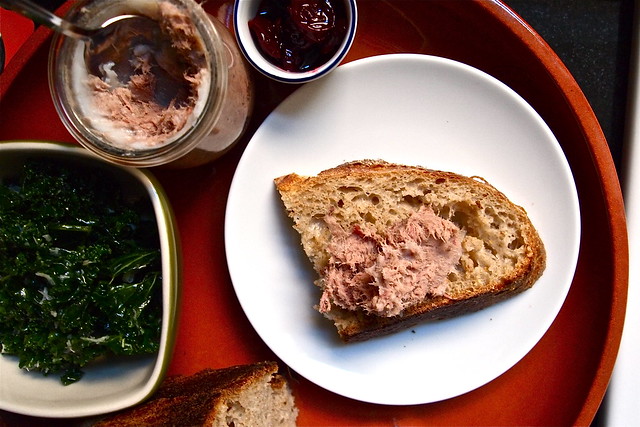
Skin and connective tissue Components collected Rillettes on sourdough
Now, this, I think, is where things get demanding. It isn't that anything gets difficult. It's just that your attention, your judgement is called for. You have to engage. Let me explain. At this point, you'll have all of your components lined up. From the hocks, you'll have meat, pork stock, and gelatin purée. You should also have some rendered pork fat (yes, lard) on hand to supplement what you have, since ham hocks are so lean. Then there are the seasonings. Quatre épices, a blend of white pepper, nutmeg, cinnamon, and clove, is traditional. Crushed garlic, dijon mustard, sherry vinegar, and fresh thyme leaves aren't out of place either. Salt, needless to say, is important. (As printed, the MSF recipe is loosey-goosey. Very helpfully, it calls for 'spices'.) The meat goes into the bowl of your stand mixer fitted with the paddle attachment. What happens next is more or less up to you. Each of the components will contribute a particular flavour and/or texture to the finished rillettes. How you prioritize them is a matter of preference. What this means is that you have to taste and tweak as you go. You have to ask yourself: does this need more fat? Is it getting too dry--should I add some stock? Could it use more acidity, more vinegar, maybe? Like I said, you have to engage. And little by little, you'll get to something that pleases you, that makes you beam.
So what I like about making these rillettes is that it's very physical, very involving. It's all about you feel and what you taste. This is no dump-and-stir exercise. There's no crossing your fingers, hoping that things have turned out. How things go is on you. It's a little scary, for sure. But it's also utterly liberating. I don't cook like this very often. I lean a lot on good cookbooks, regimented quantities. And on most days, that's all I feel I have the time for. But once in a while, I think, this is just the sort of thing you need to do.

Smoked Ham Hock Rillettes
Adapted from the Mission Street Food Cookbook
Note: About the seasoning. I stuck with fairly traditional seasonings, but you shouldn't feel limited to these. Look at other rillettes recipes for guidance. It'll be hard to go wrong. For example, I flat-out forgot to add mustard. My feeling is that juniper might be a nice addition. About the pork fat. There's no need to spring for anything as fancy as leaf lard for these rillettes. Save the good stuff for pies. But do take the trouble to find yourself some good, unprocessed fat. Try your favourite butcher. About the quantity of hocks. I got away with using just over 3 lbs of hocks but only because one of them was extra meaty. It would probably be wiser to use closer to 4 or 5 lbs. Shelf life. Sterilizing your jars will help the rillettes keep for longer in the fridge. Both Nigel Slater and Jane Grigson advise pouring a layer (half an inch or so) of melted pork fat over the rillettes if you're not planning on eating them within a few days.

3-5 lbs meaty smoked ham hocks (see above)
2.5-3 quarts chicken stock, pork stock, dashi, or water
1-2 cups rendered bacon or pork fat, plus more to cover (see above)
2 tablespoons or so sherry vinegar
1 tablespoon thyme leaves
1 1/2 tablespoons or so quatre épices
1 large clove garlic, crushed
Salt

Gently simmer the ham hocks in the chicken stock, pork stock, dash, or water.
After about 4 hours, the meat should be very tender. Cool the entire pot until you can handle the hocks. Drain and reserve the stock. (At the end you'll have plenty of stock left for cooking greens, or just for sipping.)
Pick the ham hocks apart by hand. Separate the meat from the skins and soft collagen. Reserve both. (The edges of the ham hocks can become dried out and tough from the smoking process or from not being fully submerged in liquid. Move the hocks around periodically as they simmer, and discard any parts that may be too tough to rillette. Discard any tough skin, bones, and weird gristle.)
Blend the skins and collagen with just enough stock to get the mix going (probably about 1/4-1/2 cup), creating a gelatin purée. Strain the purée through a fine sieve, using a lade or spoon to push it through.
Combine the meat and some of the purée, fat, vinegar, and spices in a stand mixer. (The ratios of fat-to-meat-to-gelatin will vary, depending on how you prioritize richness (fat), unctuousness (gelatin), and moisture (stock). Taste as you mix; add the salt, vinegar, mustard, and your spices, herbs, or garlic until you reach the desired balance.) Mix using the medium-low setting and the paddle attachment of your mixer. For best results, mix the rillettes at the temperature it will be served.
Store in glass or ceramic jars and chill in the fridge until ready to serve. Serve with good bread, pickles, a sharp salad, or even some tart fruit preserves. Consider stuffing any that remains in baked potatoes, as Nigel Slater suggests.
(In addition to the ham-hock stock, there'll be lots of leftover gelatin purée, which you can use to enrich anything from meatballs to gravy. If you're not quite ready to jump into another meat-centric project, it's okay to freeze the purée for later use.)
Serves 12-16 as an appetizer. (Fills about four 200 g jars.)

Monday, February 4, 2013

This is it

Parsley and barley salad
If in the past year or so there was a cookbook that I reached for most, one whose pages caught the spatter of sauce and oil and cream more than any other, it was definitely Nigel Slater's Tender. I cooked from it a lot, and we ate really well, all year long. But this year, it's my feeling that things will be a little different. This, I think, might just be the year of Jerusalem. And, as I'm sure you've already heard, this cookbook is one that dazzles, one that overflows with colour and stories and bold, brilliant flavours. So I won't say much more about it. I'll just say this--I cooked from it all weekend, and, friends, this is a cookbook rich in small splendours. It is one hard to pull away from. I can't wait to cook from it again.
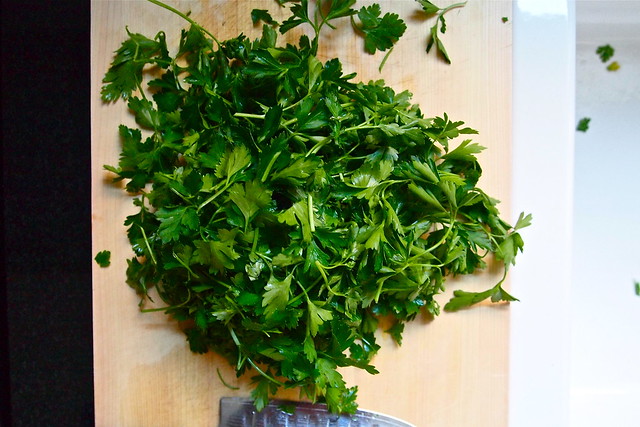
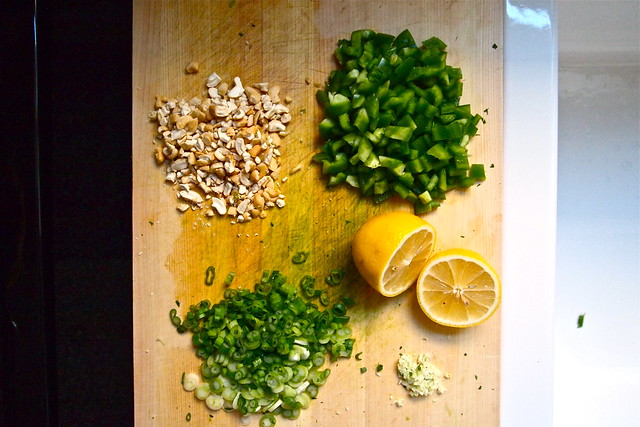
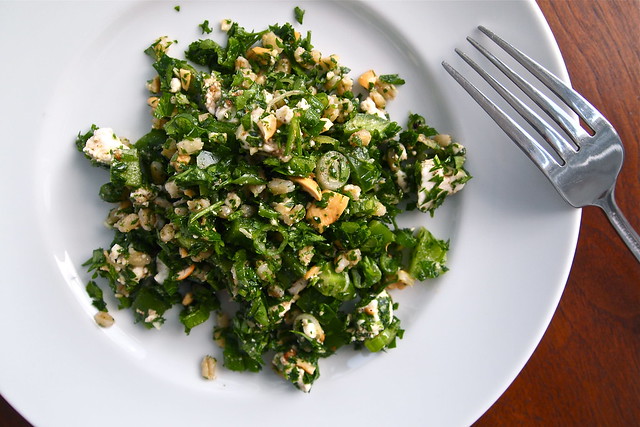
Parsley to be chopped The rest Salad again
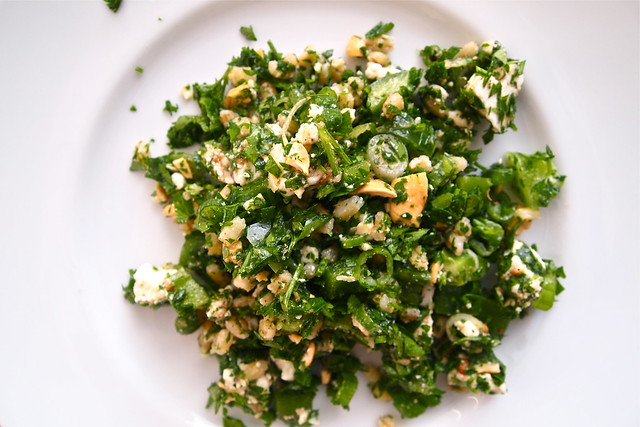
The dish from this past weekend that I want to share with you is one, I think, that between dishes like roasted chicken with clementines and arak and burnt eggplant with garlic, lemon, and pomegranate seeds is easy to overlook. Parsley and barley salad. It sounds about as uninteresting as can be. But it isn't. This salad is bright, bold, and vibrant. The parsley, with its peppery, anise notes, definitely leads, but then there's the creamy za'atar-marinated feta, the crunchy bits of sweet green pepper, the delicate barley, the crushed, roasted cashews, the sharp scallion. I don't know about you, but come February, I'm starved for clean, bright, simple foods. I need something to counter the inevitable heaviness of winter, the rich stews, the parade of roasted root vegetables. I need something that will wake me up. This salad is it. Confetti for the parade. Let it fall on your plate, and you'll see.
I've made this salad a couple of times now and have eaten it just on its own as a late dinner and alongside a number of other things. I think it went particularly well with roasted, cumin-spiced cauliflower. But it's pretty versatile. Think of it as a sort-of wintery tabbouleh, (for those months when tomatoes are just unthinkable).

Parsley and Barley Salad
Adapted from Yotam Ottolenghi and Sami Tamimi's Jerusalem
Note: About the barley. This salad is all about the parsley. Even so, I do like to add a little more barley than is called for, but do what you will. About the za'atar. Za'atar is a blend of dried thyme, sumac, and roasted sesame seeds. The blend I bought also has oregano and hyssop in it, which I'm not sure I'm all that crazy about, but it's easy enough to make your own at home. About the feta. It's really important to get a good, creamy feta for this salad. It serves as a counterpoint to the sharpness of the salad's other ingredients. None of this insipid, watery stuff.

40-55 g / scant 1/4 - 1/3 cup pearl barley (see above)
150 g / 5 oz good, creamy feta cheese
5 1/2 tablespoons olive oil
1 teaspoon za'atar
1/2 teaspoon coriander seeds, lightly toasted and crushed
1/4 teaspoon ground cumin
80 g / scant 3 oz flat-leaf parsley (2-3 bunches), leaves and fine stems
4 green onions, finely chopped
2 garlic cloves, crushed
40 g / 1/3 cup cashews, lightly toasted and coarsely crushed
1 green pepper, seeded and cut into 3/8-inch dice
1/2 teaspoon ground allspice
2 tablespoons freshly squeezed lemon juice
Salt and pepper to taste

Place the pearl barley in a small saucepan, cover with plenty of water, and boil for 30-35 minutes, until tender but with a bite. Pour into a fine sieve, shake to remove all the water, and transfer to a large bowl.
Break the feta into rough pieces, about 3/4 inch / 2 cm in size, and mix in a small bowl with 1 1/2 tablespoons of the olive oil, the za'atar, the coriander seeds, and the cumin. Gently mic together and leave to marinate while you prepare the rest of the salad.
Chop the parsley finely and place in the bowl with the green onions, garlic, cashew nuts, pepper, allspice, lemon juice, the remaining olive oil, and the cooked barley. Mix together well and season to taste. To serve, divide the salad among four plates and top with the marinated feta.
Serves 4.

Sunday, January 20, 2013

Above all, flakiness

Poppy seed danishes
When Octavian and I were in Berlin last summer, we were more or less on two different trips. He was there for a workshop and so was limited most days to a view of the city from a hotel conference room. I, however, was only tagging along and so had the luxury of spending my days wandering the winding streets, drinking in everything. There was a lot to the trip, then, that Octavian only ever saw in photos, heard about. And, unsurprisingly, there were spaces, moments, flavours, that were pretty well impossible to capture or convey, that he would've had to have just been there for.
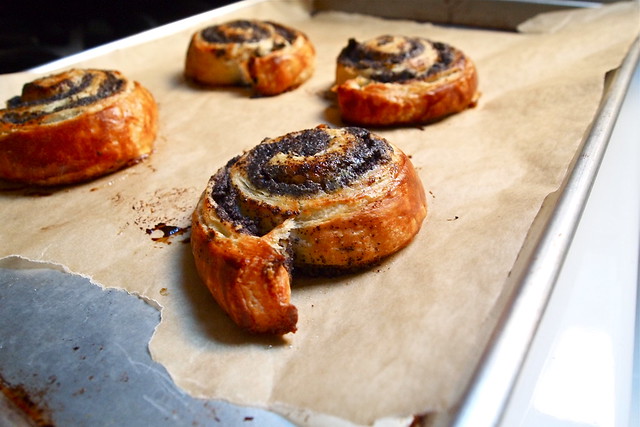
One of those things was a pastry I had at Brot und Butter, a buttery, delicate swirl of a pastry filled with poppy seeds. I ordered it pretty much at random. It was one of my first days in Berlin, and I had been walking all afternoon, paper map in hand, and had already had a few awkward I'm-sorry-my-German-is-awful-sprechen-Sie-Englisch? moments that day. So by the time I'd found my way to the cafe, I was tired and couldn't quite find the courage to speak up and order something. (I also couldn't figure out whether I was supposed to order from the counter or just take a seat.) So instead I just stood there, looking at the pastries in the cases, then at the rows of canned and boxed goods, indecisive about what to do and on the verge of just fleeing the situation. Apparently, I looked pathetic and stricken enough that about ten minutes in one of the women behind the counter asked me if I needed help. So I fumbled my way through another conversation, pointed at one of the poppy seed pastries, and was relieved just to be able to sit down with something, anything, and not feel so much like the silly North American that I was. It helped that the pastry was good, very good. For a few moments, anyway, I forgot the awkward exchange, lost between flakey, poppy-filled bites.
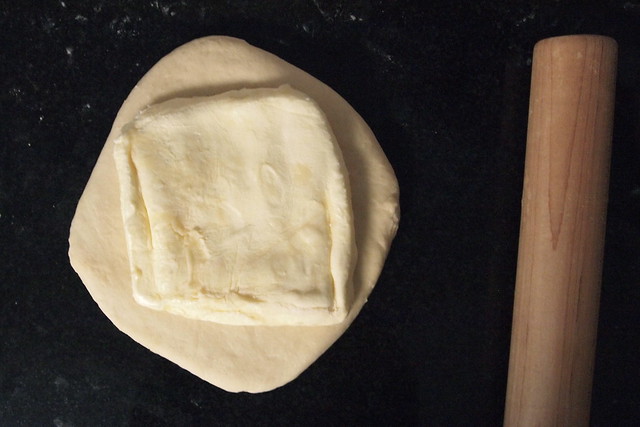
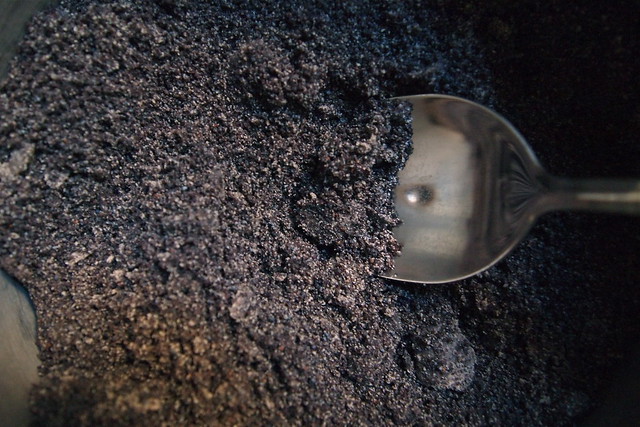
Butter slab Ground poppy seeds Danish dough
I knew as I ate that this pastry wasn't one that I'd be content just to remember. I needed to be able to make more just like it at home, long after this trip was over. But given all the awkwardness that had just transpired, I wasn't about to start asking questions about pastry methods and ingredients. So I settled for scribbling down its name from the pastry case--Mohnschnecken--and retreated.
This brings us to this past week, when I finally accepted that I would have to pull together a laminated yeasted dough if I wanted more Mohnschnecken.* Now, just what a Schnecke is seems to depend on who you ask. Some recipes have you add sour cream to the dough, some have you make letter-folds with it for flakier layers, some have you laminate in the butter for even flakier layers still. Most agree that the dough should be rolled up with its filling and cut into spirals--hence the name Schnecke, which just means snail in German. But because I remembered flakiness above all, I decided I would have to make a laminated dough--beat cold butter into a pliable slab, tuck it into a yeasted dough, and letter-fold it for layer upon layer of flakey pastry. But honestly, the prospect of working with a laminated dough again scared me. I'd only done it once before, and as I knew, it could get messy. You need to work quickly, so that the dough and butter don't get too soft to work with. But you also need to be gentle. If there isn't enough flour on the counter and the dough sticks and tears, the butter will start seeping out, and you might not get those perfect flakey layers. (I don't want to overstate the difficulty of working with laminated dough, but it's definitely something that I'm still working to get better at.) So it took me a few days to work up the courage. Then I dove in.
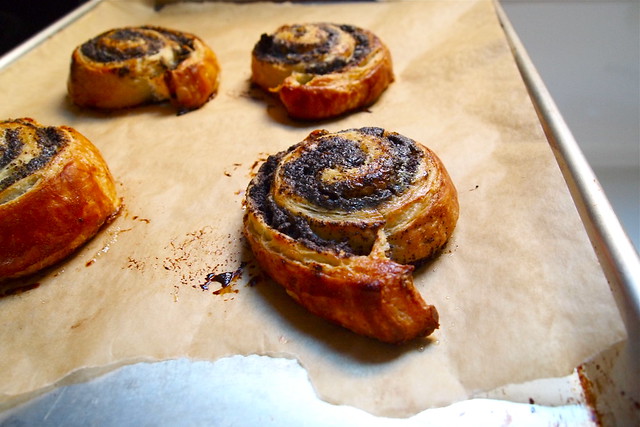
And it wasn't all that bad. I had a bit of trouble towards the beginning getting the butter the right consistency, and there were a few minor tears in the dough, which I tried my best to pinch together and then forget, but that was it. By early the next afternoon, we were tucking into our first pastries, puffed, golden, still warm from the oven, and ever so flakey. Totally, totally, worth the trouble, awkwardness and all.
Oh, and for those of you unfamiliar with poppy seed fillings--well, I just think we ought to see more of them around here. Poppy seeds have a pleasant bittersweet quality to them, which I think lends itself particularly well to pastry. I saw poppy-seed-filled pastries everywhere in Berlin and poppy seed ice cream too. The Berlinners have the right idea.
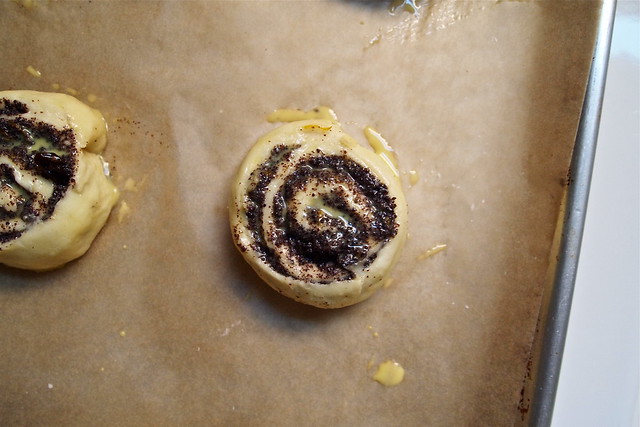
Poppy seed filling Danishes proofed and egg-washed Danishes
Much of my success with the Schnecken, I think, owe to the step-by-step photos that Joe, the man behind the pastry recipe, took the trouble to take. You can find his instructions for pulling together the pastry dough here, his instructions for laminating (especially helpful!) here, and his instructions for shaping here. I am actually looking forward to my next encounter with a laminated dough. These particular Schnecken, by the way, are a marriage of two recipes. The poppy seed filling comes from a New York Times recipe for hamantaschen via Smitten Kitchen.

Poppy Seed Snails (Mohnschnecken)
Note: About freezing. I have to say that in my experience, pastries that have been frozen and then thawed, proofed, and baked are never quite as good as ones baked fresh. They just never have quite the same airy crumb. But these Schnecken held up pretty well. I'm probably just being overly picky in saying that they're not quite, quite as good. About the raisins. The next time I make this poppy seed filling, I might consider giving the raisins a rough chop before adding them in. This filling is about the poppy seeds after all!

1 batch pastry dough, chilled for at least an hour (recipe here)
1 batch poppy seed filling, chilled completely (recipe here)
2 egg yolks lightly beaten with a splash of milk or cream

Roll out the pastry dough into a rectangle (the exact dimensions don't really matter--I'd aim for it to be at least twice as wide as it is long) just shy of a quarter-inch thick, dusting the work surface, the dough, and the rolling pin with flour as necessary. Gently spread the poppy seed filling in a thin, even layer over the dough, leaving a half-inch border at the sides and bottom of the rectangle. (You might not need all the filling.) Starting from the top of the rectangle, roll the dough up into a cylinder about 1-1/2 to 2 inches in diameter. Trim the ends and then cut the dough into 1-1/4 inch pieces with a bench scraper or a sharp knife.
Place on a baking sheet lined with parchment paper, six to a sheet, and cover to proof until soft and airy, about 2 hours. (At this stage--before the final proof--you can also put them in the fridge overnight and then proof them the next day or store them in the freezer for up to three months. Just be sure to thaw frozen pastries overnight in the fridge before proofing and baking. From the fridge, the pastries may need an extra hour to proof.) Then brush with the egg wash and bake in an oven heated to 375 degrees F until golden, about 15 minutes.
Makes about 12 pastries.

*It occurs to me now that the Mohnschnecke I had in Berlin might not have been made with a laminated dough. Looking back at my notes from the trip, my guess is that that pastry was made with a sour cream dough, which made it crisper and less croissant-like. But hey, I'm not going to complain.

Thursday, January 10, 2013

It's not always about looks

Smoked pork hock
A smoked ham hock is one of those items off a hog that will never win any beauty contests. It comes to you still wearing its skin, now dark and leathery from the smoker. Sometimes, a few wiry hairs still jut out from the skin, a reminder of its provenance. A thick bone protrudes from its centre, making it obvious that there isn't much to it but bone. I was more than a little intimidated the first time I freed one of these from its butchers' paper. I just wasn't sure that I wanted it in my pot, especially with that hair. Did this thing really belong in a cooking pot? (The one pictured above is a much nicer-looking specimen than my first hock. Hair-free too.)
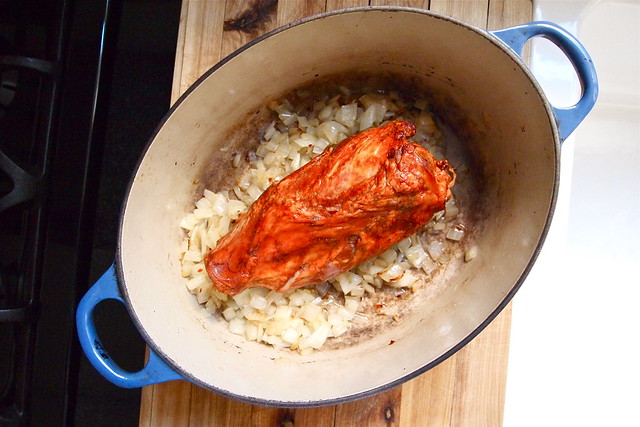
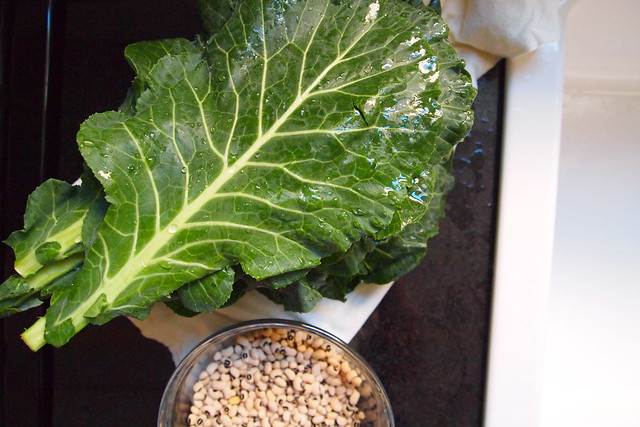
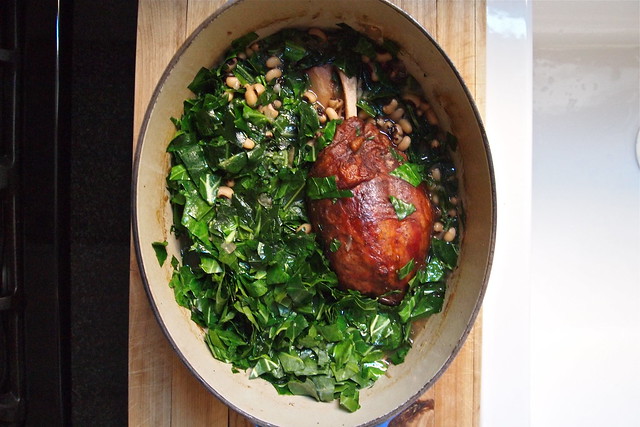
Ham hock and onions Collards and black-eyed peas Collards and the hock
But I quickly came to appreciate a smoked hock for what it was. It isn't always about looks, you know. See, a smoked ham hock is an ingenious thing. The hock is the cut from a hog's hind leg between the foot and the ham proper. Unlike the ham, there isn't much meat to the hock. It's mostly bone, skin, and tough connective tissue. And what meat there is is pretty lean. For these reasons, it's not a much sought-after cut. It takes a little work to get to a hock's goodness--a long, low, simmer. So the smoking is one way to make it worthwhile. As a smoked hock breaks down in its cooking liquid, it gives off a lot of flavour--smoky, porky, woodsy flavour. Like I said, ingenious.
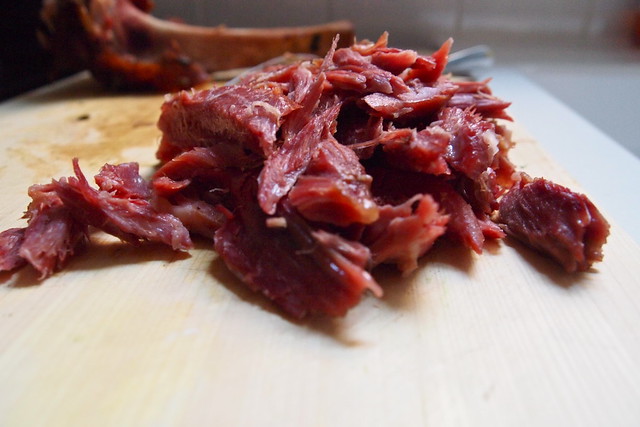
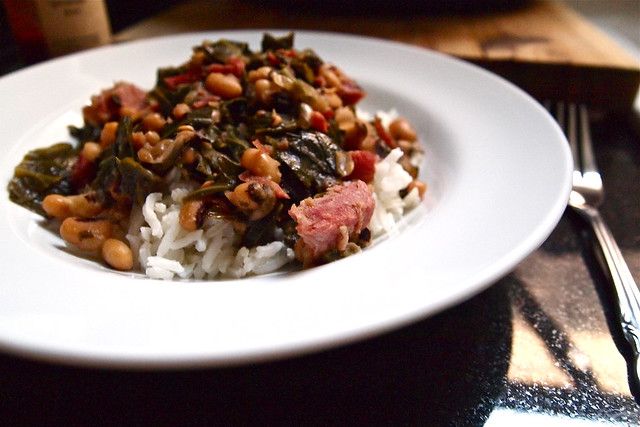
Now, maybe early January isn't the best time to be extolling the virtues of pig parts. But one of things I like most about a smoked pork hock is that a little goes a long way. Drop just one meaty hock (remember, it's mostly bone) into a pot with some onion and water and set it to simmer, and you're on your way to something special. That's the idea, anyway, behind Kemp Minifie's hoppin' John collard stew. You let your hock simmer away the afternoon, returning just to add some black-eyed peas to the pot after an hour and some collard greens an hour after that. It's my favourite kind of winter cooking. You can leave things to bubble merrily on their own and wander off to daydream, read, or do a load of laundry. And when the day's light has faded, you just return to fish out the hock, separate the meat from skin, fat, and bone, return the meat to the pot, and then ladle some of that stew over a plate of rice.
Smoked hock meat Hoppin' John collard stew
Pork and beans and greens might not exactly be your idea of how to start off the new year. But the smoked ham hock and the culinary tradition behind it--the resourcefulness of it, the ingeniousness of it--really appeal to me right now. These are ideas I can get behind, ideas I want to carry with me the  whole year through. And, if nothing else, who doesn't like a pile of silky collards, smoky meat, and creamy beans floating in porky broth on a cold winter's night? Just don't forget to bring your favourite hot sauce to the table too. Happy new year, everyone. 

Hoppin' John Collard Stew
From Kemp Minifie via Gourmet

1 medium onion, chopped
2 tablespoons vegetable oil
1/4 tsp hot red-pepper flakes
1 meaty smoked ham hock, about 1 lb in weight
10 cups water
1/2 lb / 1 1/4 cups dried black-eyed peas, picked over and rinsed (don’t soak)
1 lb collard greens, center ribs discarded and leaves chopped
Hot sauce to serve

Cook onion in oil with 1/2 tsp salt in a deep heavy medium pot over medium heat, stirring occasionally, until lightly browned, about 8 minutes. Add red-pepper flakes and cook, stirring, 1 minute. Add ham hock and water and simmer, partially covered, 1 hour. 
Add black-eyed peas and simmer, partially covered, 1 hour. 
Stir in collards (add water if necessary for a soupy consistency) and simmer, partially covered, stirring occasionally, until greens are very tender, 45 minutes to 1 hour. 
Remove ham hock and chop meat, discarding skin, fat, and bone. Stir into stew and thin with water, if necessary, then season with salt.
Serve over rice and with hot sauce at the table. The acidity of the hot sauce helps to cut through the rich smokiness of the stew.

Serves six.

Tuesday, December 18, 2012

And the jewels do shine

Raggedy blooms
A few weeks ago, a friend of mine had a few of us over for a housewarming. We spent a lot of it plopped down with steaming cups of tea, pouring over her cookbook collection. My friend said that we were free to borrow whichever cookbooks we wanted, that she didn't cook from them much and was mostly content just to read through the stories and recipes and be warmed by them. I didn't take her up on her offer that day, but there was one particular book that stuck with me, Sam and Sam Clark's Moro East.
On dark, drizzly days like the ones we've been having here in Chicago, leafing through its pages is just about enough to warm you. The book provides a glimpse into life at the community garden where the Clarks tended a plot--a year in vegetables, small gatherings, and food shared with friends. Though the Clarks are based in London, their book has the feel of some place warmer, some place arid and sun-kissed. This owes mostly to the friends the Clarks made while gardening. Many of them hailed from the Mediterrannean--Turks and Cypriots who knew a thing or two about grape leaves and sumac and grilled lamb. They and the Clarks cooked together, often over charcoal in the open air right by their neighbouring plots. Many of the recipes in the book are contributions from these friends.
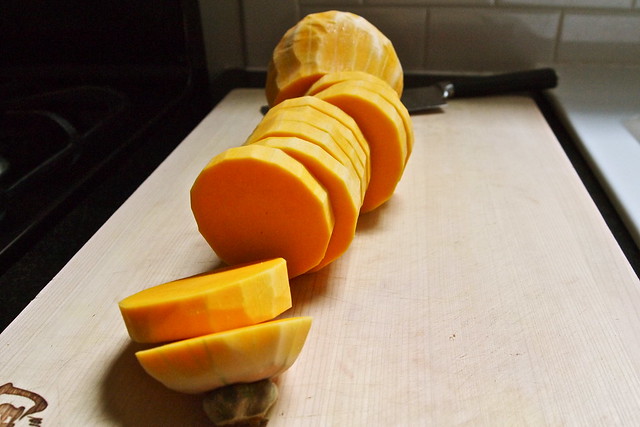
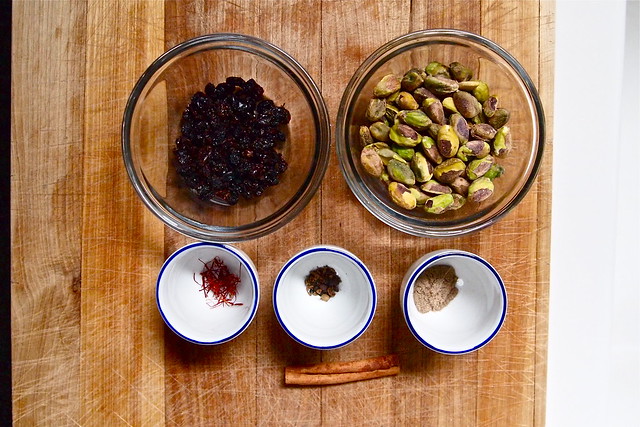
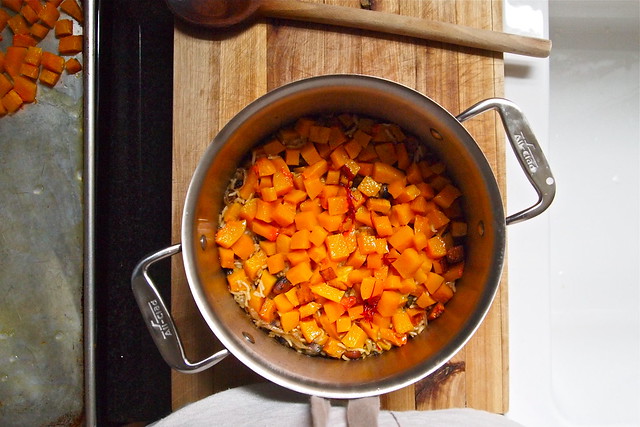
Butternut squashMise en place
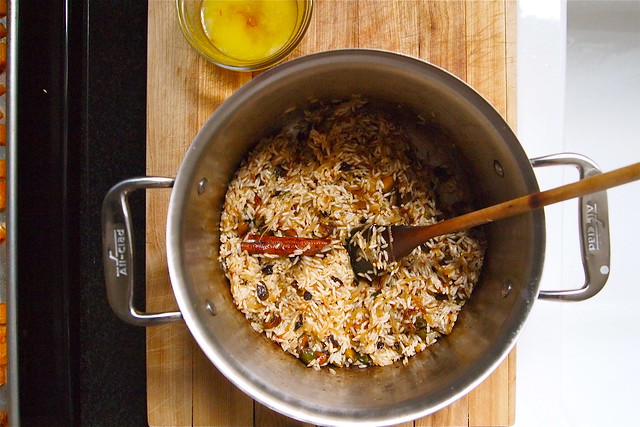
Pilaf
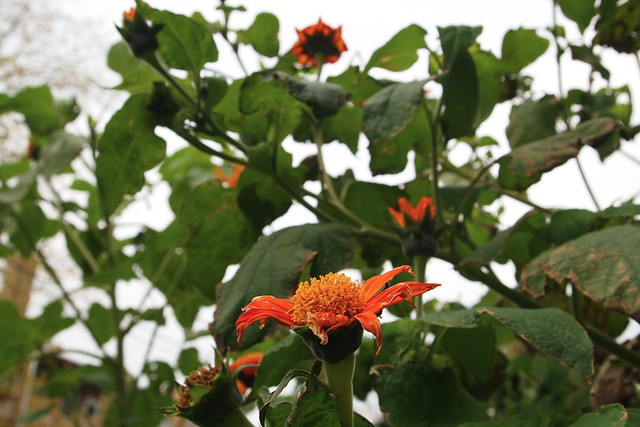
I finally asked for my friend's copy just as the temperatures around here were dipping. In return, I snipped her the last few raggedy blooms from the garden out back--something to brighten her new place for a while. By then, it was November. Thanksgiving was just around the corner. I'd been busy writing and hadn't thought much about it. I certainly hadn't placed an order for a turkey. So I started leafing through Moro East, looking for ideas. One of the first recipes I landed on was for something called la caldereta, a bone-in lamb shoulder rubbed with thyme and rosemary and slow-roasted with onions and potatoes. Exactly what I was looking for, and with a pretty name like that, how could I resist? So, that's what we built our Thanksgiving meal around this year, a lamb roast from Extremadura (in western Spain) re-interpreted by a couple of London chefs. It was wildly non-traditional. Think homemade pita bread, chickpea fritters, mint-flecked yogurt, and roasted eggplant scattered with pomegranate seeds. (I don't think our guests minded.)
Crowned with squashJewelled pumpkin rice
Thanksgiving was a while ago now. But weeks after, there's one dish from our meal that I'm still thinking of. It's another from Moro East, a side dish that the Clarks call jewelled pumpkin rice. (They really know how to name a dish, now don't they?) It's not much to look at, despite the name. The colours are those of the late autumn landscape--soft browns, bursts of orange, faded greens. But it really is something. The rice is made spectacularly fragrant by cinnamon, allspice, and cardamon. These go in the pot following the butter and onions and toast for a good long while, perfuming your kitchen. And the jewels buried in the rice do shine--tart, chewy currants, roasted butternut squash, and toothsome pistachios. All this is finished with a splash of buttery saffron water, which lends it a lovely roundness.
The friend who lent me the cookbook was one of our Thanksgiving guests. I was gratified when she told me that we'd cooked things that she'd often looked at but would probably have never cooked herself.
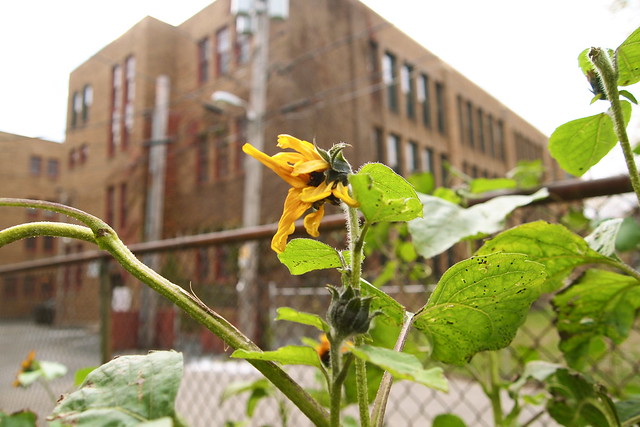
SunflowerMarigold
I thought that the rice went wonderfully with the lamb shoulder we roasted. Its sweetness complemented the grassy, gamey notes in the roast. With the onions and butternut squash in this dish, its sweetness is rather assertive. You'll want to pair it with something else that can hold its own.

Jewelled Pumpkin Rice
Adapted from Sam and Sam Clark's Moro East
Note: About the butter. Vegans, you can easily replace the butter that the onions cook in with an equal amount of olive oil (75 g), which is what I did for one of my friends at Thanksgiving. After letting the rice rest off heat for 5 minutes, I then set aside his portion and poured the buttery saffron water on the remaining rice. Just as easily, you could omit the butter from the saffron water. I've since made the rice again, this time going half butter, half olive oil. Surprisingly, the butter didn't make much of a difference.

500 g / 1 lb peeled and seeded butternut squash (the flesh of a 750 g squash), cut into 1/2-inch dice
1 teaspoon fine sea salt
2 tablespoons olive oil
a big pinch of saffron (about 50 strands)
100 g / 7 tablespoons unsalted butter, divided (see note above)
3 inch cinnamon stick
4 allspice berries
1 large or 2 medium onions, thinly sliced across the grain
15 g / 1 1/2 tablespoons dried barberries (or currants)
50 g / 1/2 cup shelled unsalted pistachios
1/2 teaspoon ground cardamom
300 g / 1 2/3 cup basmati rice, soaked in tepid, salted water for 1 hour
450 ml / 1 4/5 cup vegetable stock

Preheat the oven to 450 degrees F. Toss the diced butternut squash with half of the salt and the olive oil. Spread it in a single layer in a baking tray and roast for 30 minutes or until tender.

Mix the saffron with 3 tablespoons of boiling water and add 25 g (about 2 tablespoons) of the butter, which should melt. Set aside.

Heat the remaining butter in a medium saucepan with the cinnamon and allspice until it foams, then add the onion and the remaining half teaspoon of salt. Fry over medium heat for 10-15 minutes, stirring occasionally until the onion is soft and starting to colour. Add the barberries, pistachios, and cardamom and cook for 10 minutes more, until the onion is golden and sweet.

Now drain the rice and add to the pan, stirring for a minute or two to coat, then pour in the stock. Taste for seasoning then scatter with the roast squash. Cover with a circle of parchment paper and a tight-fitting lid and cook over high heat for 5 minutes. Reduce the heat to low and simmer for a final 5 minutes. Remove the lid and parchment and drizzle with the buttery saffron water. Replace the lid and leave to rest, off the heat, for 5-10 minutes.
Serves 4-6.

Sunday, November 18, 2012

Little luxuries

Surprise Tatin
About two weeks ago, a couple of good friends of mine here in Chicago became parents! This, for me, anyway, is still a little mind-blowing. I feel as though, still being in my mid-twenties and a grad student, I only act like a real grown-up about half the time. Sure, I have obligations. But most days, I don't have to be anywhere at any particular time. I can work at home, curled up in an armchair, barefoot, hair still a mess. I can ease my way into the day with a good cup of coffee and buttered toast, when most people are already shuffling off to work. I can pull together a loaf of sourdough pretty well every week, even mid-week, midway through the day, if I want. So I don't quite feel like I live a particularly grown-up life with grown-up responsibilities. And the thought of having that change anytime soon, of giving up little luxuries like late breakfasts and weekly bread-baking--well, let's just say that I think my friends are brave, brave folks.
So with all this in mind, when I heard that my friend had given birth to a beautiful baby boy, one of my first thoughts was that I should make some good, nourishing food for the new parents. With a tiny, helpless, newborn to care for, I thought, they probably had their hands full. (I might have been thinking of this post.) But I didn't know what to make. What do new mothers eat? Do they crave particular foods after those nine long months, those first sleep-deprived days? I really didn't have a clue. But I knew that my friends and I had at least one cookbook in common between our two kitchens--Yotam Ottolenghi's Plenty. So I asked them to pick something from it that they'd been wanting to try out.
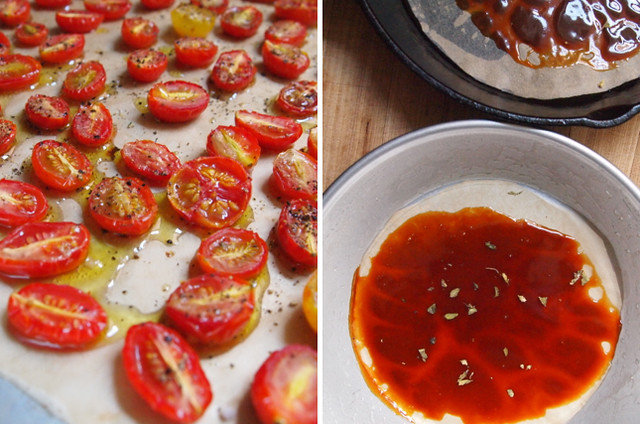
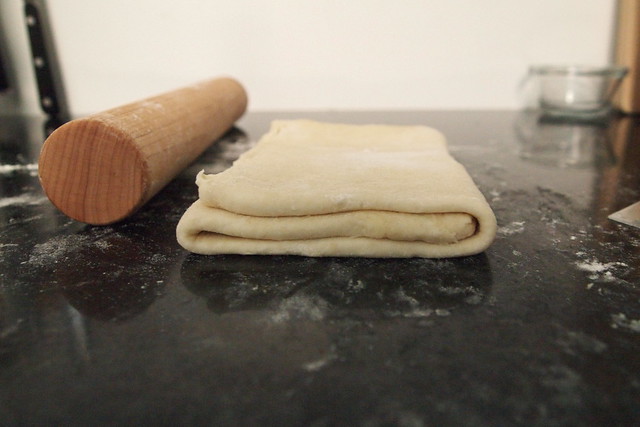
Roasted tomatoes and caramel Rough puff
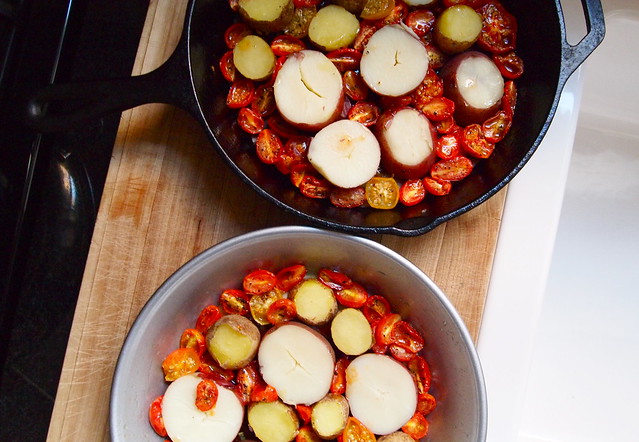
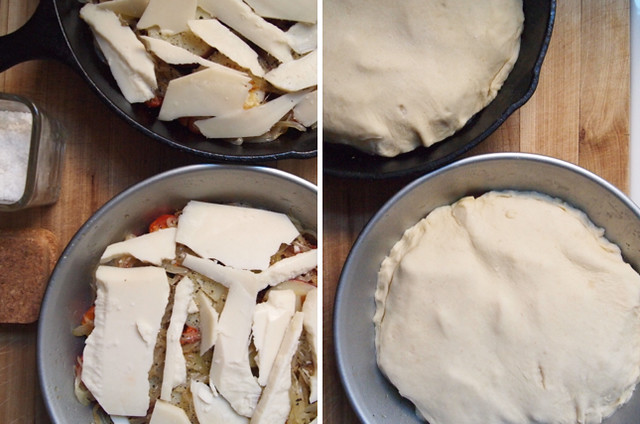
My friends chose well, really well. Ottolenghi's Surprise Tatin is something truly spectacular, a crown jewel for the dinner table. It, much like its sweeter namesake, involves a puddle of dark caramel and pillowy puff pastry. But instead of the usual apples tucked beneath that buttery lid, it's roasted cherry tomato halves, itty bitty potatoes, sweet onions, and semi-firm goat's cheese that bubble away together in the heat of the oven.
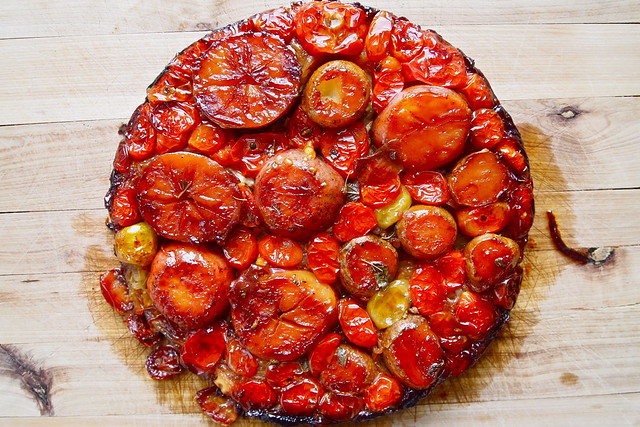
One of the things I enjoy most about tarte tatins is the anticipation--the moments leading up to the end of baking and then the big reveal when you turn the tart out of its skillet. I'm the sort of girl who can't keep away from the oven window, even if there isn't much to see. So though those forty minutes or so of baking feel impossibly long, though they keep me in suspense--heady, tantalizing smells, puff pastry ballooning--they make the end all the more worth it--that moment when you finally get to slip on your oven mitts and get your first peek at what's been happening beneath that flakey dome. And in this case, it might just take your breath away. The onions will have reduced to sticky-sweet ribbons. The caramel and tomato juices will have seeped into the potatoes, leaving them ruby-tinged. The tomato halves will gleam, bright and candy-like. Like I said, a real crown jewel.
Potatoes in a sea of tomatoes Onions added Goat's cheese and puff pastry
And this tart tastes every bit as good as it looks. With each bite you get something a little different. But each is its own discovery--different textures and flavours, harmonizing together in different ways. Sometimes, what you'll get is the sweet-tart intensity of the tomatoes balanced against the richness of the pastry and the gentle creaminess of the potatoes. With other bites, it'll be goat's cheese and the potatoes--salty, earthy, comforting. My favourite sort of bite is one where the sweetness of onions melts into that of the tomatoes right at the edge of the tart--tangy and sweet with just a little crunch from the pastry.
The process of making this tart, admittedly, is not one that you can just breeze through. The tomatoes, onions, and potatoes all need separate preparation before they get nestled together in their skillet. There's also the caramel to cook and the cheese to slice--all that prep can add up. (But once assembled, you can leave the tart in the fridge until you need it--for up to 24 hours.) And you might end up with a sink full of dishes. But this is another reason why I think my friends chose so well. Elaborate and impractical meals are a bit of a luxury on most nights, and with a newborn to care for, my friends, I thought, could use a little luxury. (Plus, I just wanted to drop something off for an excuse to see the baby.) Likewise, if there's someone in your life that deserves a little pampering, you might want to consider this tart. 
Inverted tart

Surprise Tatin
Adapted from Yotam Ottolenghi's Plenty
Note: About the puff pastry. If you're feeling really ambitious, consider making your own "rough" puff. I like this old Gourmet recipe. It makes enough for two of these tarte tatinsAbout the potatoes. Tinier potatoes tend to make for a better presentation here, I think, but I used what I could find--a mix of red-skinned new potatoes and a variety called German Butterball. About the goat's cheese. My go-to is goat gouda, but feel free to branch out.

150 g cherry tomatoes
2 tablespoons olive oil, plus extra for drizzling over the tomatoes
Salt and pepper
500 g new potatoes, really tiny ones, preferably
1 large onion, peeled and sliced thinly
45 g sugar / 3 tablespoons sugar
10 g / 2 teaspoons butter
1 sprig fresh oregano, picked, or a few big pinches of good-quality dried oregano
100 g aged goat's cheese, sliced
1 sheet (about 250 g) puff pastry, rolled thinly

Preheat the oven to 275 degrees F. Halve the tomatoes and place them skin-side down on a baking sheet. Drizzle with some olive oil and sprinkle with salt and pepper. Place in the oven to dry for 45 minutes.
Meanwhile, cook the potatoes in boiling salted water for 25 minutes or until easily pierced with a knife. Drain and let cool. Trim off a bit of the top and bottom of each potato, then cut into 1-inch-thick discs.
Sauté the onion in olive oil and a little salt for 10 minutes, until golden brown.
Butter a 9-inch cake pan or heavy-bottomed skillet and line the base with a circle of parchment paper. In a small pan cook the sugar and butter on high heat, stirring constantly with a wooden spoon, until you get a semi-dark caramel. Pour carefully into the cake pan and spread out evenly over the bottom. Scatter the oregano on top.
Stand the potatoes close together in the bottom of the pan. Press onions and tomatoes into the gaps, season well with salt and pepper, and cover with goat's cheese. Cut a puff pastry disc that is 1 inch larger in diameter than the pan. Layer the pastry lid over the tart filling and gently tuck the excess around the potatoes inside the pan. (At this stage, you can chill the tart for up to 24 hours.)
Preheat the oven to 400 degrees F. Bake the tart for 25 minutes, then reduce the temperature to 350 degrees F and continue baking for 15 minutes, or until the pastry is thoroughly cooked. Remove from the oven and let settle for 2 minutes only. Hold an inverted plate firmly on top of the pan and carefully but briskly turn them over together, then lift off the pan. Serve the tart hot or warm.
Serves 4.

Monday, November 12, 2012

We made an occasion of it

Pommes Anna à la graisse de canard
Some dishes just call for a crowd. I'm thinking here of layer cakes stacked six inches high, of flakey pastries hot from the oven, of soufflés puffed and golden--dishes just too extravagant, too involved, for a weeknight dinner with only one or two at the table. These are dishes meant to be shared, dishes whose goodness you wouldn't feel right keeping all to yourself, dishes that call for an occasion. The trouble is I always find myself with more dishes like this than occasions on which to make them. And so have my friends, apparently, since we've started making occasions out of these dishes instead of waiting for the right ones to just come along.
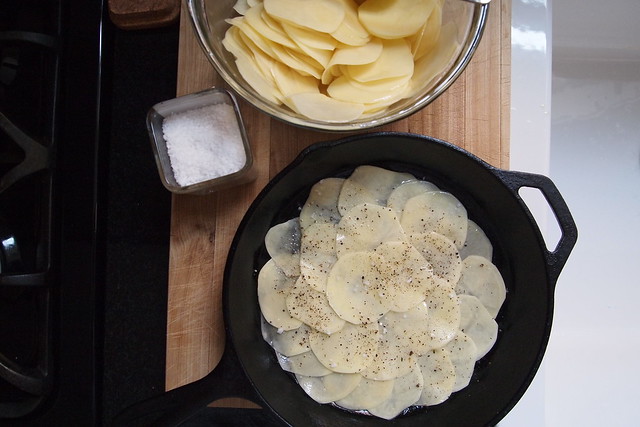
Butter and duck fat Dipping potatoes Layering potatoes
Take, for instance, dinner on Saturday night. A hunter friend of a couple of friends of mine had bequeathed to them a neatly butchered venison neck months ago, and we had talked a lot then about getting together for dinner and tackling it. But birthdays came and went, and the neck remained in the dark recesses of their freezer. Recently, though, quite possibly when we were all a little tipsy, we decided that enough was enough. We had to cook this thing. It'd be a shame for it to go to waste. So, finally, just this past weekend, we made an occasion of it. Our friends did the hard work of de-boning, trussing, browning, and braising. Octavian and I brought over side dishes and something sweet. We opened some bottles of wine. It was a great night. A venison neck roast, if you're curious, is kind of like brisket. After a few hours of gentle cooking, it has the same tender, fall-apart qualities. (If you're lucky enough to find yourself with a neck roast but don't know what to do with it, you might want to peek around here.)
Potato slices Layering and seasoning Assembly complete
But I have to admit, in encouraging this dinner to happen, I had another motive. There was something else that I'd been waiting to make, and I was confident that that neck roast would provide for the occasion. Remember that disastrous dinner a while back--the one with the saltine panna cottas? Well, not all was lost that night. We may have overcooked the duck, but we at least managed to render and save some fat. It was my one consolation, and I was determined to make the most of it. Hence, the potatoes at our venison dinner--Pommes Anna à la graisse de canard.
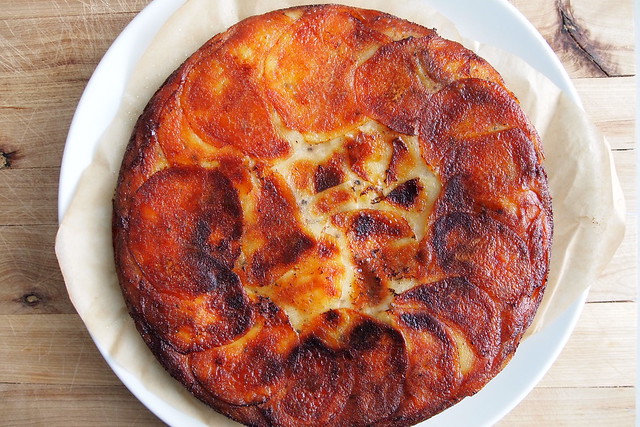
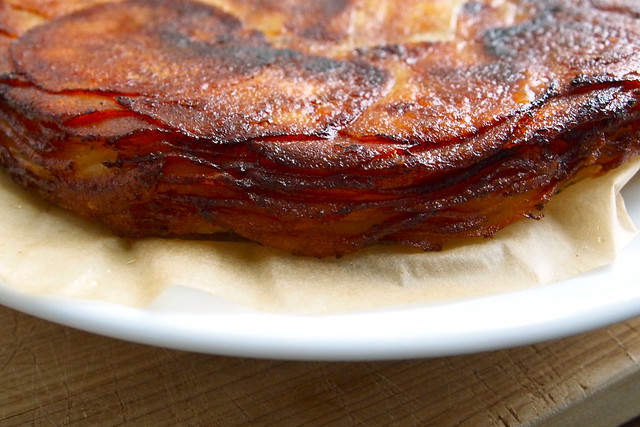
These potatoes almost call for an occasion all their own. They nearly stole the show on Saturday, anyway. There's no doubt that they're an indulgence--sliced paper-thin and slicked in plenty of butter and duck fat, they pretty well fry where they touch the pan. Crisp, burnished edges five or six layers deep. Creamy and soft beneath an equally burnished lid. They are something to behold and savour. And made for the right occasion and shared with your friends, what's the harm?
Crispy, golden layers

Pommes Anna à la graisse de canard
Adapted from Louis Gadby via Epicurious
Note: About the duck fat. The fat I had was rendered from six duck breasts and was just enough for the dish. There's lots of discussion about how best to do it here. You can also purchase rendered duck fat from a reputable source like D'Artagnan. Duck fat gives the potatoes a savouriness that you just don't get with butter. However, classic Pommes Anna calls just for butter, so I'm sure that you could do without--it would just be a bit of a different dish. Make ahead. This is a dish probably best eaten still warm from the oven. I, however, got away with making it earlier in the day and reheating it. I turned the potatoes out of the skillet as instructed but lined the plate with a piece of parchment. I then transferred the potatoes with the parchment onto a cooling rack. Reheated at a gentle 300°F for about 20 minutes, the exterior re-crisped while the insides remained moist and tender.

45 g / 3-4 tablespoons duck fat
70 g / 5 tablespoons butter
Coarse sea salt
Black pepper
3 lb Yukon gold or other yellow-fleshed potatoes
1 tablespoon flat-leaf parsley, finely chopped
1 clove garlic, minced

Put the oven rack in the middle position and preheat oven to 400°F. 
Melt the fat and butter in a well-seasoned 10-inch cast-iron skillet over low heat. Remove from heat and pour into a large bowl. Do not wipe the skillet. 
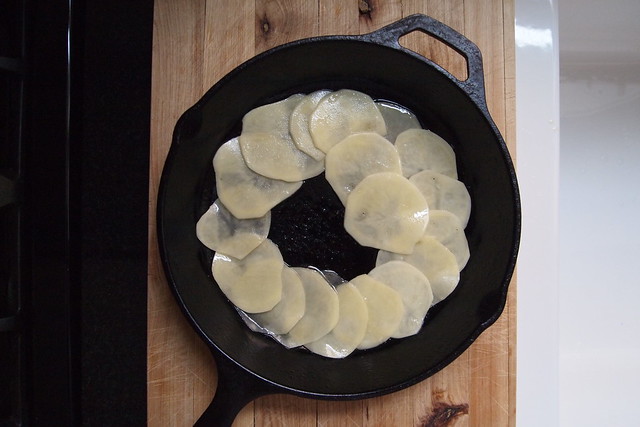
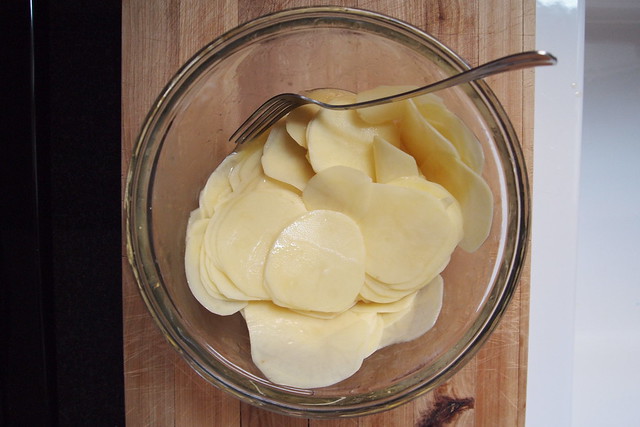
Peel the potatoes and cut crosswise with a mandoline into 1/16-inch-thick slices. Add the potatoes to the bowl with the butter and duck fat--in stages if necessary--and toss to coat. Arrange about a quarter of the potatoes in the skillet in a layer of overlapping concentric circles, starting from the centre and working your way outwards. Season the layer generously with salt and pepper. Make three more layers in the same manner, seasoning each layer as you go. You may end up with five or even six layers, depending on how closely you arrange your potatoes--that's okay.
Cook potatoes over moderate heat for about 15 minutes. Take care--towards the end of cooking, the fat at the edges tends to bubble and fly with some vigour. Press down on potatoes with a wide spatula, then cover surface with parchment paper, and cover skillet with foil. 
Bake until outside edge is golden brown and potatoes in center are tender when pierced with a fork, about 25-30 minutes. Let stand, covered, at room temperature 5 minutes, then carefully loosen edge with a heatproof flexible spatula. Invert a plate with a rim over skillet. Using pot holders and holding plate and skillet together firmly, invert skillet. Remove skillet and sprinkle potato cake with parsley and garlic.
Serves 8.