Showing posts with label breakfast. Show all posts

Friday, July 26, 2013

Something enduring

Cherry Preserves with Plums
I know, I know, another batch of preserves--what gives? I've been asking that of myself a lot lately, and I still don't have much of an answer. I've just found myself this summer making jam feverishly--and not only that but thinking a lot about it (also feverishly)--about what went well and what didn't with past batches, about how to squeeze in another session soon, about what to make next. It's all gotten, I admit, just a little bit obsessive. And before this, if you can believe it, jam wasn't something that really held my interest. Butter, I thought, is all a girl really needs. Why complicate matters?
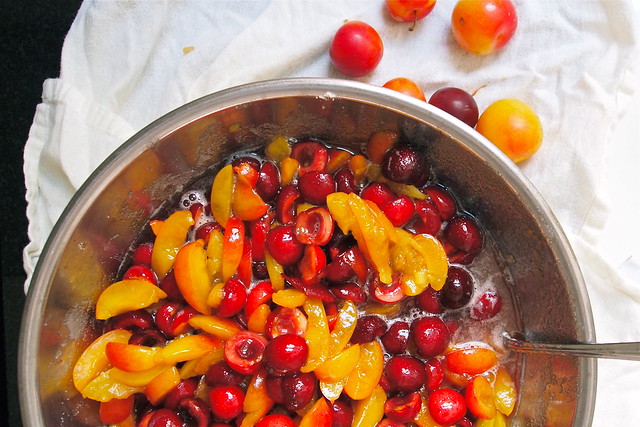
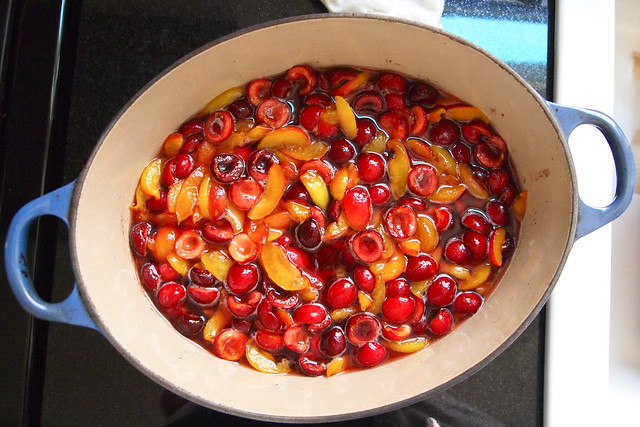
Plums and cherries Macerating fruit Ready to cook
Why, indeed, complicate matters? That was, for a long time, my attitude towards summer fruit. Berries, peaches, and plums--why fuss with them when they're good as they are? On a sticky July day, you can't do much better for yourself than eating a cold plum over the kitchen sink, juices running down your arms. So why trouble yourself with more? But then twice last week I found myself in the kitchen sweating it out over a pot of bubbling fruit and sugar, glass jars close at hand waiting to be filled. So obviously, at some point, I'd undergone a change of mind.
It had a lot to do with the process, I think. Making preserves is very physical, very absorbing--pulling apart cherries one by one and plucking out their pits or slicing up a mound of plums. You give more attention to the fruit than you might just sticking it in your mouth, and it feels good. And the transformation that takes place, because it happens in an open pan, and because you're there the whole time, stirring, stirring, stirring, is one you get to see all the way through. You get to see the fruit slump and soften. You get to see the sugar disappear into the juices, and the juices bubble up wildly and thicken. It's dramatic and beautiful. You get a different appreciation of the fruit. And you feel like you're tapping into something old, elemental, deeply human.
This, anyway, is the feeling I'm left with, having recently read and swooned over much of Kevin West's Saving the Season. The book is a bit unusual for a cookbook. West provides plenty of clear instruction and assurance on pickles, jams, jellies, and the like. But he also contextualizes preservation as a practice. Between recipes, he draws on a mixture of history, literature, and personal narrative to give us a better sense of the fruits, vegetables, and processes to follow. You get the feeling reading it that you're being given an heirloom, something enduring to hold on to. I'm pretty sure that I'll be turning to the book season after season, year after year, for a long time. (Before the book, West wrote a blog by the same name. I suggest you check on his post on quince, if you want to get the flavour of his work. It's heady.)
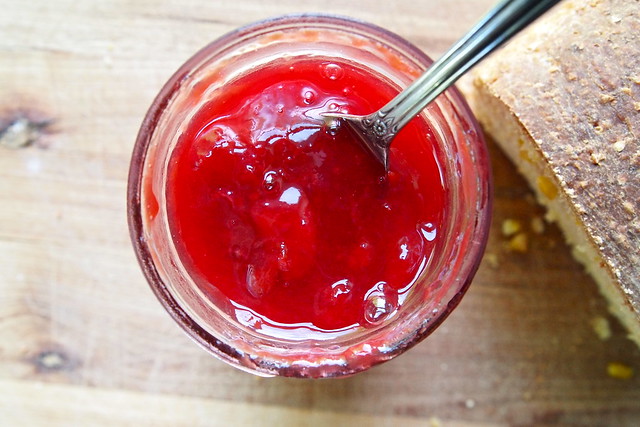
Preserves on toast
This latest batch is from the book, a mixture of early plums and sweet cherries, finished with a splash of bourbon. I didn't make it quite as intended. I was supposed to use inky-dark Bing cherries, but in a moment of absentmindedness at the market, I ended up with a brighter, less assertive variety. So my preserves don't quite have the depth and colour they're supposed to. But I don't really mind. Instead, they have a sort of all-round, stone-fruit sunniness to them, something I know I'll appreciate come January. My favourite spoonfuls are the ones that include a slice of plum. The fruit is velvety, yielding in the best way. And with the bourbon, it is made luxurious, buttery even.

Cherry Preserves with Plums
From Kevin West's Saving the Season
NOTE: Fruit obviously varies in sweetness. The measurements provided for both sugar and lemon juice are therefore guidelines only. West encourages you to taste your fruit at every stage of the process--out of hand, once macerated, and during reduction (after a minute on one of those chilled plates). Adjust with more sugar or lemon juice as you see fit. West also advises starting out with a little less (up to a 1/2 cup less) sugar, depending on the plum varieties available to you. You can always add more sugar towards the end, if you don't think the preserves are sweet enough.

2 pounds black cherries, such as Bing
2 pounds firm, yellow-fleshed plums, such as Red Beauty (the tarter, the better)
2 tablespoons freshly squeezed lemon juice
3 cups sugar
1/4 cup bourbon or brandy

Wash and drain the fruit. Pit the cherries. (West isn't one for cherry-pitters. His method is to grab each cherry, one thumb on either side of the stem, and pull it apart. It should split lengthwise along its seam. Then you can just dig out the pit. This works best, I've found, with soft, ripe cherries. It makes less of a mess than a pitter.) Slice the plums away from their pits in sections. Stir together the fruit, lemon juice, and sugar. Set aside to macerate for at least 15 minutes. (If you plan to macerate for longer, e.g. overnight, press a piece of parchment paper or plastic wrap close to the fruit to prevent oxidation.)
Set a few small plates in the freezer. Warm 5 clean half-pint jars and lids in the oven set at 200 degrees F.
Turn the fruit-sugar mixture into a preserving pan or other large, wide, heavy-bottomed pot. Reduce over high heat, stirring frequently. Once it comes to a full rolling boil, it should take 10-12 more minutes to fully reduce. Test the preserves. Turn off the heat and spoon about a teaspoon's worth onto one of the chilled plates. Return it to the freezer for 1 minute. If the surface wrinkles when you push your finger through it, it's ready. If not, continue reducing for a couple minutes more and test the consistency again. Once fully reduced, add the brandy or bourbon and continue to cook, stirring well, for 1 minute longer.
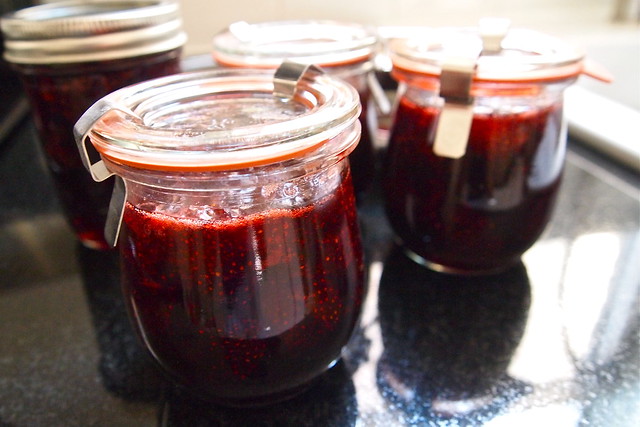
Ladle the hot preserves into the five half-pint jars, leaving 1/4-inch headspace. Wipe the jars' rims clean and put on their lids and bands (screwed only finger-tight).
Process in a boiling-water bath for 10 minutes (count 10 minutes from when the water returns to a boil). Remove the jars from the water and let cool. Check to see if a proper seal has formed by removing each jar's band and holding the jar by its lid. The lid should hold firm. If it doesn't, store the jar in the fridge and eat its contents promptly.
Makes about 5 1/2-pint jars

Thursday, June 20, 2013

Sitting plump and gorgeous

Jars cooling
While in the kitchen, I don't tend to think of my mother much. It has a lot to do, I think, with not having learned to cook from her. Growing up, I just didn't have much interest in it. So, in a lot of ways, when I did learn, I grew into a very different kind of cook from her, one with different rhythms, different appetites. And so now, between what I might make for dinner on any given night and what she might, there just isn't much overlap. If, when she calls, she asks me about what I had for dinner, it's more out of motherly concern. (I'm pretty sure she thinks I don't eat enough vegetables.) We don't talk much about what we've been cooking. And for me, at least, this is a bit of a sad state of affairs, if only because we both do a lot of cooking, and cooking, if for different reasons, is important to both of us.
But I thought of her while making this jam, and I'm sure to call her about it soon. See, my mother has never much cared for more traditional strawberry jams. She thinks that the fruit loses too much of itself in all that heat and violent bubbling over the stove. So, she makes a no-cook freezer jam for herself every year, one which calls just for crushed strawberries, sugar, liquid pectin, and a lot of stirring. But I think that she's been missing out all these years. Those strawberries could use a little bubbling action before making their way into jars. And that needn't mean annihilating them.
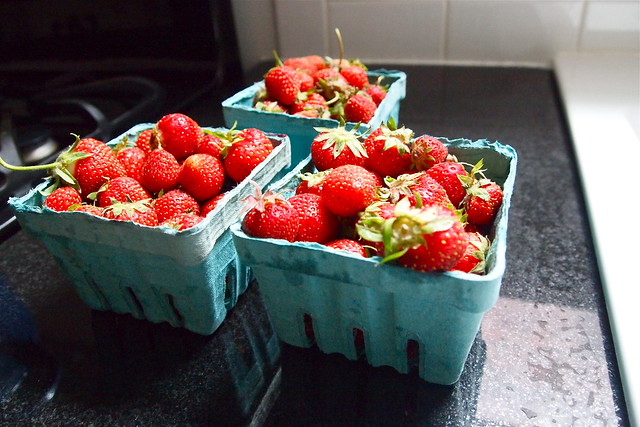
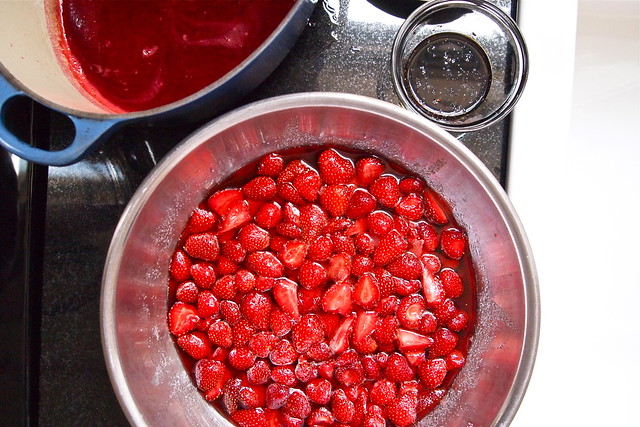
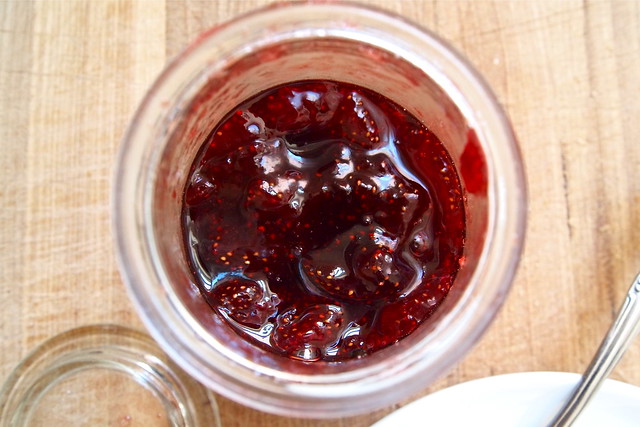
Three pints of strawberries Macerated berries Macerated berries close-up Strawberry jam
The jam I made comes from Christine Ferber's Mes Confitures. And, admittedly, the process is quite a bit fussier than most. But, it is worthwhile. (Ferber's known as the jam fairy of Alsace for a reason!) You first let the strawberries macerate in sugar overnight, drawing out their juices. In the morning, you strain the berries. The juice goes into a wide, heavy pot, along with the juice from some quickly cooked raspberries. And here's where it gets good. You let the juices bubble away on their own for a spell, until they reach 221 degrees F. And only then do you add those delicate berries, cooking them just until  they're translucent, jewel-like. Off heat, you stir in the final flourishes--a splash of good balsamic vinegar and a little black pepper.
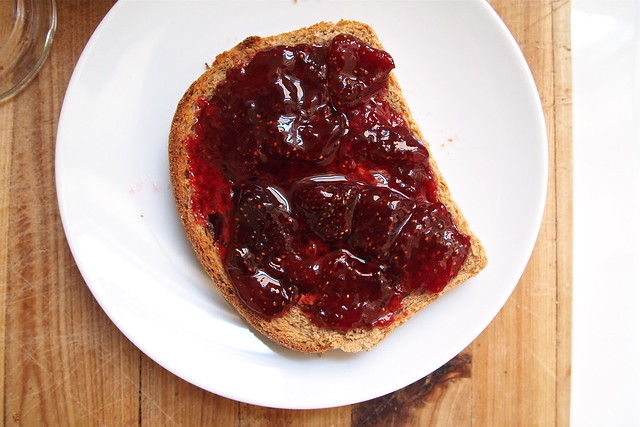
This jam is really nothing like my mother's. Its flavours are big and resonant, and it tastes deeply, unmistakably of strawberries. The other ingredients--the raspberry juice, the balsamic vinegar, the black pepper--are really just there to heighten what's already present in the fruit. And most of the berries remain whole, sitting plump and gorgeous on your toast. It is wonderful, wonderful stuff. And I think it could change my mother's mind.
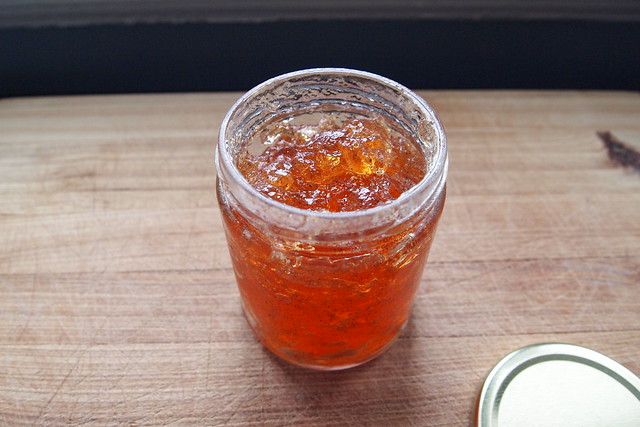
Strawberry jam on toast
By the way, the jam is pictured here with this bread, and while, I do like the bread a lot, I think this particular jam needs something a little more refined to carry it--something with a delicate crumb, maybe a little sweetness to it, and no pesky seeds or bran. My guess is that the jam would also pair well with ricotta. But what I'm really looking forward to is trying it with a little cheese after dinner, maybe some sort of salty, firm goat's cheese.

Strawberry Preserves with Raspberry Juice and Balsamic Vinegar 
Adapted, just a little, from Christine Ferber's Mes Confitures via Lindsey's Luscious
NOTE: Timing and yield. I cooked my jam once the berries were in for probably an additional 12 minutes--I don't think I quite let the liquid prior to that reach 221 degrees F. My mistake. This might explain why I got more like 2 pints out of my berries instead of 2 1/2. I might also just have skimmed too eagerly throughout. Jars. This was my first time canning with Weck jars, those lovely German-made jars with glass lids, rubber rings, and clips. I followed Marisa McClellan's very clear instructions.

790 g / 1 3/4 lb strawberries (680 g / 1 1/2 lb net), the smallest, most fragrant you can find
800 g / 4 1/4 cups granulated sugar
Juice of 1 small lemon
565 g / 1 1/4 lb raspberries, preferably fresh but frozen will do
1 tablespoon + 2 teaspoons balsamic vinegar, your best
5 peppercorns, freshly ground

Rinse the strawberries sparingly in cold water. You don't want to waterlog them. Dry them gently with a towel and then stem and halve them (quarter the largest ones, leave the tiniest whole).
In a large bowl, combine the strawberries, sugar, and lemon juice. Cover the bowl with a sheet of parchment and place in the refrigerator to macerate overnight.
The next day, place the raspberries in a small saucepan with 100 ml / 3 1/2 oz water and bring to a boil. Cook for a few minutes, until the berries break down. Pour the berries into a fine-mesh sieve over a bowl to collect their juices, pressing on the fruit with the back of a spoon lightly. Discard the raspberry pulp.
Set a small plate in the freezer. Place the raspberry juice in a large, wide, heavy-bottomed pot (or a preserving pan, if you have one). Strain the strawberry juice (with a clean sieve) into the same pot and set the fruit aside. (Some of the sugar may not have dissolved. Not to worry--just try to get most of it into the pot with the juice.) Bring the juices to a boil over medium-high heat. Skim any foam that bubbles up. This will make for a clearer jam. Cook until it reaches 221 degrees F on a candy thermometer, about 10-15 minutes. Then add the macerated strawberries and return to a boil. Skim again, as needed, and don't leave the pot unattended--this jam really bubbles up. Cook for about five minutes more, stirring gently and frequently.
Check to see if the jam is set. Spoon a small amount on the cold plate from the freezer. Return the plate to the freezer for 1 minute. Try pushing the jam with your finger. If the surface wrinkles a little, the jam is ready. (I left my jam on the loose side, which I think really works in this case.) If not, continue cooking for a few more minutes and repeat the test. Remove the jam from heat and stir in the balsamic vinegar and black pepper. Ladle the jam into sterilized jars, leaving a 1/4 inch of head space. Wipe the jars' rims clean and put on their lids and bands.
Process in a boiling-water bath for 10 minutes (count 10 minutes from when the water returns to a boil). Remove the jars from the water and let cool. Check to see if a proper seal has formed by removing each jar's band and holding the jar by its lid. The lid should hold firm. If it doesn't, store the jar in the fridge and eat its contents promptly.
Makes about 5 1/2-pint jars.

Monday, May 27, 2013

Aglow with summer

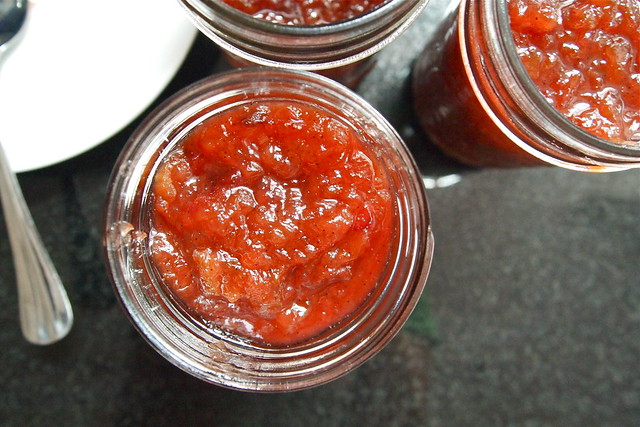
Rhubarb-vanilla jam
Last year, I let rhubarb season pass me clear on by. I had deadlines to meet and couldn't allow myself even to daydream about matters pink and bright. It would have been too much. One thing would have led to another. Daydreams to a bus that would take me across town. That bus to the festive sprawl of Green City Market and row upon row of pearly pink stalks. A serious armload of such stalks to an afternoon in the kitchen, chopping them up and letting them cook down in sugar. And if you ask me, there few better ways to spend an afternoon. But deadlines are deadlines. So I pushed those thoughts out of my head and let the season pass.
This year, I was determined to have things turn out differently. This season would have to make up for the last. I would get my hands on some rhubarb early and make the most of it. So, last weekend, as a start, I scooped up some rhubarb from the market and made myself a few jars of rosy-hued jam.
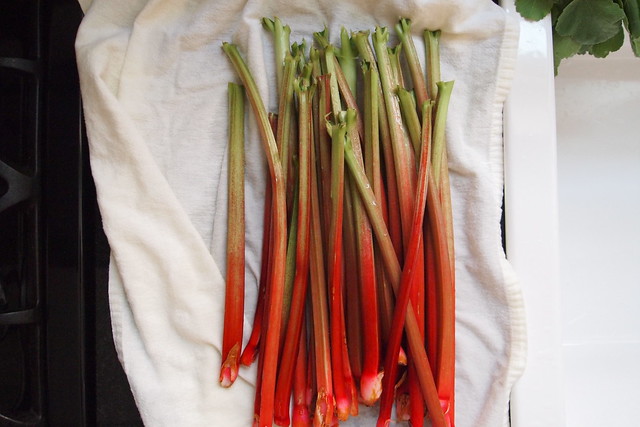
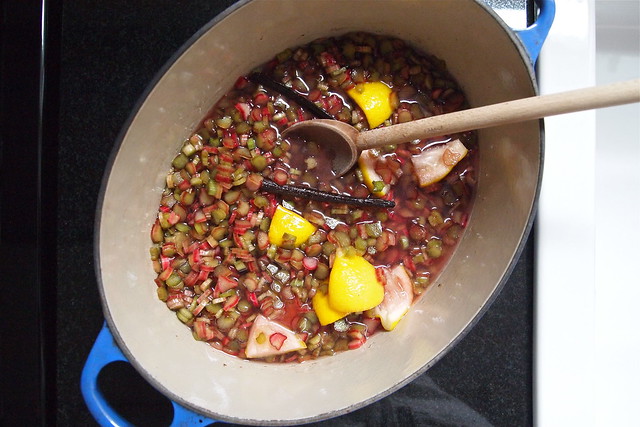
Rhubarb stalks Chopping stalks Macerated rhubarb
Now, making jam is one of those things I don't have much experience with. I've made jelly here and there in small quantities, but none has been an unqualified success. Like the apple jelly I made last October--I let it cook for way too long. After it set, it was pretty well unworkable, like trying to spoon and spread an oversized gummy bear on toast. So, yes, preserving fruit--or at least fruit juices--has not really been my thing. But lately, for some reason, the idea is something I've been drawn to. I think that it has something to do with tangibility. So much of what we make in the kitchen disappears so quickly. That's just how it is--an afternoon's effort spent in a few mouthfuls. But a batch of jam is something you can hang on to for a good long while. And it marks some particular moment in your year. I, anyway, find comfort in the idea that I could wake up on a dark morning in January and find a row of jars in the kitchen still aglow with summer. There would be something really special about prying open one of those jars on a morning like that and thinking back to the day I'd ladled in the fruit and sealed it up.
But I'd be surprised if this particular batch lasted until January. For one, it's a very small batch--just a little over a pint's worth. But more to the point, the jam is very good--bright, fruity, and aromatic. It'll be hard not to go through it all pretty quickly. I'm hoping, though, that this batch is only the first of many I'll make this year.
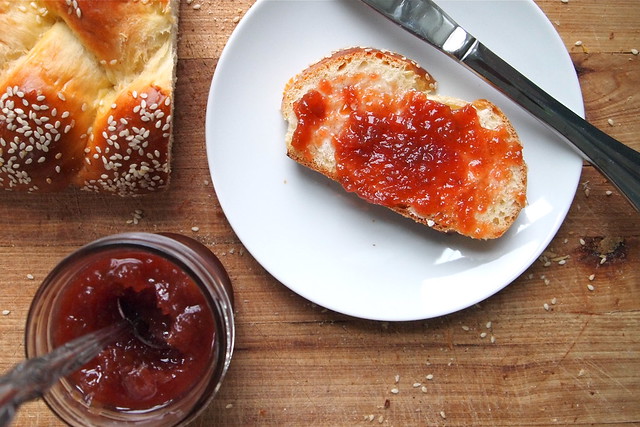
Rhubarb jam on toast

Rhubarb-Vanilla Jam
Adapted from Brandi Henderson's I made that!
Note: Though my jam-making experience is limited, I've found that it's one of those cooking processes where it pays to be very attentive--not enough stirring and you might scorch your fruit or let it overcook. You could also make use of a candy or instant-read thermometer in cooking the jam (the set point is supposed to be 220 degrees F), but I've found the wrinkle test to be a more reliable indicator. About the lemon. The lemon in this recipe is important for two reasons. First, the juice adds the acidity needed to make the jam shelf-stable. Second, both the juice and rind add pectin, which will help your jam set.

24 oz rhubarb, trimmed
17.25 oz granulated sugar
Half a vanilla bean
1 lemon, preferably organic

Slice the rhubarb into pieces about 1/8 of an inch thick. For particularly thick stalks, halve them lengthwise before slicing.
Pour the sugar into a large bowl. Split the vanilla bean lengthwise, scrape out the seeds, and add them to the sugar. Using your fingers, break up the clumps of seed and distribute throughout the sugar. Add in the rhubarb and the vanilla pod. Juice the lemon and add to the rhubarb. Cut the rind and flesh into quarters, remove any seeds, and then add the quarters to the bowl. Stir well. Cover and refrigerate for at least an hour (but up to overnight) to allow the fruit to release its juices.
Sterilize two half-pint jars and their bands and lids, either by heating them in a 200 degree F oven or in boiling water for 10 minutes. Put a small plate in the freezer. 
Transfer the rhubarb to a large, heavy-bottomed pot. Bring to a lively simmer over medium-high heat. Continue to cook, stirring frequently, until the fruit is thickened and hisses loudly in the pot as you stir, about 20-25 minutes. Check to see if the jam will set. Spoon a small amount on the cold plate from the freezer. Return the plate to the freezer for 1 minute. Try pushing the jam with your finger. If the surface wrinkles, the jam is ready. If not, continue cooking for a few more minutes and repeat the test. Remove the jam from heat and ladle into the sterilized jars, leaving a 1/4 inch of head space. Wipe the jars' rims clean and put on their lids and bands. 
Process in a boiling-water bath for 10 minutes (count 10 minutes from when the water returns to a boil). Remove the jars from the water and let cool. Check to see if a proper seal has formed by removing each jar's band and holding the jar by its lid. The lid should hold firm. If it doesn't, store the jar in the fridge and eat its contents promptly.
Makes about 1 pint.

Saturday, April 27, 2013

Breakfast that takes care of itself

Honey-cinnamon scones
Around here, breakfast tends to get the least of our attention. More often than not, it's a rushed affair. What matters is that the steady drip, drip, drip of coffee gets underway and that one of us coaxes Morning Edition from the crackle of the radio (we always seem to be losing our signal). Even on weekends, we don't linger long in the kitchen at breakfast time. I, anyway, feel most pressed in those early hours to tackle something and not let the day slip away. I have patience, enormous patience, for the sometimes slow-going, often messy stretches of making a good meal--just not at breakfast time. I get fidgety, almost anxious, for instance, hovering over the stove, flipping pancakes. It feels like an eternity passes between cracking the eggs and getting to the bottom of that big bowl of batter. So, around here, we stick mostly to buttered toast and the occasional bowl of oatmeal.
But, there are, of course, mornings on which I feel that something a little more special is in order. And lately, that hasn't at all been a problem. I've had a stash of honey-cinnamon scones in the freezer to dig into.
Brushing scones Scone interior
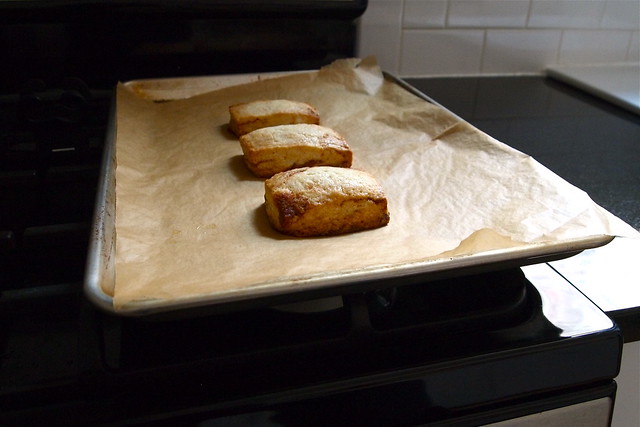
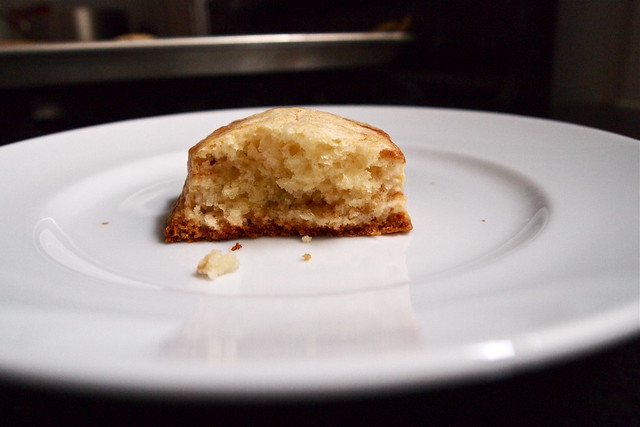
These are not your run-of-the-mill scone. Their texture is a bit surprising, not quite like what you might expect. There's a pleasing heft and crumbliness to them, which is delicate, melting, even. And then there's the cinnamon-honey butter that marbles the scones. The bits that find their way to the edges give those bites a special crackle and sweetness. And, rather conveniently, these scones are meant to be baked straight from the freezer. On pretty well any morning, you can probably manage to get these to the table and do whatever else you need to in order start your day. For the scones, all you have to do is get the oven ready, and they will take care of themselves. I like breakfasts that take care of themselves.
These scones come from Bouchon Bakery Cookbook. I've only had it for a couple of weeks, but I think that it's set to become my new favourite baking book. It is beautiful and staggeringly comprehensive. There is a whole section dedicated to pâte à choux. There are not one but two madeleine recipes. And, most exciting of all, there is a method for generating steam in home ovens (always a problem for bread baked at home) that calls for river rocks, chains, and a Super Soaker. The book, in this way, while certainly detail-oriented and technique-driven, doesn't take itself too, too seriously. Its tone, also, is patient and reassuring. There are lots of explanations and technical advice scattered throughout the book, but none of it feels overwhelming. I, anyway, am ready to fill a hotel pan up with rocks and chains and bake some bread soon.

Cinnamon Honey Scones
Adapted, just a little, from Thomas Keller and Sebastian Rouxel's The Bouchon Bakery Cookbook
Note: The measurements. As Keller explains, the measurements are a bit crazy-looking but only because the recipe has been scaled down for home use. The glaze. Though the scones are better with the glaze brushed on top, I have skipped it when not inclined to add another pan to my pile of dishes.

CINNAMON-HONEY CUBES
30 g / 3 tablespoons all-purpose flour
30 g / 2 1/2 tablespoons granulated sugar
4 g / 1 1/2 teaspoons ground cinnamon
30 g / 1 ounce cold unsalted butter, cut into 1/4-inch cubes
20 g / 1 tablespoon clover honey

SCONE DOUGH
152 g / 1 cup + 1 1/2 tablespoons all-purpose flour
304 g / 2 1/4 cups + 2 tablespoons cake flour
12.5 g / 2 1/2 teaspoons baking powder
2.5 g / 1/2 teaspoon baking soda
91 g / 1/4 cup + 3 1/2 tablespoons granulated sugar
227 g / 8 ounces cold unsalted butter, cut into 1/4-inch pieces
135 g / 1/2 cup + 1 1/2 tablespoons heavy cream
135 g / 1/2 cup + 2 tablespoons crème fraîche

HONEY BUTTER GLAZE
45 g / 3 tablespoons + 2 teaspoons butter
20 g / 1 tablespoon clover honey

For the cinnamon-honey cubes. Place the four in a medium bowl. Sift in the sugar and cinnamon and whisk to combine. Toss in the butter cubes, coating them with the dry mixture. Using your fingertips, break up the butter until there are no large visible pieces. Using a spatula, mix in the honey to form a smooth paste. Press the paste into a 4-inch square on a sheet of plastic wrap. Wrap tightly and freeze until solid, about two hours or for up to 1 week.
For the scones. Place the all-purpose flour in the bowl of a stand mixer and sift in the cake flour, baking, powder, baking soda, and granulated sugar. Fit the mixer with the paddle attachment and mix on the lowest setting for about 15 seconds to combine. Stop the mixer, add the butter, and then on the lowest setting, pulse to begin incorporating the butter. Increase the speed to low and mix for about 3 minutes to break up the butter and incorporate it into the dry mixture. If any large pieces of butter remain, stop the mixer, break them up by hand, and mix just until incorporated.
With the mixer running, slowly pour in the cream. Add the crème fraîche and mix for about 30 seconds, until all of the dry ingredients are moistened and the dough comes together around the paddle. Scrape down the sides and bottom of the bowl and the paddle and pulse again to combine. Remove the bowl from the mixer.
Cut the cinnamon-honey butter paste into 1/4-inch cubes and add them to the scone dough. Mix them in by hand. They may begin to break up a bit in the dough, but that's okay. Mound the dough on your work surface and, using the heel of your hand or a pastry scraper, push it together. Place the dough between two pieces of plastic wrap and, using your hands, press it into a 7 1/2-by-10-inch block, smoothing the top. Press the sides of your hands against the sides of the dough to straighten the edges. Wrap in plastic wrap and refrigerate for a bout 2 hours, until firm.
Line a baking sheet with parchment paper. Using a chef's knife or a bicycle cutter, cut the block of dough along its length into thirds and then crosswise into quarters. Arrange the dough on the parchment-lined sheet, leaving space between them. Cover with plastic wrap and freeze until solid, at least 2 hours, but preferably overnight. The scones can be stored in the freezer for up to 1 month. (If storing them long term, be sure to wrap them well or, once frozen, transfer them to an air-tight freezer bag.)
Preheat the oven to 350 degrees F (or 325 degrees F if using a convection oven). Line a sheet pan with parchment paper. Bake for 27-30 minutes (or 20-23 minutes, if using a convection oven), until golden brown.
For the glaze. Stir the butter and honey together in a small saucepan over medium-low heat until the butter has melted and combined with the honey. 
As soon as the scones come out of the oven, brush the tops with the glaze. Set the sheet pan on a cooling rack and cool completely.
The scones are best on the day they are baked, but they can be stored in a covered container for 1 day.
Makes 12 scones.

Tuesday, February 26, 2013

That pâte à choux magic

Honey-glazed crullers
There are the things that you outgrow, and then there are the things you know you never will. The former, for me, include wild hair colours, teenage crushes, the (over)use of twenty-dollar words, and cookies-and-cream anything; the latter, wooly scarves, long road trips made in the right company, French philosophy, and honey crullers.
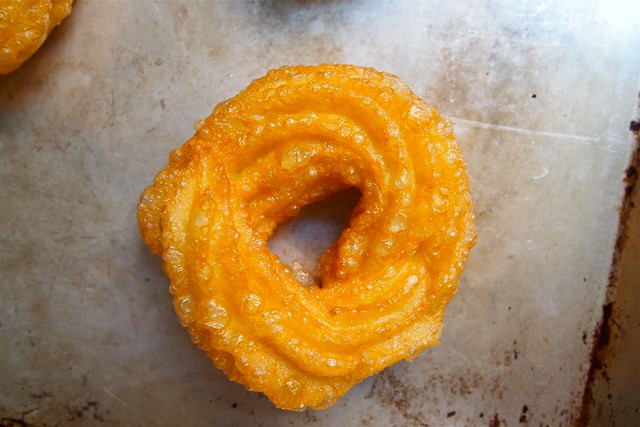
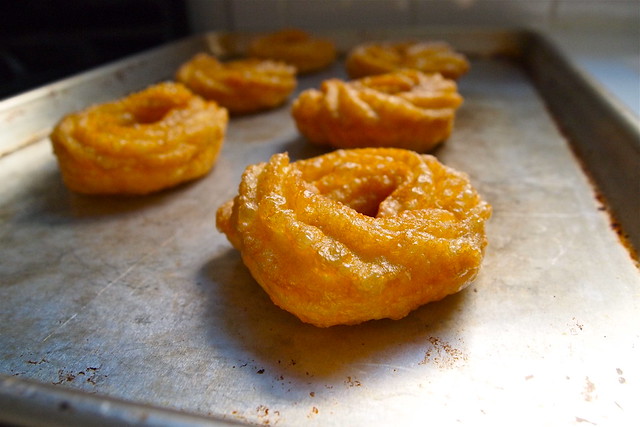
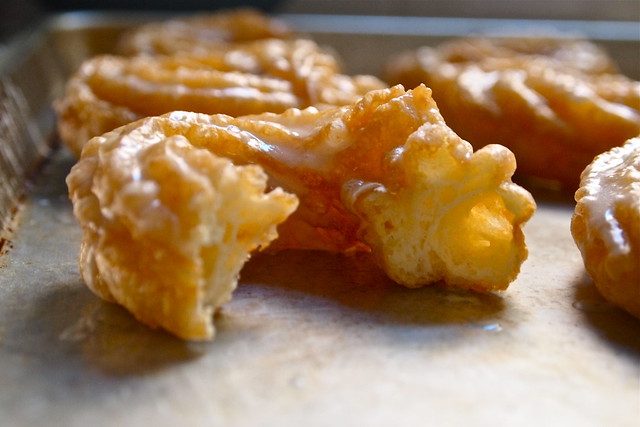
The cruller has always been my favourite doughnut. I love its delicate egginess, its impossible airiness, the crackly glaze that clings to its winding, golden ridges. It, for me, is doughnut perfection. So, naturally, I was excited to see that it was among the doughnuts featured in this month's Saveur (for those of you haven't seen it yet, it is a veritable doughnut extravaganza). Before this, it hadn't occurred to me to even try making crullers at home. How, after all, would you be able to reproduce those distinctive ridges, that airy structure, in your own kitchen? Saveur had answers. A star piping tip! Pâte à choux! Actually, now that I think about it, it seems kind of obvious. Pâte à choux is the egg-rich pastry dough out of which éclairs, gougères, and gnocchi parisienne are made. You start, typically, with water, butter, sugar, and salt over the stove and add to that flour and then eggs to pull together a pretty soft, unassuming dough. But when that dough hits heat it puffs, airy, golden, ethereal. So, really, it should have come as no surprise that crullers are made out of pâte à choux. They have that same magical quality about them.
Parchment squares Piped rings Unglazed
So I was all set to make my first crullers until I looked at the ingredients list. Vodka? Instant potato flakes? Now, I'm not one to baulk at an unusual pâte à choux, but I at least want an explanation. The head notes, however, said nothing, and I just wasn't feeling that adventurous. But I still wanted crullers, so I took this as an excuse to get a book I've wanted for some time, Lara Ferroni's Doughnuts.
Leafing through the book, I almost got sidetracked. There are so many doughnuts in it that I'd like to make. Apple-cider doughnuts made with graham flour, picarones, which are Peruvian winter-squash fritters, crème brûlée doughnuts--they all sounded fantastically good. But in the end, the thought of those swirled ridges, that pâte à choux magic, it got to me.
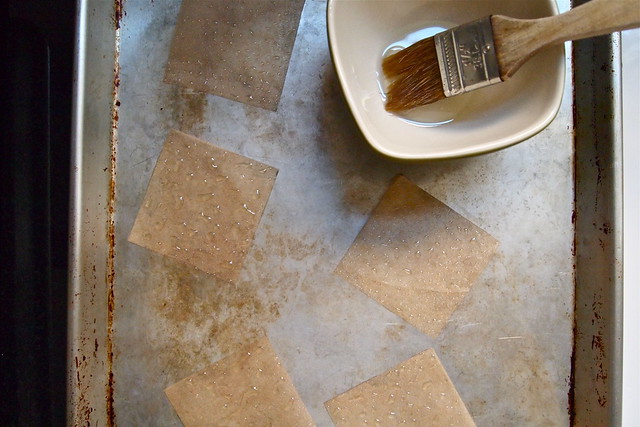
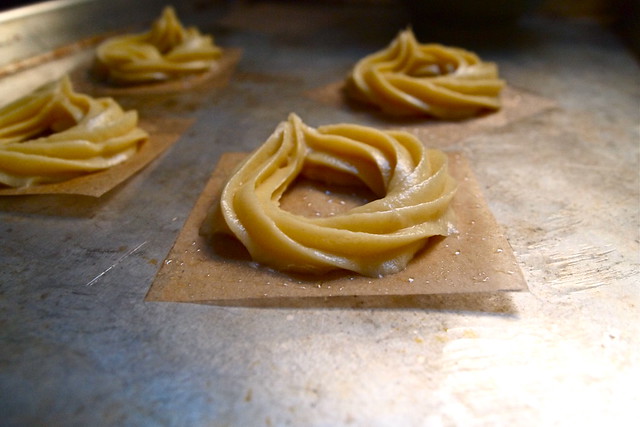
Deep-frying, admittedly, can be intimidating. That oil, after all, gets very, very hot. But common sense, a deep, heavy-bottomed pot, a deep-fry thermometer, and a spider skimmer are all you really need to keep things safe. And besides, making doughnuts is fun, especially with a friend in the kitchen to help out. For these crullers, one of you can pipe rings of pâte à choux onto squares of greased parchment, while the other takes care of the frying. It's pretty straightforward. Really, there isn't much at all  standing between you and a dozen fine and lofty crullers.
Half-dozen Glazed, overhead Cruller interior
And now that I've made these crullers, I'm really curious about the recipe printed in Saveur. Has anyone tried it out? Can anyone tell me what the vodka and potato flakes do?

Honey Crullers
Adapted, ever so slightly, from Lara Ferroni's Doughnuts
Note: About the piping tip. I used an Ateco no. 846, which is actually a closed-star piping tip. The equivalent open-star tip is the Ateco no. 826, but I couldn't find one of these in time. The only difference between the two, as far as I can tell, is that the closed-star tip produces more pronounced ridges in the pastry, which isn't a bad thing at all in this case. About the frying oil. I used canola oil, but I'm not sure that I would again. Though canola is a fine frying oil for some things, it isn't all that neutral, and with these doughnuts at least, its flavour was more noticeable than I'd have liked it to be. Ferroni recommends safflower oil, and I second that. About the parchment squares. If you end up with enough pâte à choux to make more than 12 crullers like I did, you might find yourself short on parchment squares. I reused a few. They were a little crinkly from the hot oil, but that didn't really pose much of a problem for piping.

1 cup water
85 g / 6 tablespoons butter
2 teaspoons sugar
generous 1/4 teaspoon salt
135 g / 1 cup all-purpose flour, sifted
3 large eggs, at room temperature
1-2 large egg whites, at room temperature and slightly beaten
Vegetable oil for frying
Honey glaze (see below)

Place the water, butter, sugar, and salt in a small heavy-bottomed saucepan and bring to a brisk boil over medium-high heat. Add the flour and stir with a wooden spoon until the flour is completely incorporated. Continue to cook and stir for 3 to 4 minutes to steam away as much water as possible. The more moisture you can remove, the more eggs you can add later and the lighter your pastry will be. The mixture is ready when a thin film coats the bottom of the pan.
Move the mixture to the bowl of a stand mixer fitted with the paddle attachment. Although you can mix the pâte à choux by hand, this can be rather arduous, so use a mixer if you have one. Stir the mixture for about 1 minute to allow it to cool. Then mix on medium speed and add the first egg. Let it mix in completely and then scrape down the sides of the bowl. Add the remaining eggs, one at a time, and mix in completely. Add the egg whites, a little at a time, until the paste becomes smooth and glossy and will hold a slight peak when pinched with your fingers. Be careful not to add too much egg white or your crullers will become heavy. Transfer the batter to a pastry bag fitted with a 1/2-inch star piping tip.
To fry the crullers, heat at least 2 inches of oil in a heavy-bottomed pot until a deep-fry thermometer registers 370 degrees F. While the oil is heating, cut out twelve 3-inch-by-3-inch squares of parchment paper and lightly grease them. Pipe a generous ring onto each square. When the oil is hot, gently place one cruller at a time in the oil, paper side up. Remove the paper with tongs. Fry on each side until golden brown, 2-3 minutes. (Undercooked crullers will collapse while cooling, so observe the first one, and if this happens, increase your frying time and check the oil temperature for the rest.) Remove with a spider skimmer or slotted spoon and drain on paper towel for at least 1 minute. Leave on a rack to cool. Once cool to the touch, the crullers can be glazed.
Alternatively, you can bake the crullers. They will have slightly firmer crusts than fried ones. Preheat the oven to 450 degrees F. Line a baking sheet with parchment paper and pipe the crullers onto it, at least 2 inches apart from one another. Bake for 5 minutes, then reduce the heat to 350 degrees F and bake for another 15 minutes. Turn off the heat, open the oven door slightly and let the crullers sit in the cooling oven for 5 to 10 minutes. Remove, dip in glaze, and cool on a rack until the glaze has set.
Makes 10-15 doughnuts.

Tips for using a pastry bag. To fill the bag, first fit the bag with the tip and then tuck some of the bag into the wide end of the tip. This will prevent whatever you're filling the bag with from running out the tip as you fill. Second, roll down the sides of the bag a bit so that when you transfer your filling to the bag, it doesn't end up all near the wide opening where your hands will be. You'll just make a mess trying to squeeze its contents towards the tip. If you're working alone, stand the empty bag up in a tall glass to keep it steady as you fill. Regardless, a tall glass can be helpful if you need to put the bag down at any point in the middle of piping. Finally, with the bag filled, twist the wide end of the bag shut and hold it there with one hand (use your other hand to support and guide the bag by holding the bag closer to the tip). With the bag twisted and held this way, you should be able to easily force the filling through the tip.

Honey Glaze
From Lara Ferroni's Doughnuts

150 g / 1 1/2 cups confectioners' sugar, sifted
1 tablespoon honey
3 to 4 tablespoons milk water

Place the sugar in a medium bowl and slowly stir in the honey and milk, a little at a time, to make a smooth, pourable glaze.

Sunday, January 20, 2013

Above all, flakiness

Poppy seed danishes
When Octavian and I were in Berlin last summer, we were more or less on two different trips. He was there for a workshop and so was limited most days to a view of the city from a hotel conference room. I, however, was only tagging along and so had the luxury of spending my days wandering the winding streets, drinking in everything. There was a lot to the trip, then, that Octavian only ever saw in photos, heard about. And, unsurprisingly, there were spaces, moments, flavours, that were pretty well impossible to capture or convey, that he would've had to have just been there for.
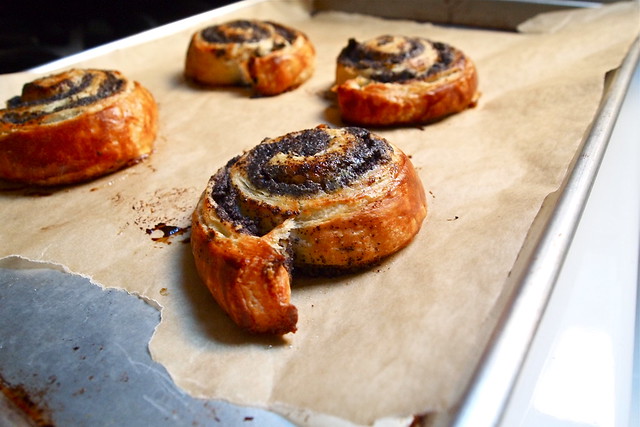
One of those things was a pastry I had at Brot und Butter, a buttery, delicate swirl of a pastry filled with poppy seeds. I ordered it pretty much at random. It was one of my first days in Berlin, and I had been walking all afternoon, paper map in hand, and had already had a few awkward I'm-sorry-my-German-is-awful-sprechen-Sie-Englisch? moments that day. So by the time I'd found my way to the cafe, I was tired and couldn't quite find the courage to speak up and order something. (I also couldn't figure out whether I was supposed to order from the counter or just take a seat.) So instead I just stood there, looking at the pastries in the cases, then at the rows of canned and boxed goods, indecisive about what to do and on the verge of just fleeing the situation. Apparently, I looked pathetic and stricken enough that about ten minutes in one of the women behind the counter asked me if I needed help. So I fumbled my way through another conversation, pointed at one of the poppy seed pastries, and was relieved just to be able to sit down with something, anything, and not feel so much like the silly North American that I was. It helped that the pastry was good, very good. For a few moments, anyway, I forgot the awkward exchange, lost between flakey, poppy-filled bites.
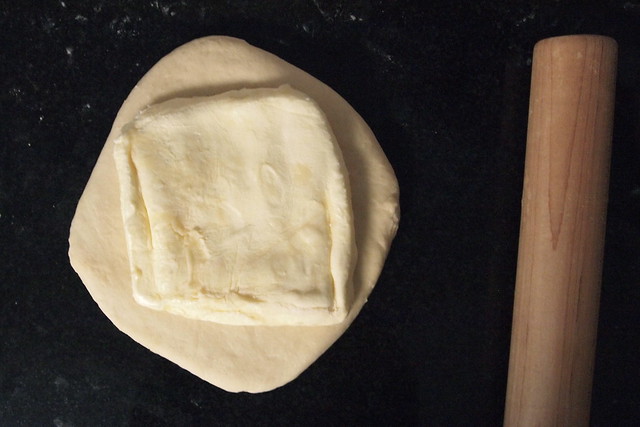
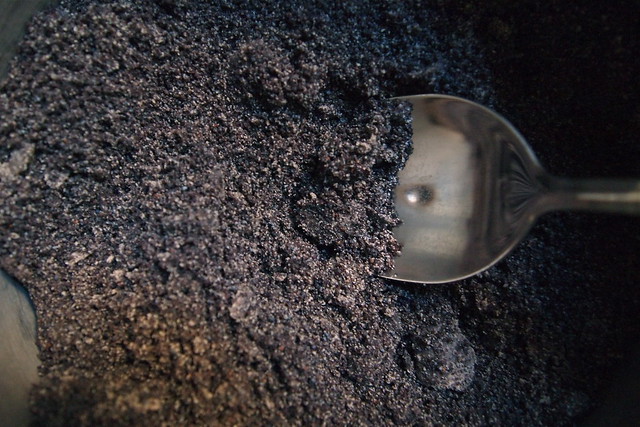
Butter slab Ground poppy seeds Danish dough
I knew as I ate that this pastry wasn't one that I'd be content just to remember. I needed to be able to make more just like it at home, long after this trip was over. But given all the awkwardness that had just transpired, I wasn't about to start asking questions about pastry methods and ingredients. So I settled for scribbling down its name from the pastry case--Mohnschnecken--and retreated.
This brings us to this past week, when I finally accepted that I would have to pull together a laminated yeasted dough if I wanted more Mohnschnecken.* Now, just what a Schnecke is seems to depend on who you ask. Some recipes have you add sour cream to the dough, some have you make letter-folds with it for flakier layers, some have you laminate in the butter for even flakier layers still. Most agree that the dough should be rolled up with its filling and cut into spirals--hence the name Schnecke, which just means snail in German. But because I remembered flakiness above all, I decided I would have to make a laminated dough--beat cold butter into a pliable slab, tuck it into a yeasted dough, and letter-fold it for layer upon layer of flakey pastry. But honestly, the prospect of working with a laminated dough again scared me. I'd only done it once before, and as I knew, it could get messy. You need to work quickly, so that the dough and butter don't get too soft to work with. But you also need to be gentle. If there isn't enough flour on the counter and the dough sticks and tears, the butter will start seeping out, and you might not get those perfect flakey layers. (I don't want to overstate the difficulty of working with laminated dough, but it's definitely something that I'm still working to get better at.) So it took me a few days to work up the courage. Then I dove in.
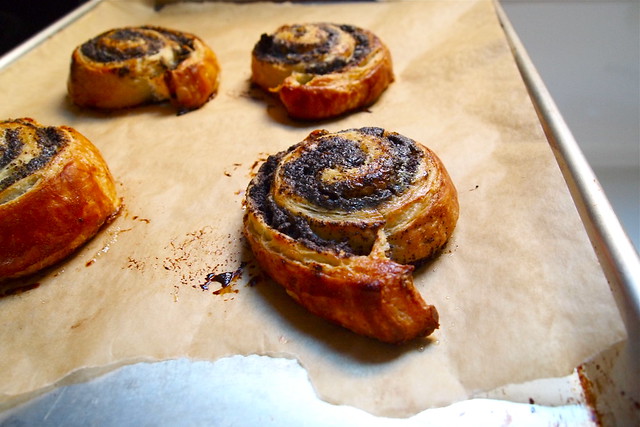
And it wasn't all that bad. I had a bit of trouble towards the beginning getting the butter the right consistency, and there were a few minor tears in the dough, which I tried my best to pinch together and then forget, but that was it. By early the next afternoon, we were tucking into our first pastries, puffed, golden, still warm from the oven, and ever so flakey. Totally, totally, worth the trouble, awkwardness and all.
Oh, and for those of you unfamiliar with poppy seed fillings--well, I just think we ought to see more of them around here. Poppy seeds have a pleasant bittersweet quality to them, which I think lends itself particularly well to pastry. I saw poppy-seed-filled pastries everywhere in Berlin and poppy seed ice cream too. The Berlinners have the right idea.
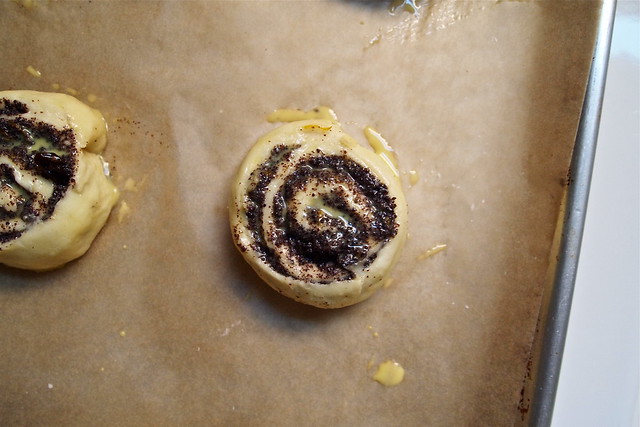
Poppy seed filling Danishes proofed and egg-washed Danishes
Much of my success with the Schnecken, I think, owe to the step-by-step photos that Joe, the man behind the pastry recipe, took the trouble to take. You can find his instructions for pulling together the pastry dough here, his instructions for laminating (especially helpful!) here, and his instructions for shaping here. I am actually looking forward to my next encounter with a laminated dough. These particular Schnecken, by the way, are a marriage of two recipes. The poppy seed filling comes from a New York Times recipe for hamantaschen via Smitten Kitchen.

Poppy Seed Snails (Mohnschnecken)
Note: About freezing. I have to say that in my experience, pastries that have been frozen and then thawed, proofed, and baked are never quite as good as ones baked fresh. They just never have quite the same airy crumb. But these Schnecken held up pretty well. I'm probably just being overly picky in saying that they're not quite, quite as good. About the raisins. The next time I make this poppy seed filling, I might consider giving the raisins a rough chop before adding them in. This filling is about the poppy seeds after all!

1 batch pastry dough, chilled for at least an hour (recipe here)
1 batch poppy seed filling, chilled completely (recipe here)
2 egg yolks lightly beaten with a splash of milk or cream

Roll out the pastry dough into a rectangle (the exact dimensions don't really matter--I'd aim for it to be at least twice as wide as it is long) just shy of a quarter-inch thick, dusting the work surface, the dough, and the rolling pin with flour as necessary. Gently spread the poppy seed filling in a thin, even layer over the dough, leaving a half-inch border at the sides and bottom of the rectangle. (You might not need all the filling.) Starting from the top of the rectangle, roll the dough up into a cylinder about 1-1/2 to 2 inches in diameter. Trim the ends and then cut the dough into 1-1/4 inch pieces with a bench scraper or a sharp knife.
Place on a baking sheet lined with parchment paper, six to a sheet, and cover to proof until soft and airy, about 2 hours. (At this stage--before the final proof--you can also put them in the fridge overnight and then proof them the next day or store them in the freezer for up to three months. Just be sure to thaw frozen pastries overnight in the fridge before proofing and baking. From the fridge, the pastries may need an extra hour to proof.) Then brush with the egg wash and bake in an oven heated to 375 degrees F until golden, about 15 minutes.
Makes about 12 pastries.

*It occurs to me now that the Mohnschnecke I had in Berlin might not have been made with a laminated dough. Looking back at my notes from the trip, my guess is that that pastry was made with a sour cream dough, which made it crisper and less croissant-like. But hey, I'm not going to complain.

Sunday, May 6, 2012

Those first few minutes were glorious

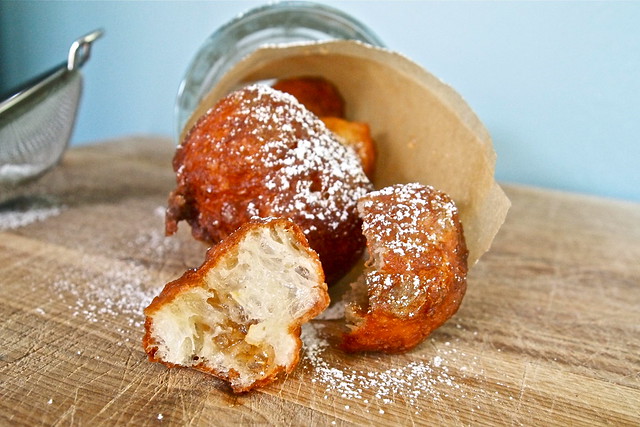
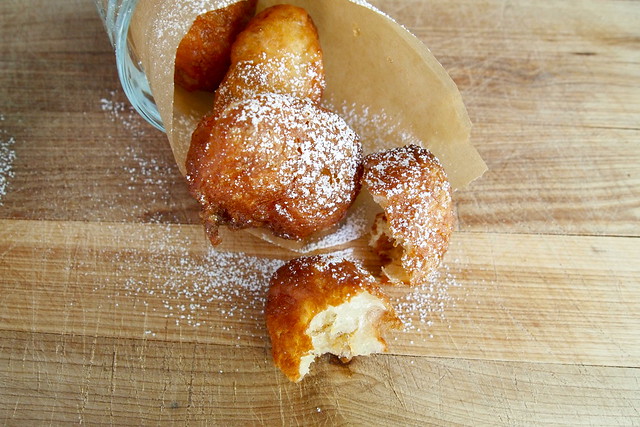
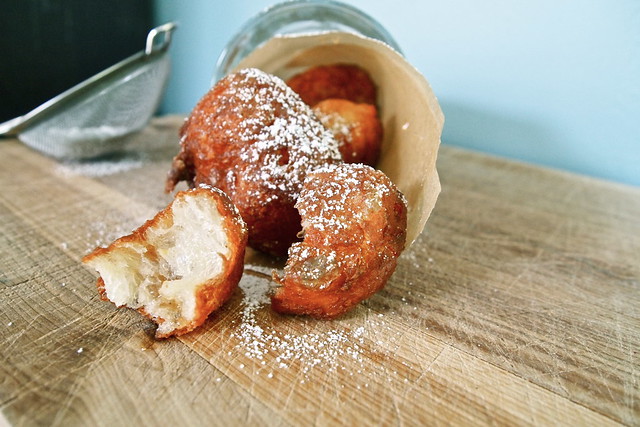
Grapefruit jelly filling!
Common sense recommends that you not fry doughnuts in your kitchen when it's 82 degrees F out or when you're planning to attend a rather technical philosophy talk in a few hours or when the only ventilation in your kitchen is an open window. It also recommends that you not down four or five such doughnuts (as modestly sized as they might be) within seconds of one another. But some considerations tend to drown out that sober, well-meaning voice in your head--for example: grapefruit-jelly doughnuts! Just the idea of them--it's like bells ringing in your head. It chimes and crashes 'til you wake up one day thinking, "Common sense--what's that?" and then find yourself juicing grapefruits in the kitchen.
So it was under the spell of these doughnuts that a few friends and I gathered in my sweltering, cramped kitchen this past week, dropping bits of brioche dough into hot, shimmering oil to have them sizzle, puff, and blister golden. It got pretty sticky and greasy in there, but that didn't matter to us. Warm doughnuts filled with grapefruit jelly--the idea kept us going.
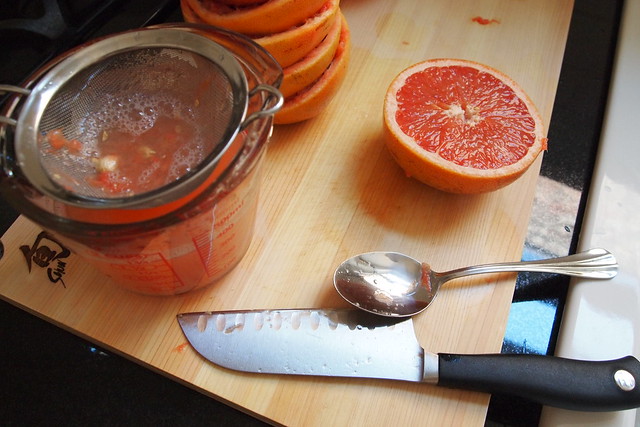
Squeezing grapefruits Grapefruit jelly
And when we were through, those first few minutes were glorious. We stood there together in the thick air of the kitchen, just eating. We reached for one doughnut, then another, then another. Whatever sense we had had left us. We blissfully gorged ourselves. It was not, perhaps, our finest moment. Five or six doughnuts in, we started to feel the grease on our fingertips, the sugar going to our heads, and had to stop ourselves. But I maintain that those first few minutes were glorious. The aftermath--not so much. Octavian and I, anyway, were headache-stricken and drowsy for the remainder of the day. Doughnut coma is a phrase that comes to mind.
But I don't mean to discourage you from making your own doughnuts at home. It's a good way to spend an afternoon with friends (you should just round up more than I managed to to help you with the eating), and these doughnuts are really good. Make a party of it. Your friends will thank you.
That said, making these doughnuts in particular does require a bit of planning ahead and a few extra hands (remember those friends?). It's easiest, I think, to spread the work over two days. On the first day, you should put together the brioche dough. This is my favourite part. You start by mixing together a basic yeasted dough. Then you add butter, a lot of butter, to the dough, bit by bit, until it's satiny and yielding. This process takes a while, and you may find it tedious, but I am all for the waltz of dough and butter whirling around the bowl of my stand mixer. I find it mesmerizing.
Leaven and poolish Butter and zest Proofed dough
Brioche dough is not typically what you'd use for jelly doughnuts. By weight, the butter-to-flour ratio in brioche ranges from 1:2 to 4:5, which makes the dough far richer than what you find in most doughnuts. But this, I think, makes these doughnuts all the better--airy, delicate, meltingly tender. (I wouldn't have thought to do this myself. I came across the idea in Tartine Bread.) And the grapefruit jelly does help tame some of that richness.
You should make the jelly on the first day too, if not beforehand. It's a cinch and can be made well in advance (I made mine several weeks ago, when it was still legitimately grapefruit season)--just transfer it to a clean jar and store it in the freezer until you need it.
On the second day, gather your friends and put them to work (what else are friends for?). You should at least have one other person on hand. You'll have a much easier time with the deep-frying that way--maintaining the oil temperature, keeping track of the time, and turning the doughnuts in the oil are a lot for one person to do, given how quickly the doughnuts fry. And if you have more friends willing to help, all the better. Make yourselves a little assembly line. You'll definitely need a second set of hands when filling the doughnuts. (Try holding a pastry bag full of jelly and piercing a doughnut with the filling tip--no good can come of it.)
Doughnuts! Doughnuts
So, these doughnuts do call for a good deal of effort, and many of them will disappear into your friends' mouths seconds after you've put your pastry bag down. But I can think few better things to do with friends when you've got an afternoon.

Grapefruit Jelly Doughnuts
Adapted from the December 2011 Bon Appétit and Tartine Bread
Note: About the grapefruit jelly. The first time I cooked the jelly, it didn't set. I failed to note the importance of using a large saucepan. If this happens to you, just return the mixture to a large saucepan and bring to a boil. Let it boil for 3-4 minutes and pour it back into the shallow dish. You do not need to let the jelly reach 220 F while on the stove--it will set too hard if it reaches this temperature. If the jelly has set too hard, return it to a saucepan and cook over medium heat. Add up to 1/2 cup more of fresh grapefruit juice and whisk to incorporate. Bring it to a vigorous boil and then pour it back into the shallow dish to cool and set. And if you find yourself with extra jelly, it's wonderful on toast. About the brioche dough. I used Tartine Bread's brioche recipe for my doughnuts, which involves using sourdough starter and poolish for leavening. I'm pretty confident, however, that just about any brioche dough with a similar butter-to-flour ratio, 1:2, will produce good results. I like this Dorie Greenspan recipe. You might also consider using this brioche dough (but without all of the savouries, of course). Or, if you have Peter Reinhart's Bread Baker's Apprentice, you could also use his recipe for "middle-class" brioche. Whichever recipe you settle on, it will most certainly make more dough than you'll want for doughnuts. Scale the recipe and portion out the dough so that you have just as much as you need or bake a loaf of brioche with the extra like I did. Follow your chosen recipe's directions up to and including bulk fermentation (the first rise) and then chill the dough (for up to a day) until you're ready to follow the procedure below. About the safflower oil. Depending on the size of the pot in which you're deep-frying, you may need up to 1 quart of oil. Once you've finished the frying, you can let the oil cool and then filter it through a fine-mesh sieve or a coffee filter to get at least one more use out of it. Store it in the fridge until then.

GRAPEFRUIT JELLY
2 cups sugar
1 1/2 cups fresh grapefruit juice (from about two and a half grapefruits)
1/4 cup liquid pectin
1 vanilla bean, split lengthwise

DOUGHNUTS
700 g brioche dough, chilled (see note above)
Safflower oil for deep-frying
Powdered sugar for dusting

SPECIAL EQUIPMENT
Long-handled slotted spoon
Deep-fry/candy thermometer
Stand mixer
1 1/2-inch biscuit cutter
Pastry bag fitted with a Bismarck tip (no. 230)

Make the grapefruit jelly. Combine the sugar, grapefruit juice, and pectin in a large saucepan (the mixture tends to foam as it heats up--a larger saucepan will allow it to properly boil and release enough of its water content to set into a jelly). Scrape in the seeds from the vanilla bean and add the pod. Cook over medium heat, stirring, until the sugar dissolves. Increase the heat to high and whisk until mixture boils vigorously, about 6 minutes. Pour mixture into a shallow, heat-proof dish. Remove the vanilla bean pod. Let cool completely at room temperature. Cover and chill until set, at least 2 hours. The jelly should have a consistency similar to preserves--thick enough to cling to the end of a spoon. The jelly can be made up to a week in advance (or earlier if stored in the freezer in a clean jar).

Shape the doughnuts about 2 hours before serving. Lightly flour the dough and the work surface. There are two options for shaping the dough. (i) divide the dough into 3 equal portions and roll each portion into a cylinder about a 1/2 inch in diameter. If the dough feels as if it will not stretch further, let it rest for 10 minutes and continue rolling. Transfer the dough to a cutting board and set in a draft-free place or cover with a kitchen towel. Let rise until the dough looks soft and inflated, 1 to 2 hours. Cut the dough into on the diagonal into pieces about 2 inches long or as you prefer and then place near the stove. (ii) Roll the dough out to a thickness of 1/2 inch. Cut circles out the dough with a biscuit cutter. Transfer the circles to two lightly floured half-sheets and set in a draft-free place or cover with a kitchen towel. Let rise until doubled, 1 to 2 hours. Place near the stove.
Pour oil into a heavy, high-sided pan to a depth of 2 to 3 inches. Heat the oil over medium-high heat until it registers 375 degrees F on a deep-frying thermometer.
When deep-frying it's best to set up your prep area like an assembly line so you can work safely and efficiently. Set a rack near the stove and under it place a layer or two of papers towels.
Carefully slip four pieces of dough into the hot oil and fry until golden brown, about 1 minute. Using the slotted spoon, turn the dough and fry until brown on the second side, about 1 minute.
Carefully remove the doughnuts from the oil and transfer to the wire rack. Fry the remaining pieces of dough, checking the temperature of the oil intermittently. If necessary, allow a couple of minutes for the oil to return to 375 degrees F in between batches.
Transfer the grapefruit jelly to a pastry bag fitted with a Bismarck tip. Filling the doughnuts is a two-person job--you need one set of hands to hold the pastry bag upright and to pipe out the jelly and another set of hands to insert the Bismarck tip into the doughnuts. A squeeze bottle fitted with a 1/4-tip would also work. Fill each doughnut with about a 1 teaspoon of jelly. 
Dust the doughnuts with powdered sugar and serve immediately.
Makes 40-50 two-bite doughnuts.

Sunday, March 25, 2012

I made a beeline

Les brioches
I don't often get nostalgic about my undergraduate days. I'll admit it--I was an awkward, geeky kid coming out of high school. I was nowhere near ready for the droves of rowdy frat-boy types, the 11 am beer pong, the near constant party going on somewhere down the hall. This, of course, wasn't all there was to college, but when I lived in a dorm it seemed like it, and I was miserable. It took me a long while to find my place.
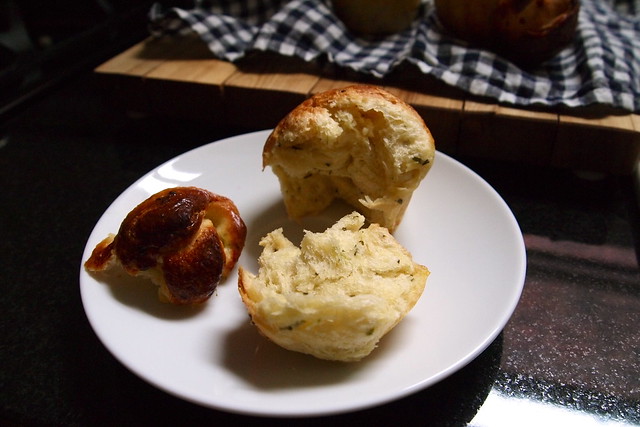
But one of the things I do remember fondly about those days (once I found a real place to live) is the splendid bakery downtown, Pan Chancho. Octavian and I would often wander in on Sunday afternoons to admire the rows of burnished sourdough boules and enjoy a cup of soup. I was doing most of our baking at home at the time, but there were a few things we always found hard to resist taking with us, like a couple of the savoury brioches. They were our favourite--lofty, buttery, herb-flecked--and just perfect with a sharp, lemony salad on a warm day. When it came time to move, I knew I'd miss them. 
The savouries
Brioche block
Proofing
And clearly, I still haven't stopped thinking about those brioches. When Octavian and I were visiting this past December and popped into Pan Chancho, I made a beeline for the cookbooks. The bakery had published a collection of its recipes a few years ago, including one for the savoury brioches. I was determined to have those brioches, wherever I happened to be.
Getting the recipe to work for me took some tinkering. The translation from professional bakery to home kitchen has got to be a little tricky. So, while the first attempt was a little disappointing, the second--when I did what made the most sense to me--turned out brioches just as we remembered them--gleaming, golden, buttery, and tender.
If there's anything challenging about making brioches à tête like these (tête is just French for head), it's in the shaping. You want to make each round of dough as smooth and uniformly round as possible, and you want to place each tête dead-centre on top of its round. (You also don't want to handle the dough for too long and have the butter melt out on you.) Imperfections will be obvious once the brioches hit oven and start rising. Misaligned and unevenly shaped têtes will bake off-centre. (You can see from my photos that I haven't quite mastered the technique!) It just takes a little practice, and even if your brioches are a bit wonky looking, I don't see anyone complaining once they've taken a bite or two.
Proofed, egg-washed
Split brioche
I planned to have the brioches with a modest soup over a few lunches, but I never quite got around to making any soup before all of the brioches disappeared. (We gave some away...I didn't eat all of them!) But I can say that these brioches are not out of place at breakfast and definitely make for an outstanding afternoon snack. I can even see them taking the place of dinner rolls if anyone wants to have me over for something that needs a little mopping up.

Savoury Brioche
Adapted, somewhat liberally, from The Pan Chancho Cookbook
Note: Mixing. It might be possible to mix the dough by hand, but I wouldn't recommend it. It will be difficult to pull the dough together, I think, and using your hands to knead the dough will warm the butter too much. Shaping. It takes a bit of practice to get the technique down for shaping the brioches. Alternatively, you can use the method that Dorie Greenspan uses here for bubble-top brioches, which is more forgiving.

375-500 g / 3-4 cups all-purpose flour
1 teaspoon fine sea salt
3 tablespoons sugar
2 sticks / 225 g unsalted butter, soft but still cool
5 large eggs
1 tablespoon instant yeast
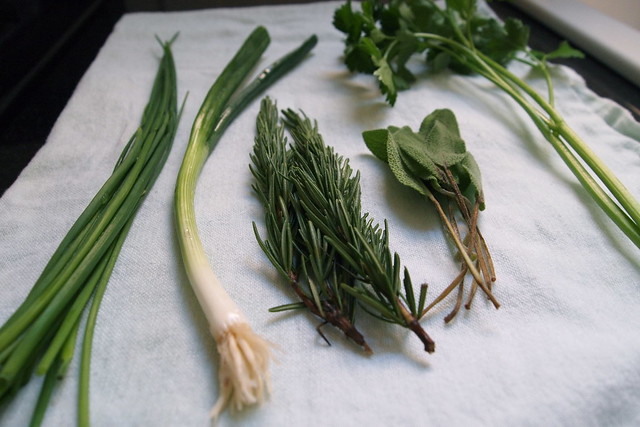
1 tablespoon fresh Italian parsley, finely chopped
1 teaspoon fresh sage, finely chopped
2 teaspoons fresh chives, finely chopped
2 teaspoons rosemary, finely chopped
1 scallion, thinly sliced
60 g sharp cheddar, grated (about a 1/2 cup)
1/2 teaspoon freshly ground black pepper
1 large egg + 1 teaspoon water

Sift 375 g / 3 cups flour, the salt, and the sugar together. In a stand mixer fitted with a paddle attachment, cream the butter. Paddle in three of the eggs and scrape down the bowl. Incorporate the flour mixture at low speed, 1 cup at a time, and scrape down the bowl. Paddle in the remaining eggs at medium speed, one at a time. Add in the yeast and beat for 1-2 minutes. The dough should have pulled away from the sides the bowl at this point. If it's too wet and hasn't, mix in as much of the remaining flour as necessary on low. 
Re-fit the stand mixer with the dough hook and knead the dough at medium-low speed for about 5 minutes. Knead in the herbs, cheese, and pepper at low speed. The dough should be smooth and elastic enough to pass the windowpane test. Press it into an even rectangle and wrap it tightly in plastic wrap. Refrigerate for 6 hours or overnight to firm up the butter.
Butter 16 of the cups in two muffin tins or 16 small brioche moulds if you have them. Place the dough on a lightly floured surface. Divide into 16 equal pieces, about 65-70 g each. Cut a bit of dough off each piece, about 1/5 of the total, for the tête. You don't want the tête too small, or it will dry out while baking. 
Working quickly, shape all 32 pieces into rounds--cup your hands around each and press the edges of your palms into the edges of the dough and pull them in and towards the work surface, rotating the dough and repeating this motion until you have a smooth, even round; pinch the round from the bottom to tighten it. Place the large rounds into the greased muffin cups seam-side down. Press a well 3/4 of an inch deep into the centre of each round. Gently press a tête into each well. Cover with a damp tea towel and let rise for about 90 minutes or until doubled in size. The brioches should pretty much fill the muffin cups, their têtes clearing the tin. 
Meanwhile, preheat the oven to 375 degrees F. Beat the remaining egg with the water for egg wash and brush the brioche. Bake for 18-20 minutes. The brioche should be golden and their têtes a deep mahogany. Unmould immediately and cool on a wire rack for at least 10 minutes. The brioche are best eaten the day they're baked but will keep for another day in a zip-top bag.
Makes 16 brioches.

Thursday, March 15, 2012

With abandon

Bagel Bombs
Writing term papers is not a pretty affair--at least in my case. The dishes pile up. I don't bother with my hair. I grimace a lot. So, I'll have to be brief today.
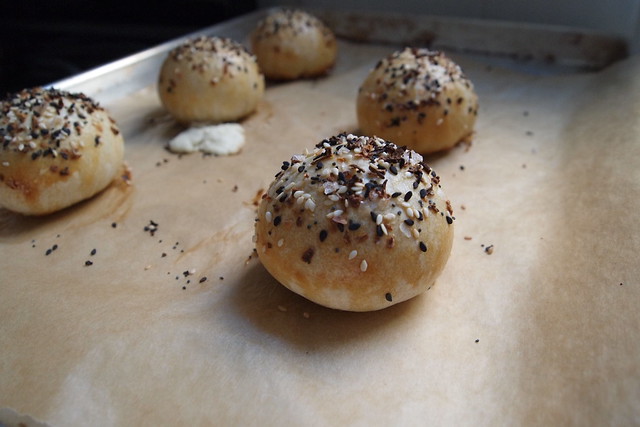
A few weeks ago, I finally kneaded together a batch of Milk Bar "mother" dough and baked up a few bagel bombs to share with the other sleepy-eyed folks in my early-morning political philosophy seminar. The bagel bomb is Christina Tosi's nod to the New York bagel, sesame seeds, dried onions, garlic powder, and all. Bite into one and you'll get the "bomb" bit--think bacon-scallion cream-cheese explosion. I think they went over pretty well with the class. I might have seen a person or two reaching for a second, maybe even a third bomb...but I won't mention any names.
Bacon-scallion cream cheese
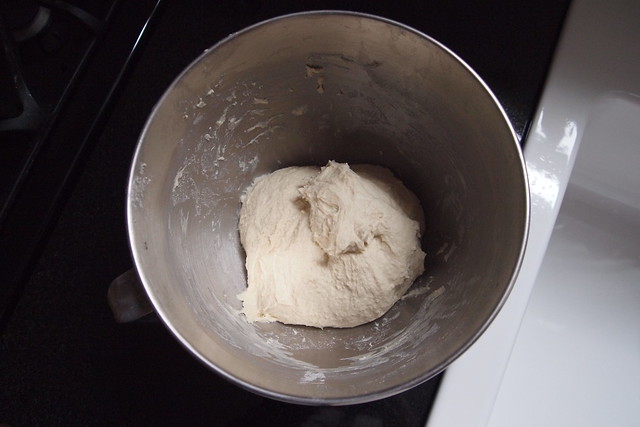
Mother dough
Munching on bagel bombs definitely helped the morning along, but, really, I still think that I got the best of it while making them earlier that week. That bacon-scallion cream cheese? Totally amazing and dead easy to make too. I'll admit to having had a taste or two and maybe to licking the stand-mixer paddle clean. Hey--I get to when I'm doing the baking, right?
Assembly
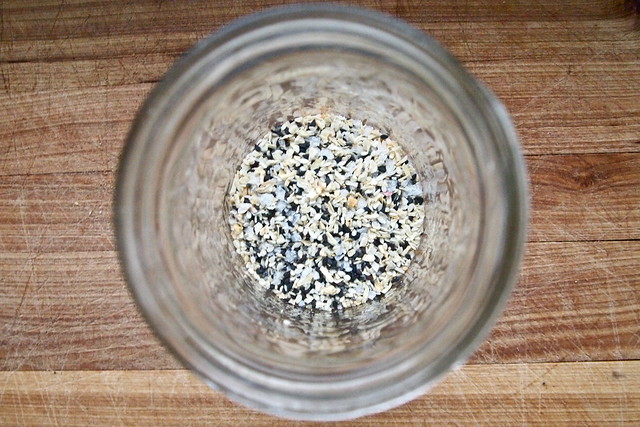
Bagel topping
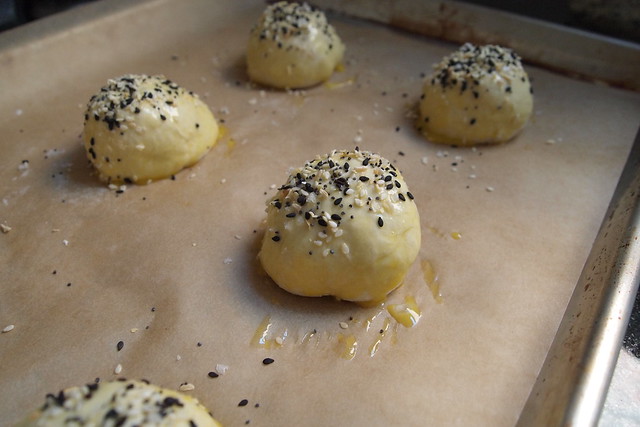
Egg washed, seed dusted
But in all seriousness, I have to say that after its spell in the oven, the cream cheese tucked into each bomb isn't nearly as good. The scallions lose their pluck. The cream cheese gets a little curdled. Next time around, I think I might just try my hand at some proper bagels and paddle together this cream cheese to mound on top. If you ate sour-cream-and-onion chips with abandon as a kid like I did, this is your cream cheese.

Bacon-scallion Cream Cheese
Adapted from the Momofuku Milk Bar Cookbook

50 g / 1 3/4 oz bacon, the smokier the better
200 g / 7 oz cream cheese
2 g scallion greens, thinly sliced (about 2-3 scallions' worth)
5 g / 1 teaspoon sugar
2 g / 1/2 teaspoon fine sea salt

Cook the bacon in a skillet over medium heat until it's auburn brown and crunchy. Remove it from the pan and chop it into small pieces; reserve it and, separately, the rendered bacon fat.
Put the cream cheese in the bowl of a stand mixer fitted with the paddle attachment and cream it on medium speed. Pour in the reserved bacon fat and paddle to combine. Scrape down the sides of the bowl. Add the chopped bacon, scallions, sugar, and salt and paddle briefly to incorporate.

One last thing: to help out those of you who already have the relevant cookbook and who might want to tackle a project I've posted about, I'm going to be adding a few technical notes to the end of my project posts from now on. I hope some of you out there will find them helpful!

Technical Notes for Milk Bar's Bagel Bombs

  • Oven temperature: the recipe directs you to bake these at 325 degrees F, but even when I baked the bombs at 350 degrees for 30 minutes, I wasn't getting any colour on them. I tweeted Tosi about it (it's a thing she does every Friday), and she suggested that I give them a minute or two on low under the broiler. It did the trick.
  • Yeast: the "Ingredients" section at the beginning of the Milk Bar cookbook says to use active-dry yeast, but I'm pretty confident that you should be using instant yeast for the mother dough. First of all, the active-dry stuff won't break down unless you dissolve it in liquid. Second, the quantity of yeast and the time allotted for proofing are more appropriate for instant.
  • Dough: the mother dough is probably a little wetter than the average bread dough--just keep your hands floured.