Sunday, March 25, 2012

I made a beeline

Les brioches
I don't often get nostalgic about my undergraduate days. I'll admit it--I was an awkward, geeky kid coming out of high school. I was nowhere near ready for the droves of rowdy frat-boy types, the 11 am beer pong, the near constant party going on somewhere down the hall. This, of course, wasn't all there was to college, but when I lived in a dorm it seemed like it, and I was miserable. It took me a long while to find my place.
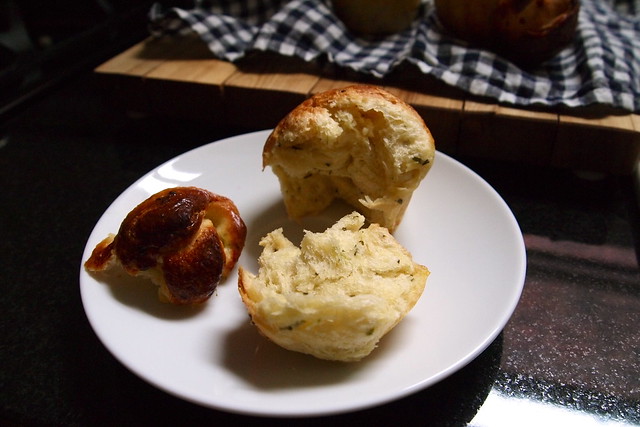
But one of the things I do remember fondly about those days (once I found a real place to live) is the splendid bakery downtown, Pan Chancho. Octavian and I would often wander in on Sunday afternoons to admire the rows of burnished sourdough boules and enjoy a cup of soup. I was doing most of our baking at home at the time, but there were a few things we always found hard to resist taking with us, like a couple of the savoury brioches. They were our favourite--lofty, buttery, herb-flecked--and just perfect with a sharp, lemony salad on a warm day. When it came time to move, I knew I'd miss them. 
The savouries
Brioche block
Proofing
And clearly, I still haven't stopped thinking about those brioches. When Octavian and I were visiting this past December and popped into Pan Chancho, I made a beeline for the cookbooks. The bakery had published a collection of its recipes a few years ago, including one for the savoury brioches. I was determined to have those brioches, wherever I happened to be.
Getting the recipe to work for me took some tinkering. The translation from professional bakery to home kitchen has got to be a little tricky. So, while the first attempt was a little disappointing, the second--when I did what made the most sense to me--turned out brioches just as we remembered them--gleaming, golden, buttery, and tender.
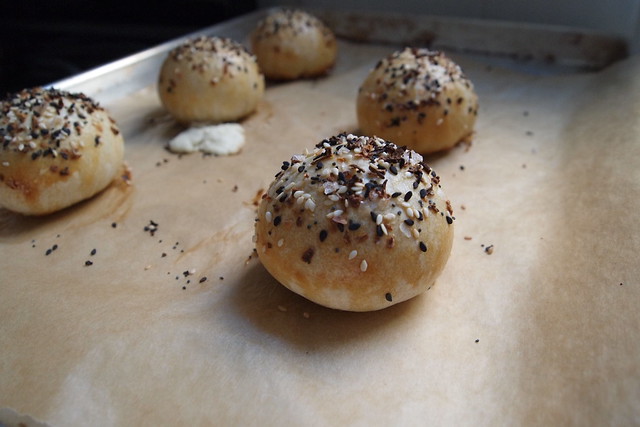
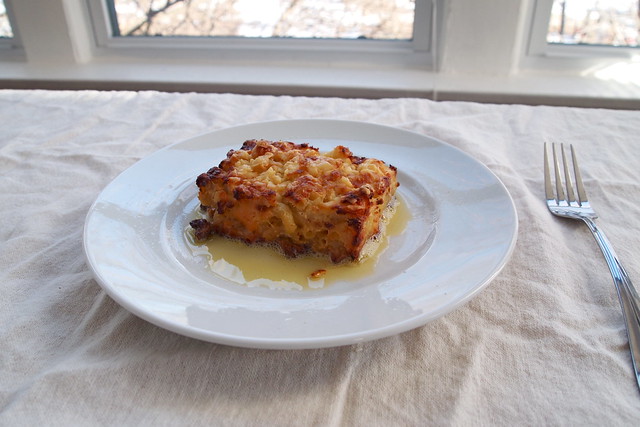
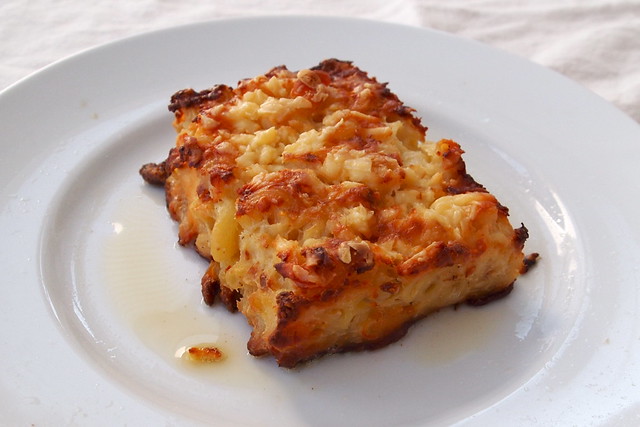
If there's anything challenging about making brioches à tête like these (tête is just French for head), it's in the shaping. You want to make each round of dough as smooth and uniformly round as possible, and you want to place each tête dead-centre on top of its round. (You also don't want to handle the dough for too long and have the butter melt out on you.) Imperfections will be obvious once the brioches hit oven and start rising. Misaligned and unevenly shaped têtes will bake off-centre. (You can see from my photos that I haven't quite mastered the technique!) It just takes a little practice, and even if your brioches are a bit wonky looking, I don't see anyone complaining once they've taken a bite or two.
Proofed, egg-washed
Split brioche
I planned to have the brioches with a modest soup over a few lunches, but I never quite got around to making any soup before all of the brioches disappeared. (We gave some away...I didn't eat all of them!) But I can say that these brioches are not out of place at breakfast and definitely make for an outstanding afternoon snack. I can even see them taking the place of dinner rolls if anyone wants to have me over for something that needs a little mopping up.

Savoury Brioche
Adapted, somewhat liberally, from The Pan Chancho Cookbook
Note: Mixing. It might be possible to mix the dough by hand, but I wouldn't recommend it. It will be difficult to pull the dough together, I think, and using your hands to knead the dough will warm the butter too much. Shaping. It takes a bit of practice to get the technique down for shaping the brioches. Alternatively, you can use the method that Dorie Greenspan uses here for bubble-top brioches, which is more forgiving.

375-500 g / 3-4 cups all-purpose flour
1 teaspoon fine sea salt
3 tablespoons sugar
2 sticks / 225 g unsalted butter, soft but still cool
5 large eggs
1 tablespoon instant yeast
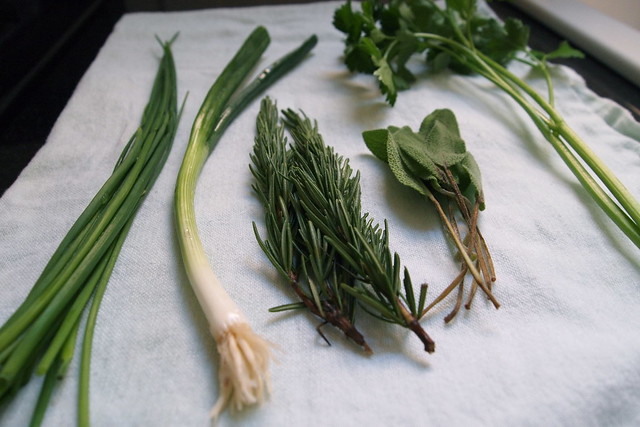
1 tablespoon fresh Italian parsley, finely chopped
1 teaspoon fresh sage, finely chopped
2 teaspoons fresh chives, finely chopped
2 teaspoons rosemary, finely chopped
1 scallion, thinly sliced
60 g sharp cheddar, grated (about a 1/2 cup)
1/2 teaspoon freshly ground black pepper
1 large egg + 1 teaspoon water

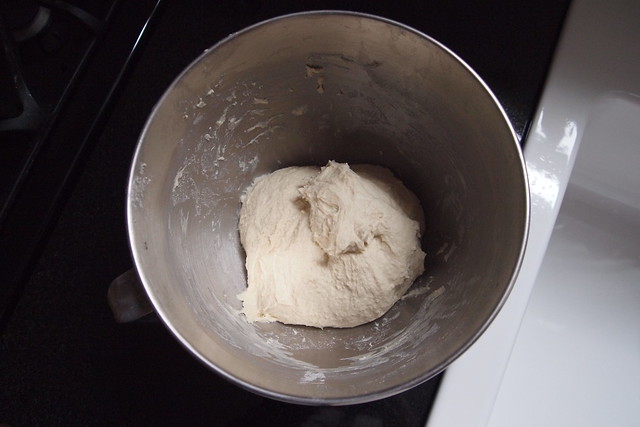
Sift 375 g / 3 cups flour, the salt, and the sugar together. In a stand mixer fitted with a paddle attachment, cream the butter. Paddle in three of the eggs and scrape down the bowl. Incorporate the flour mixture at low speed, 1 cup at a time, and scrape down the bowl. Paddle in the remaining eggs at medium speed, one at a time. Add in the yeast and beat for 1-2 minutes. The dough should have pulled away from the sides the bowl at this point. If it's too wet and hasn't, mix in as much of the remaining flour as necessary on low. 
Re-fit the stand mixer with the dough hook and knead the dough at medium-low speed for about 5 minutes. Knead in the herbs, cheese, and pepper at low speed. The dough should be smooth and elastic enough to pass the windowpane test. Press it into an even rectangle and wrap it tightly in plastic wrap. Refrigerate for 6 hours or overnight to firm up the butter.
Butter 16 of the cups in two muffin tins or 16 small brioche moulds if you have them. Place the dough on a lightly floured surface. Divide into 16 equal pieces, about 65-70 g each. Cut a bit of dough off each piece, about 1/5 of the total, for the tête. You don't want the tête too small, or it will dry out while baking. 
Working quickly, shape all 32 pieces into rounds--cup your hands around each and press the edges of your palms into the edges of the dough and pull them in and towards the work surface, rotating the dough and repeating this motion until you have a smooth, even round; pinch the round from the bottom to tighten it. Place the large rounds into the greased muffin cups seam-side down. Press a well 3/4 of an inch deep into the centre of each round. Gently press a tête into each well. Cover with a damp tea towel and let rise for about 90 minutes or until doubled in size. The brioches should pretty much fill the muffin cups, their têtes clearing the tin. 
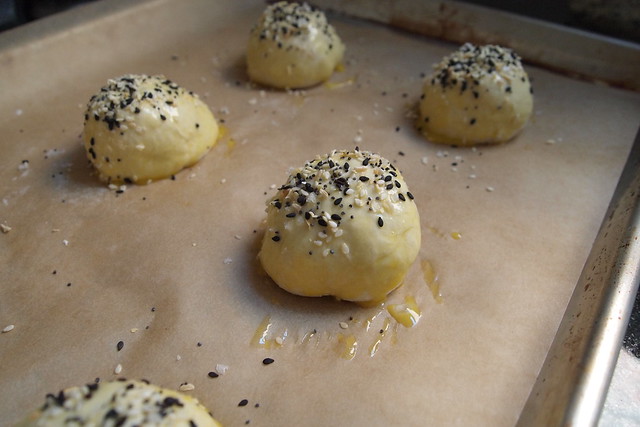
Meanwhile, preheat the oven to 375 degrees F. Beat the remaining egg with the water for egg wash and brush the brioche. Bake for 18-20 minutes. The brioche should be golden and their têtes a deep mahogany. Unmould immediately and cool on a wire rack for at least 10 minutes. The brioche are best eaten the day they're baked but will keep for another day in a zip-top bag.
Makes 16 brioches.

Thursday, March 15, 2012

With abandon

Bagel Bombs
Writing term papers is not a pretty affair--at least in my case. The dishes pile up. I don't bother with my hair. I grimace a lot. So, I'll have to be brief today.
A few weeks ago, I finally kneaded together a batch of Milk Bar "mother" dough and baked up a few bagel bombs to share with the other sleepy-eyed folks in my early-morning political philosophy seminar. The bagel bomb is Christina Tosi's nod to the New York bagel, sesame seeds, dried onions, garlic powder, and all. Bite into one and you'll get the "bomb" bit--think bacon-scallion cream-cheese explosion. I think they went over pretty well with the class. I might have seen a person or two reaching for a second, maybe even a third bomb...but I won't mention any names.
Bacon-scallion cream cheese
Mother dough
Munching on bagel bombs definitely helped the morning along, but, really, I still think that I got the best of it while making them earlier that week. That bacon-scallion cream cheese? Totally amazing and dead easy to make too. I'll admit to having had a taste or two and maybe to licking the stand-mixer paddle clean. Hey--I get to when I'm doing the baking, right?
Assembly
Bagel topping
Egg washed, seed dusted
But in all seriousness, I have to say that after its spell in the oven, the cream cheese tucked into each bomb isn't nearly as good. The scallions lose their pluck. The cream cheese gets a little curdled. Next time around, I think I might just try my hand at some proper bagels and paddle together this cream cheese to mound on top. If you ate sour-cream-and-onion chips with abandon as a kid like I did, this is your cream cheese.

Bacon-scallion Cream Cheese
Adapted from the Momofuku Milk Bar Cookbook

50 g / 1 3/4 oz bacon, the smokier the better
200 g / 7 oz cream cheese
2 g scallion greens, thinly sliced (about 2-3 scallions' worth)
5 g / 1 teaspoon sugar
2 g / 1/2 teaspoon fine sea salt

Cook the bacon in a skillet over medium heat until it's auburn brown and crunchy. Remove it from the pan and chop it into small pieces; reserve it and, separately, the rendered bacon fat.
Put the cream cheese in the bowl of a stand mixer fitted with the paddle attachment and cream it on medium speed. Pour in the reserved bacon fat and paddle to combine. Scrape down the sides of the bowl. Add the chopped bacon, scallions, sugar, and salt and paddle briefly to incorporate.

One last thing: to help out those of you who already have the relevant cookbook and who might want to tackle a project I've posted about, I'm going to be adding a few technical notes to the end of my project posts from now on. I hope some of you out there will find them helpful!

Technical Notes for Milk Bar's Bagel Bombs

  • Oven temperature: the recipe directs you to bake these at 325 degrees F, but even when I baked the bombs at 350 degrees for 30 minutes, I wasn't getting any colour on them. I tweeted Tosi about it (it's a thing she does every Friday), and she suggested that I give them a minute or two on low under the broiler. It did the trick.
  • Yeast: the "Ingredients" section at the beginning of the Milk Bar cookbook says to use active-dry yeast, but I'm pretty confident that you should be using instant yeast for the mother dough. First of all, the active-dry stuff won't break down unless you dissolve it in liquid. Second, the quantity of yeast and the time allotted for proofing are more appropriate for instant.
  • Dough: the mother dough is probably a little wetter than the average bread dough--just keep your hands floured.

Saturday, March 3, 2012

Macaroni, matrimony, and cheese

Edna Lewis' Mac and Cheese
It came out in conversation a few months ago that my friend Ben doesn't like macaroni and cheese. Doesn't like macaroni and cheese! I didn't think that that was humanly possible--at least for someone who'd grown up in this country. Worse yet, he admitted, his fiancée loves mac and cheese. How was this going to work out once they tied the knot this summer? Would Ben have to sneak his share of mac and cheese to the dog? Would the dog even welcome a pile of mac and cheese in his bowl? It didn't matter--there would be no room for a dog and two people in a Hyde Park apartment. Ben was a little apprehensive.
So, naturally, I invited him over for dinner. Ben's a good guy--the picture of a southern gentleman, really--well-dressed, soft-spoken, warm and, of course, appreciative of the good things in life, like fine bourbon and bluegrass. I wanted to do what little I could for his and his fiancée's matrimonial happiness. So, it was time to subject him to a good plateful of mac and cheese, hot, golden, and bubbly--something that would be irresistible, even to a hardened sceptic like him.
P2120856
Okay, so it turned out that Ben was not all that hardened a sceptic. His past experiences with mac and cheese had been of the orange-powdered, cardboard-boxed variety. And that's probably enough to leave most at least somewhat sceptical. All that Ben really needed was a little push, and I was happy to be the one to do it, to acquaint him with the good stuff.
The mac and cheese we made that night was a southern variation on the standard bubbly, baked sort. Instead of starting with a roux and making a cheese sauce for the macaroni, you douse it in a rather immodest mixture of cream and eggs, scattering cubes of cheddar throughout, and then finish it off with another good heap of cheddar. It bakes up golden and creamy, almost custard-like beneath that cheesy lid.
That said, I can see how an absolute die-hard mac and cheese lover might not be entirely satisfied with this particular plate--it doesn't ooze cheese. But I still think it's fantastic, especially with a mess of braised collards on the side. And most importantly, it won Ben over. I look forward to the wedding!

Southern-Style Macaroni and Cheese
Adapted from Edna Lewis and Scott Peacock's The Gift of Southern Cooking via the May 2010 Saveur
Note: I used 2 cups of heavy cream and 1 cup of milk in place of heavy cream and half-and-half with no issues. I'm pretty confident that using less heavy cream wouldn't have been a problem either. And if indeed you're a die-hard mac and cheese lover, a few more ounces of cubed cheddar probably wouldn't hurt.

12 oz elbow macaroni
Butter, for greasing
13 oz extra-sharp cheddar, 7 oz (about 1 1/2 cups) cut into half-inch cubes + 6 oz (about 2 cups) grated
1 1/2 teaspoons salt
2 tablespoons + 1 teaspoon all-purpose flour
1 tablespoon Dijon mustard
1⁄4 teaspoon freshly ground black pepper
1⁄4 teaspoon freshly grated nutmeg
1⁄8 teaspoon cayenne pepper
2⁄3 cup sour cream
2 eggs, lightly beaten
1 1⁄2 cups half-and-half
1 1⁄2 cups heavy cream
1⁄3 cup grated onion
1 teaspoon Worcestershire

Heat oven to 350° F. Bring a 4-quart saucepan of salted water to a boil. Add the pasta and cook until cooked halfway through, about 3 minutes. Drain pasta and transfer to a buttered 9" x 13" baking dish. Stir in the cubed cheddar cheese and set aside.
Combine the salt, flour, mustard, black pepper, nutmeg, and cayenne in a large mixing bowl. Add the sour cream and the eggs and whisk until smooth. Whisk in the half-and-half, heavy cream, onions, and Worcestershire. Pour the egg mixture over the reserved pasta mixture and stir to combine. Sprinkle the grated cheese evenly over the surface. Bake until the pasta mixture is set around the edges but still a bit loose in the center, 60-70 minutes. Let cool for 10 minutes before serving.
Serves 8-10.