Showing posts with label mains. Show all posts

Monday, October 27, 2014

Uncommonly good

Red-braised pork
Hello, friends. It’s been a while, ages, really. I’ve had my hands full trying to sort some things out. Most of it has had to do with my dissertation. It’s taken me the better part of a year to undo some of the habits and thinking that were holding me back, making me miserable. So, now, writing bits and pieces of it is not quite the terrible thing it once was. And that has opened up my days some. There has been more time for friends and cooking and soaking up the sun. I’ve been in a good place, and I hope that things can stay this way.
Last month, I was in China with my parents for a few weeks. I won’t say much about the sights, though, because, really, this trip for me was about family—the long hours I spent with my mom on the bus, gazing out at the passing scenery (yaks, looming peaks, haphazard fields of tomatoes hugging the winding, narrow mountain roads) and talking quietly, the morning we spent at an open market in Huanlong Valley, threading through the crowds and munching on sweets like the ones my mom grew up with, the last afternoon in Guangzhou when all of us, even my dad, who doesn’t do any of the cooking at home, gathered at the table and fumbled with dumpling wrappers, trying to imitate my uncle’s deft hand movements. It had been years since I’d spent this much uninterrupted time with my parents and almost as long since I’d seen many of these members of my extended family. And though, of course, we got on each other’s nerves occasionally (okay, maybe more), the time we spent together left me feeling closer to them than I have in a while.
Mis All in
I’m not very good at sustaining relationships at a distance. I let the more immediate demands in my life pull me away. And it’s always been especially difficult with my parents, I think. I’ve grown into a person very different from them in a lot of ways. So, there isn’t always a whole lot to talk about from week to week. But having spent so much time with them recently, I’ve been determined not to let things lapse. And as became obvious to me during the trip, the easiest way to do this will be to talk about food.
It’s not as though my mom and I didn’t talk about cooking before this. But up until I started cooking from Fuchsia Dunlop’s books last year, most of what found its way to my table wouldn’t have been anything my mom could’ve related to. During the trip, however, we all talked about food a lot—about the produce we saw at markets, about the cooking methods behind dishes served to us at restaurants, about the greens I was growing back home and what I might plant next year. Cooking more Chinese food—even if it wasn’t exactly the kind of food I’d grown up with—had given me a way of connecting with my family that I hadn’t quite had before.
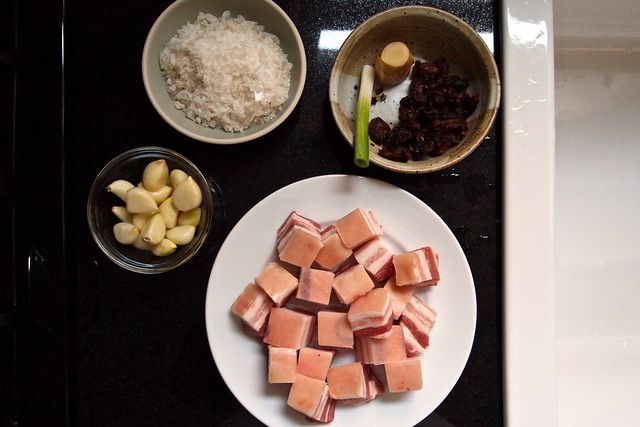
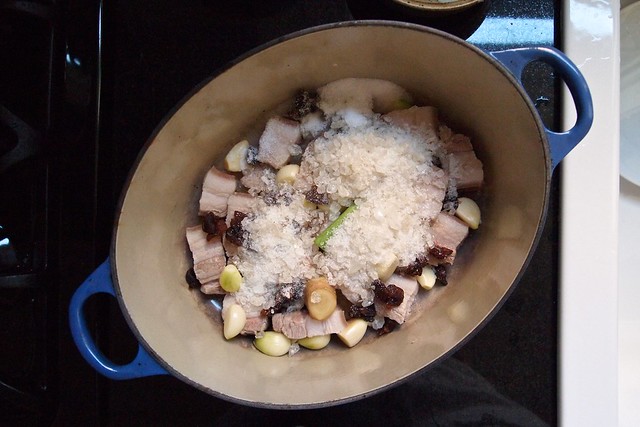
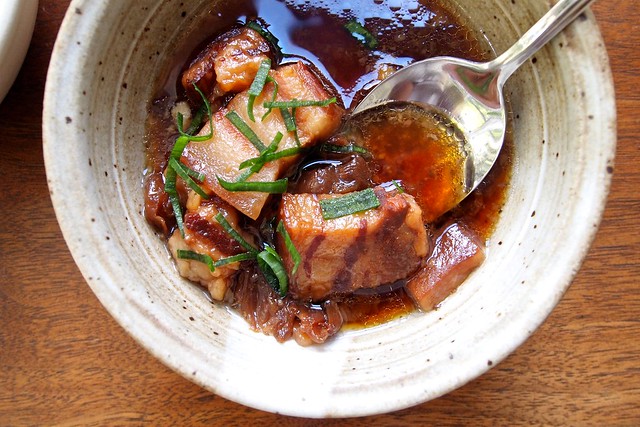
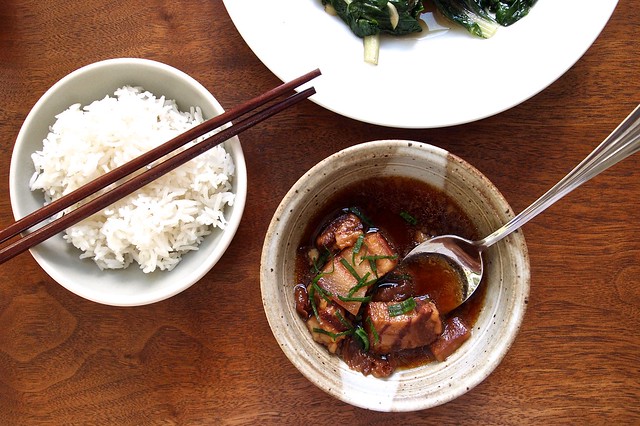
So, I’ve been trying to do more Chinese cooking since getting back. The dish that’s really stood out since then is another from Fuchsia Dunlop—her red-braised pork with garlic. This dish might be a hard sell for some of you. But I think it’s incredible. You start with a one-pound slab of pork belly. You cut it into one-inch cubes and set these in a heavy pot along with whole garlic cloves, rock sugar, ginger, scallion, Sichuan peppercorns, and dried longan fruit, with water to cover. Then, you cook it all at the barest simmer for ten hours, at the end of which the pork belly pieces are translucent, unctuous, and uncommonly good—a whole-mouth luxury. 
Now, the thing that you might hesitate over is the pork belly. There is no way around this: it is mostly fat. To be clear, I’m not usually one to shy away from animal fat. But I tend to think of pork fat as something to cook things in—not as the thing to be eaten. So, even I blanched a little when I unwrapped the parcel from the butcher. There was definitely more fat than muscle on this slab. This dish was seeming like less of a good idea. But I was wrong about that. You want all that fat. The long cook transforms it. It takes on the flavours in the pot and becomes something delicate and meltingly delicious. 
Another close-up
Of course, it is still fat. But that’s okay. Red-braised pork is meant to be enjoyed just a morsel or two at a time. Cover the rest of the table with vegetable dishes and gather some friends around. That, anyway, is what I’ll tell my mom when I talk to her about it. (Even if lard was the choice fat for cooking when she was growing up, she has never quite embraced animal fat in the way I have. So, I’m not sure that I’ll be able to talk her into cooking this dish.)

Red-Braised Pork with Garlic
From Fuchsia Dunlop in Lucky Peach no. 11
Note: About the longan fruit. I’m not sure about how widely available these are in North America in their dried form. I coincidentally was given some by a family friend while in China. Dunlop says that you can substitute dates or just go without. About the rock sugar. Rock sugar is a common ingredient that you can find in Chinese grocery stores. It’s less sweet, and possibly less refined, than conventional granulated sugar. It’s sold in large chunks, which you are supposed to break up yourself at home. I’ve found that a mortar and pestle are the best tools for the job. Pound away at it, and it’ll eventually start breaking up.

450 g pork belly with skin
3 heads garlic
1 small piece of ginger (about 25 g), unpeeled
1 scallion
165 g / 3/4 cup sugar, preferably rock sugar
45 g / 1/4 cup dried longan fruit (pits removed)
1 tablespoon sea salt
8 Sichuan peppercorns

Bring a medium pot of water to a boil.
Meanwhile, break up the garlic into cloves and peel them. Use the flat side of a cleaver to crush the ginger and scallion slightly to release their flavours.
Cut the pork into 1-inch chunks. But do not cut it along its vertical axis—it’s okay if the chunks end up longer on this axis. You want each morsel to have a bit of skin and then layers of fat and muscle underneath. (It’s these together that make for the most delicious bites!)  Drop the pork into the boiling water and blanch for about a minute. Drain in a colander and then rinse with cold water.
Place the pork and all the remaining ingredients in a heavy-bottomed pot (clay or cast-iron) that will fit them all in a single layer. Add just enough water to cover. Bring the liquid to a boil over medium heat, then cover and cook over extremely low heat for 10 hours, by which time the pork will be fall-apart tender and the garlic will have melted into the sauce.
Before serving, remove and discard the ginger and scallion. Garnish with more fresh scallion if you wish, and serve with plain steamed rice.
Serves 4-6 with other dishes.

Wednesday, December 11, 2013

Dig deep

La caldereta
I've felt lately that I've been letting the days get away from me. While I've been researching and thinking, thinking and baking, things have been piling up, bit by bit. Cookbooks and philosophy texts sit in haphazard stacks all over the apartment. Some sort of upset is imminent, I'm sure. I've taken to writing at our little dining table, pesky breadcrumbs and all. There's also a canvas bag in the kitchen I keep tripping over. I used it to lug things back from the garden all summer, and it is still slumped where I left it well over a month ago. It's mud-caked from a hurried last beet-greens harvest and full of half-empty seed packets I still need to sort through. And earlier this week, my remaining bottle of elderflower syrup exploded in the refrigerator! I was not home at the time, but I'm sure that it made a spectacular commotion. (I'm a bit sorry to have missed it!) There was glass and syrup everywhere. It should have occurred to me to pop the top off every now and then. Fermentation gases, friends--these are not to be underestimated!
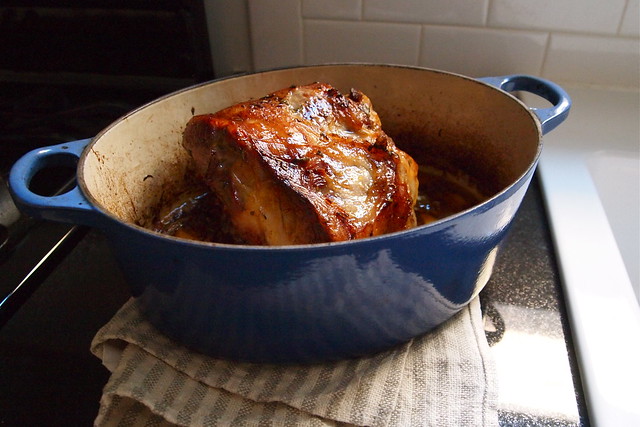
But it hasn't all been mayhem around here. My dissertation research is finally starting to take shape. And the baguettes I pulled out of the oven this week were decidedly less woeful-looking. Also, there was this lamb shoulder, slow-roasted in a lavish puddle of wine, smoked paprika, onion, and whole garlic cloves.
When there is snow on the ground, this is the sort of cooking I like doing best--slow, deliberate, decidedly leisurely. Once you've rubbed salt, rosemary, and thyme into the lamb and cooked down some onion and garlic, there is not much else to do. The lamb joins the onion and garlic in the pan, along with the wine and paprika. Then it all goes into the oven. You just need to look in on it once in a while and do a little basting. Towards the end, you crank the heat and drop in some quartered potatoes to finish with the roast.
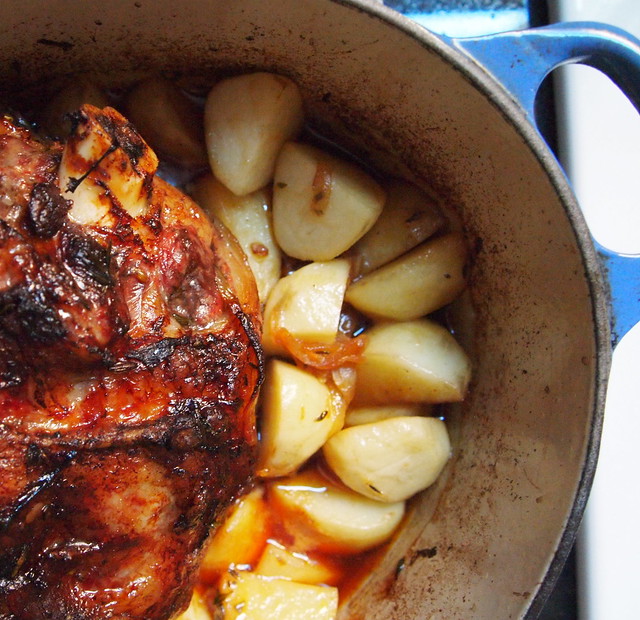
By the time evening closes in, then, you'll have something marvellous on your hands. The lamb will be gleaming, falling off the bone, crackling at the edges. Its gaminess will have been tamed just enough by the wine and herbs. And what it didn't drink up the potatoes will have. You should dig deep with this one. Pull that silken onion, those sweet, slumped garlic cloves from the bottom of the pan and add them to your plate. You won't regret it.
I intended with this roast to have a little less of the days get away from me. I had a few days' worth of sandwiches in mind. But I should have known--lamb only gets gamier with time. I have been countering that with sharp dijon mustard and roasted red peppers. But really, what you should do if you make this roast is gather some friends 'round and remind them of just how much they matter to you.
With the potatoes

Roasted Lamb Shoulder in White Wine and Herbs
Adapted, just a little, from Moro East

1 lamb shoulder, bone-in, about 4.5 lb
3 teaspoons fine sea salt
1 tablespoon fresh thyme leaves
1 tablespoon finely chopped fresh rosemary
5 tablespoons olive oil
1 large onion, roughly sliced
18 garlic cloves, peeled
2 bay leaves, preferably fresh
1/2 teaspoon fennel seeds
1/2 teaspoon smoked sweet paprika
1 1/2 cups good white wine
3 tablespoons brandy (optional)
2 lb small waxy potatoes, peeled and quartered

Rub the shoulder with the fine sea salt and half the thyme and rosemary and let it stand for an hour.
Preheat the oven to 350 degrees F.
Meanwhile, put the olive oil, onion, garlic, and a pinch of salt in a large roasting pan. Fry for about 10 minutes over medium heat until the onion softens and starts to colour. Stir in the bay leaves, fennel seeds, paprika, and remaining thyme and rosemary, followed by the wine and brandy, if using. Place the shoulder in the pan, skin-side up, and put the pan in the oven. Roast for 2 1/2 hours, basting the shoulder at least 4 times (be careful not to leave any onion on top of the shoulder - it may burn).
Toss the potatoes in the juices in the roasting pan. Turn up the oven to 425 degrees F and cook for a further 40 minutes, adding a splash of water to the pan if the juices have totally dried up. Taste for seasoning and leave to rest for at least 10 minutes before serving.
Serves 4-6.

Sunday, October 13, 2013

A kitchen garden

Fava beans
Two springs ago, when I put my first seeds in the ground, I had no idea just how much this little patch would come to mean to me. These were the beginning days of my modest kitchen garden, set to sprout from one of the three 10-x-4-foot raised beds my more capable neighbours had constructed behind our building. Back then, I thought of the space and the work to come only as something that might lead to better eating, to more varied and vibrant plates at our table. I didn't give much thought to the growing itself. A row of collards, at the time, seemed an unlikely place to cultivate affections.
But I've since changed my mind--because once you've put those seeds in the ground, I've found, it's hard not to get drawn into the lives of your plants, to be utterly captivated by them. Your heart leaps when you see the first seedlings poking out from the soil. Sometimes you catch them mid-stretch, just as they're emerging--still pale, partly curled, their first leaves yet to completely unfurl. They look a little sleepy. You are struck by their vulnerability. You want to do whatever you can to see that they thrive. So you find yourself in the midst of an unfolding drama. Your plants are the unlikely heroines, weathering the assault of pests, the elements. You do what you can to help them.
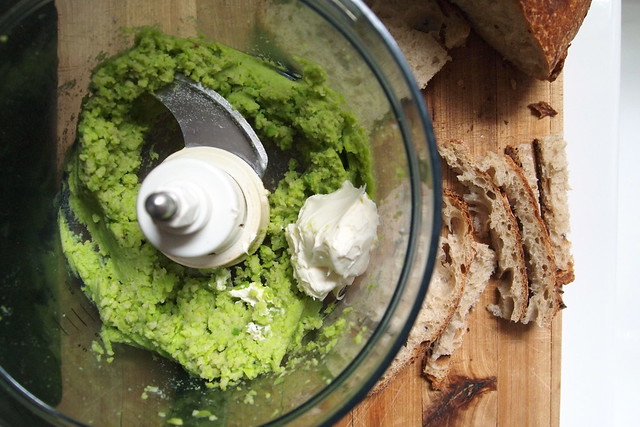
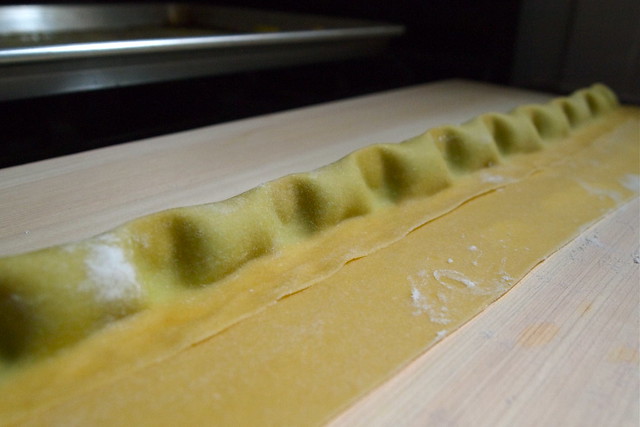
Making the filling Fava bean filling Pinched Agnolotti
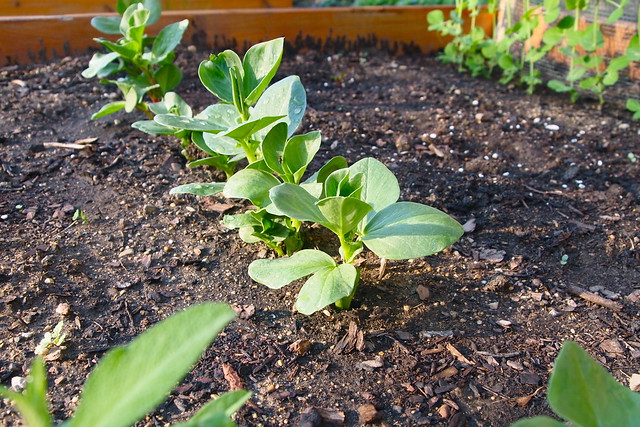
And, of course, the plants you grow most attached to are the ones that really struggle, the ones that seem to need you most. For me, this year, it was my fava beans. Favas aren't really meant to be cultivated here in the Midwest. They are slow to grow. It takes them 70-90 days to go from seed to filling their fat pods, and the cool, damp weather that they love is too short-lived here. By the time they flower and begin to set pods, the first of summer's scorching days have already arrived, and so they struggle to produce. Mine also happened to attract the attention of hungry aphids. So for awhile I was afraid they wouldn't produce at all.
But they did. Pathetically, but they did. After a month's worth of harvesting, de-podding, blanching, and freezing--usually just a handful of pods at a time--I was just shy of half a pound of beans. Thinking back on it now, I wonder if it would have been better just to have eaten them as they came in and not worried so much about how few they were. The ones I tried straight from the blanching pot were, after all, incredible--delicate, sweet, vegetal--by far the best tasting thing I've been able to grow. But after all the trouble they'd given me, I wanted to do something special with them. So I ended up making Thomas Keller's fava bean agnolotti.
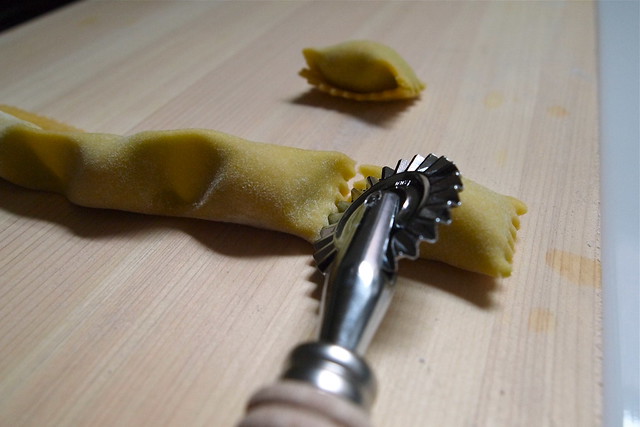
To be cut Cutting agnolotti Agnolotti
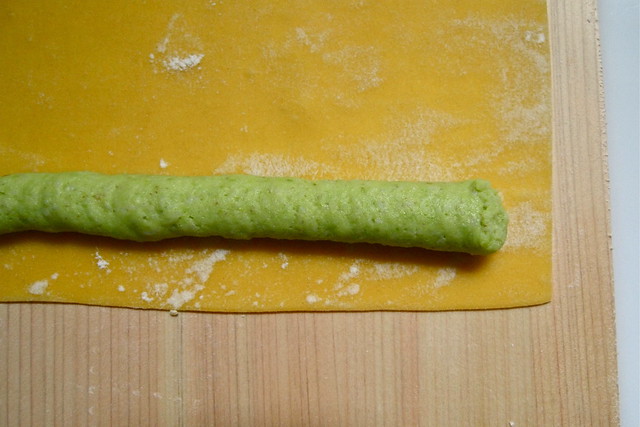
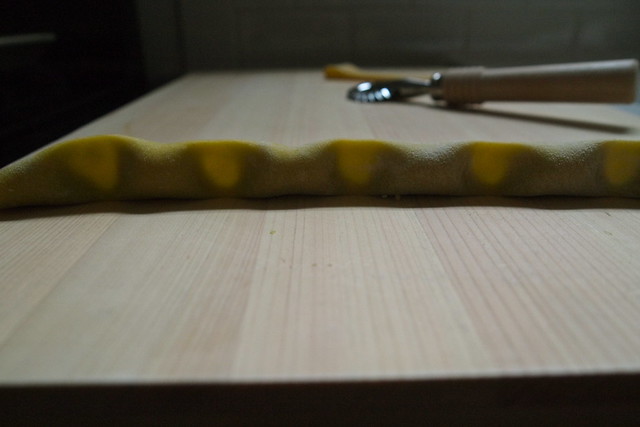
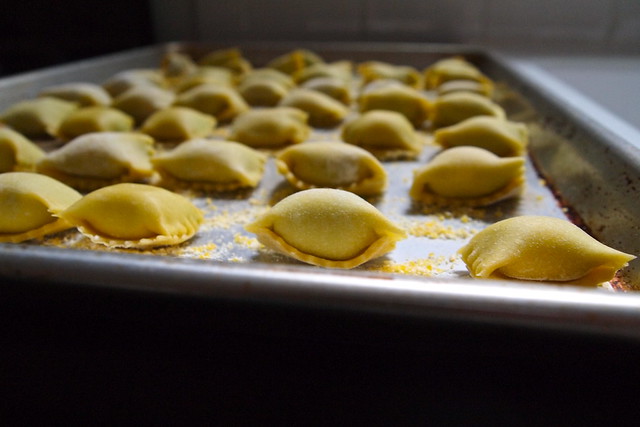
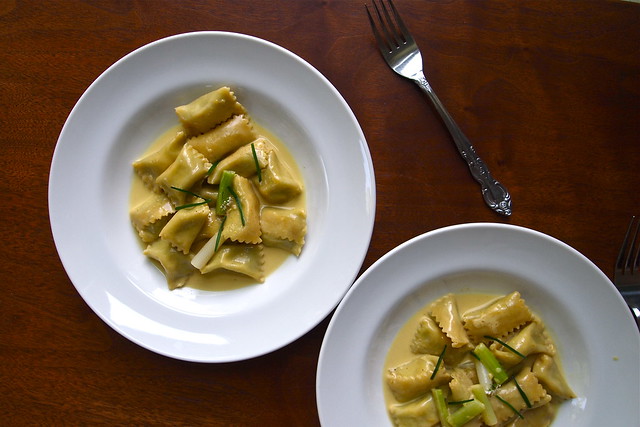
Making any sort of filled pasta takes a bit of time and practice. But it feels rewarding to get your hands dirty and tackle something new. You make agnolotti from long, narrow sheets of pasta. You pipe a single line of filling along each sheet and then bring bottom of the sheet over the filling, folding and pressing to form a tube. Then, using both your thumbs and forefingers, you work your way down the tube, pinching out individual agnolotti. There is something especially satisfying about this part, seeing an agnolotto plump up between your fingers, feeling the filling squish. And once you've cut them apart from each other, what you end up with are gorgeously plump little dumplings. They are so darling that you just want to pinch their cheeks.
Agnolotti Fava bean agnolotti
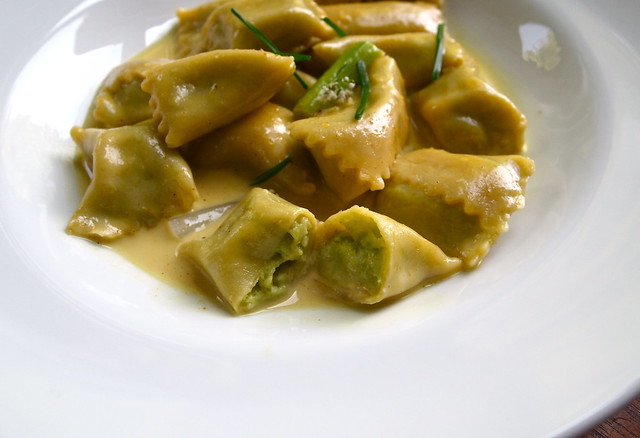
Fat with a filling of fava bean purée, mascarpone, and breadcrumbs, these particular agnolotti were especially lovely--luxuriously textured and delicately vegetal. The puddle of warm spices, butter, stock, and cream in which they sat only helped. On a whim, I garnished each serving with a cluster or two of tiny cilantro flowers snipped from my neighbours' plot. These added a brazen citrusy pop to some bites, which I quite liked. Though the season for fava beans stretches from late spring into early summer, I feel as though these agnolotti are what I'd want to throw together on one of the chilly days just about to creep up on us. They have a soothing, velvety warmth to them that would perfect to cozy up with. And I would do just that, if there were anymore agnolotti in the freezer. But my plants weathered a lot, and I barely had beans enough for this one batch. But maybe favas fare better wherever you are.

Fava Bean Agnolotti with Curry Emulsion
Adapted from Thomas Keller's The French Laundry Cookbook
NOTE: This recipe is a long one, but don't be intimidated. You can break up this recipe over weeks if you want (which is in fact what I did). You can shell and blanch the fava beans one day and then just tuck them into the freezer. Then, when you have more time on your hands, you can make the pasta dough and the filling (thaw your favas first). Shortly after that, or on the same day, you can fill and shape your agnolotti. Finally, when you want to enjoy your agnolotti, all you have to do is cook them and put together the curry emulsion. Shaping agnolotti. It took me a few tries to really understand how to get the shape right (which is not to say that my agnolotti are at all perfect). I think that written instructions can only help so much. At some point, things just clicked for me. But you might want to take a look at the Kitchn's step-by-step agnolotti-making tutorial. Curry emulsion. If, like me, you happen to find yourself with more emulsion than the agnolotti look like they can really handle, just pour off what remains in the pan and stick it in the fridge. Drizzle some on your scrambled eggs or some roasted asparagus the next day. Trust me. Portioning. Keller intends these agnolotti as a starter for six. In my case, they made a modest lunch for three.

PASTA
200 g / 1 2/3 cup all-purpose flour
6 large egg yolks
1 large egg
1 1/2 teaspoons olive oil
1 tablespoon milk

FAVA BEAN FILLING
2-3 lb fava beans (225 g / 1/2 cups shelled)
65 g / 3/4 cup fresh bread crumbs
55 g / 1/4 cup + 1/2 tablespoon mascarpone
Salt to taste

CURRY EMULSION
2 teaspoons curry powder
2 tablespoons chopped scallions
3/4 cup + 2 tablespoons vegetable stock or water
1/4 cup heavy cream
1/4 cup crème fraîche
8 tablespoons unsalted butter, cut into chunks
Salt and fresh ground pepper to taste
18 one-inch-long pieces ramps or scallions, blanched for 1 minute, then chilled and pat dry

TO SERVE
18 one-inch-long pieces garlic sprouts or garlic chives
6 sprigs cilantro flowers (optional)

TO MAKE THE PASTA DOUGH
Mound the flour on a clean work surface and make a well in the centre, pushing the flour to all sides to make a ring with sides about 1-inch wide. Make sure that the well is wide enough to hold all the eggs without spilling.
Pour the egg yolks, egg, oil, and milk into the well. Use your fingers to break the eggs up. Still using your fingers, begin turning the eggs in a circular motion, keeping them within the well and not allowing them to spill over the sides. This circular motion allows the eggs to gradually pull in flour from the sides of the well: it is important that the flour not be incorporated too rapidly, or your dough will be lumpy. Keep moving the eggs while slowly incorporating the flour. Using a pastry scraper, occasionally push the flour towards the eggs; the flour should be moved only enough to maintain the gradual incorporation of the flour, and the eggs should continue to be contained in the well. The mixture will thicken and eventually get too tight to keep turning with your fingers.
When the dough begins thickening and starts lifting itself up from the work surface, begin incorporating the remaining flour with the pastry scraper by lifting the flour up and over the dough that's beginning to form and cutting it into the dough. When the remaining flour from the sides of the well has been cut into the dough, the dough will still look shaggy. Bring the dough together in the palms of your hands and form it into a ball. It will look flaky but hold together.
Knead the dough by pressing it, bit by bit, in a forward motion with the hells of your hands rather than folding it over on itself as you would with a bread dough. Re-form the dough into a ball and repeat the process several times. The dough should feel moist but not sticky. Let the dough rest for a few minutes while you clean the work surface.
Dust the clean work surface with a little flour. Knead the dough by pushing against it in a forward motion with the heels of your hands. Form the dough into a ball again and knead it again. Keep kneading in this forward motion until the dough becomes silky smooth. The dough is ready when you can pull your finger through it and the dough wants to snap back into place. The kneading process can take anywhere from 10 to 15 minutes. It is important to work the dough long enough to pass the pull test; otherwise when it rests, it will collapse.
Double wrap the dough in plastic wrap to ensure that it does not dry out. Let the dough rest for at least 30 minutes and up to 1 hour before rolling it through a pasta machine. The dough can be made ahead, wrapped, and refrigerated: bring to room temperature before proceeding.

TO MAKE THE FAVA BEAN FILLING
Shell the fava beans and then peel the skins from the beans. Starting a small slit in the skin with a sharp paring knife makes the peeling easier. Remove the small germ at the side of each bean. You need 1 1/2 cups of beans for the filling; reserve any extra beans for another use. Blanch the beans in generously salted water for 5 minutes, or until tender, and immediately transfer to ice water to chill. When they are cold, drain the beans and spread on paper towels to drain thoroughly.
Place the beans in a food processor with the bread crumbs. Blend until they come together and form a ball. Add the mascarpone and process again until the mixture is smooth. Season to taste with salt. You will have 1-1 1/4 cups of filling. Refrigerate the mixture until it is cool, or for up to 2 days.

TO FORM THE PASTA SHEETS
Divide the dough into three or four pieces (you will have a little extra that you can cut into spaghetti or fettuccine and freeze for later use). Work with one piece at a time and keep the others covered so that they don't dry out. Set the rollers of your pasta machine to the widest setting. Flatten the first piece out with your hands into a long rectangle and feed it through the machine. Fold it over onto itself as you would a letter and flatten it with your hands again. Rotate it a quarter turn and feed it through the machine. Repeat this procedure 2 or 3 more times. Use flour as necessary to keep the pasta from sticking. You shouldn't need to use much at all.
Set the rollers down one notch and feed the pasta through. Do not fold it over. Run the sheet through on the same setting 2 more times. Then, adjust the rollers again and repeat this procedure, adjusting the rollers as you go, until the pasta is thin enough to see your fingers through it but not so thin that it's translucent. (On my machine, this means rolling it multiple times through the second-last setting.) Repeat with the remaining pieces of dough.

TO FILL THE AGNOLOTTI
Work with one sheet of pasta at a time, keeping the others covered. Lay the sheet on a lightly-floured work surface with the long side facing you. Trim the edges so that they are straight. Place the agnolotti filling in a pastry bag fitted with a 1/2-inch plain tip. Pipe a line of filling across the bottom of the sheet, leaving a 3/4 inch border of pasta along the left, right, and bottom edges.
Pull the bottom edge of the pasta up and over the filling. Seal the agnolotti by carefully molding the pasta over the filling and pressing lightly with your index finger to seal the edge of the dough to the pasta sheet; don't drag your finger along the dough to seal, or your risk ripping the dough. When it it sealed, there should be about a 1/2-inch of excess dough visible above the tube of filling (where you sealed it). Be certain that you are sealing tightly while pressing out any pockets of air. Seal the left and right ends of the dough.

TO SHAPE THE AGNOLOTTI
Starting at one end, place the thumb and forefinger of each hand together as if you were going to pinch something, and leaving about 1 inch of space between your hands and holding your fingers vertically, pinch the filling firmly in 1-inch increments, making about 3/4 inch of pinched area between each pocket of filling. It is important to leave this much pinched area between the agnolotti, or when the agnolotti are separated, they may come unsealed.
Run a crimped pastry wheel along the top edge of the folded-over dough, separating the strip of filling pockets from the remainder of the pasta sheet. Don't cut too close to the filling, or you risk breaking the seal. Separate the individual agnolotti by cutting through the center of each pinched area, rolling the pastry wheel away from your and leaning the tube of filling away from you and into the work surface as you cut. The leaning helps form the agnolotti's characteristic pocket-shape. Working quickly, place the agnolotti on a baking sheet dusted with a thin layer of cornmeal, which will prevent sticking. Don't let the agnolotti touch sac other, or they may stick together. Repeat the same procedure with the remaining pasta sheets.
At this point, you can either cook the agnolotti in boiling water immediately or freeze them on the baking sheet. Once the agnolotti are frozen, place them in airtight freezer bags and keep them frozen for up to several weeks. Cook the agnolotti while still frozen.

TO COMPLETE
For the curry emulsion, toast the curry powder in a small saucepan over medium heat until it is fragrant. Stir in the scallions and heat for another minute. Add the 3/4 cup stock, the cream, and the crème fraîche, bring to a simmer, and cook until the liquid is reduced to a half cup. Swirl in the butter. When the butter is melted, add the remaining 2 tablespoons of stock and blend for 30 seconds with an immersion blender to emulsify the mixture (alternatively, transfer to a conventional blender and emulsify). Season the mixture with salt and pepper and strain into a wide pan.
Meanwhile, cook the agnolotti in a large pot of lightly salted boiling water until cooked through, 4-5 minutes.
Drain the agnolotti, add the agnolotti and ramps to the curry emulsion, and toss over low heat to coat with sauce. Divide the agnolotti and ramps among three serving dishes and garnish the top of each with 6 garlic sprouts and 2 flower sprigs, if using. Serve immediately.
Makes 48 agnolotti.

Thursday, May 9, 2013

In-between days

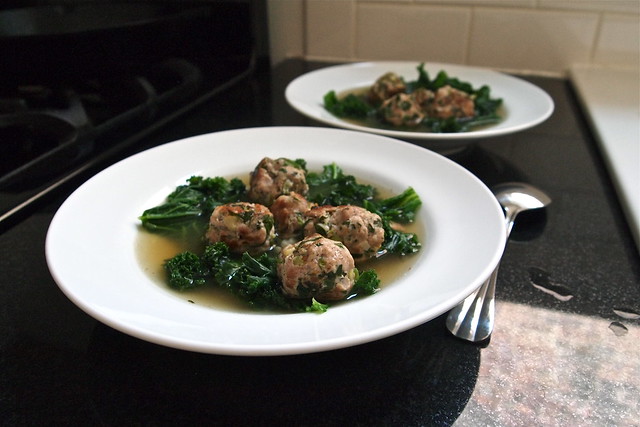
Pork balls in broth
Around here, spring tends to come in dribs and drabs--a splash of sunshine here, a smattering of blooms there. It takes a while for the season to gather momentum, to really come into its own. In some ways, these first few weeks are the ones I like best. The first shoots out of the ground, the first lacy blossoms on the trees--spotting these on walks around the neighbourhood makes me want to skip to the end of the block. Spring! It's here! It's here! There's something so good about the newness of it all. 
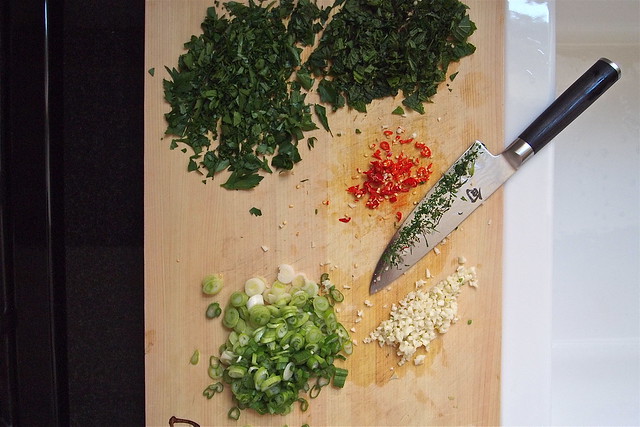
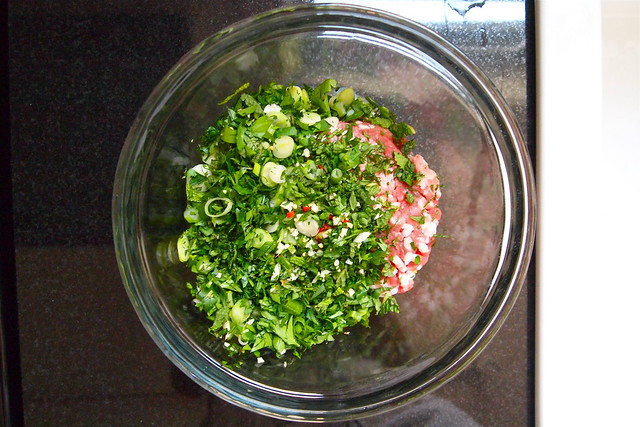
Mise for the pork balls Chopped For mixing
But like I said, the season's momentum is slow to gather. Like right now, it feels just about like spring. It's warm enough to throw open all the windows, and when passing through the yard, it's hard not to crush a few violets underfoot. They've got it carpeted. But most of the farmers' markets in town have yet to open, and even when they do in the coming days, it might be a while before there's much more filling the stands than asparagus and pea shoots (which is not to say that I have anything against either). So, yes, I'm being impatient. But after months and months of brassicas--roasted, braised, and pan-fried--how can you not be? There comes a point in the year, however short-lived, when it's hard to even look at another cabbage.
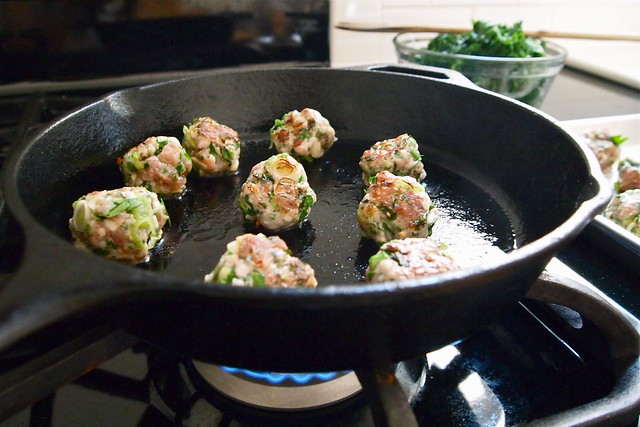
Fry up Pork balls Bowls
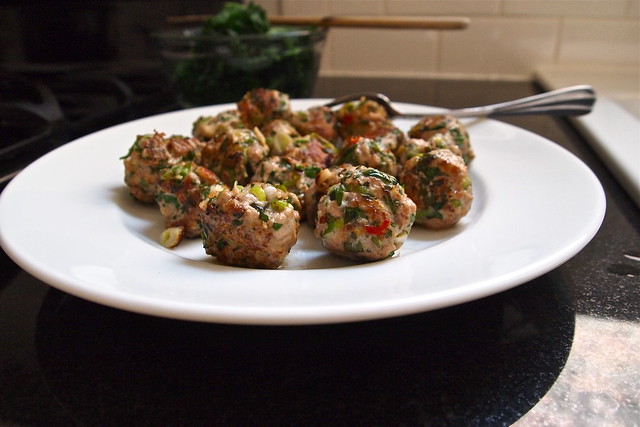
But, in these in-between days, cabbage is what you can count on. So here is something to help you wait out the days--Nigel Slater's chicken broth with pork and kale. Now, I can't go so far as to say that it tastes like spring--that would just be a bit of a stretch--but it doesn't quite recall the depths of winter either. An in-between kind of dish. For, though that ruffled kale afloat in broth has an unmistakable wintriness to it, the meatballs do not. These are rolled together with generous handfuls each of parsley, mint, and scallion, as well as a bit of fresh chile for kick, then seared golden in a hot pan and finished in the broth. The effect is something bright and fresh, something powerfully enlivening--enough to slough off the last of winter's drabness and make you forget (at least for a little while) that you are waiting.
Germination!

Chicken Broth with Pork and Kale
Adapted from Nigel Slater's Tender
Note: As Slater says, you can substitute the kale leaves for savoy cabbage, and I get the feeling that I might have preferred it that way. I also bulked up the leftovers the next day with some cubes of boiled potato, which rounded things out rather nicely.

PORK BALLS
400 g / 14 oz ground pork
2 small, hot chiles
4 scallions
2 garlic cloves
6 bushy sprigs of parsley
6 bushy sprigs of mint
1/2 teaspoon fine sea salt
A little vegetable oil

SOUP
1 liter / 4 cups chicken stock
125 g / 4 1/2 oz kale leaves (from about half a bunch)

Remove any tough stalks from the kale leaves and tear into rough pieces. Bring a medium pot of salted water to a boil and blanch the kale for a minute or two, then drain and set aside. Give the pot a quick rinse.
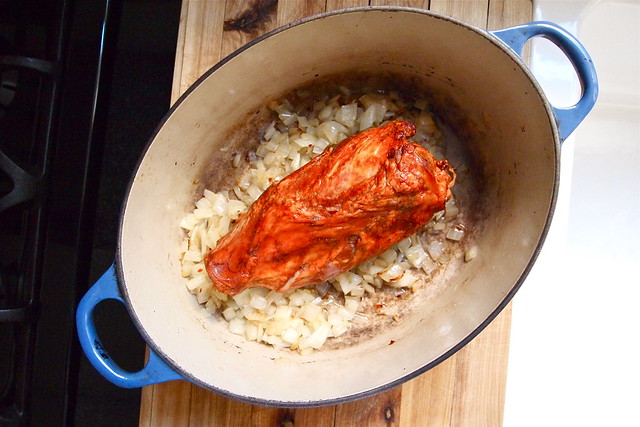
Put the pork in a mixing bowl. Finely chop the chiles and add them with their seeds to the pork. Slice the scallions, discarding the roots and the very darkest tips of the leaves. Peel and mince the garlic, and add with the scallions to the pork. Pull the parsley and mint leaves from their stems and chop coarsely, then add them to the pork with the salt. Mix everything thoroughly with your hands and form into about sixteen balls, about 1 1/4 inches in diameter.
Warm a thin slick of oil in a cast-iron pan and cook the pork balls, in batches if needed, until toasty on all sides, about 5 minutes.
Meanwhile, in the same pot the kale cooked in, bring the stock to a boil and season with salt and pepper. Lower in the pork balls and then decrease the heat and simmer for 5-7 minutes, until they are cooked through. Add the kale to the soup and serve immediately.
Serves 3-4.

Monday, March 25, 2013

The flavours they remembered

Oma and Bella
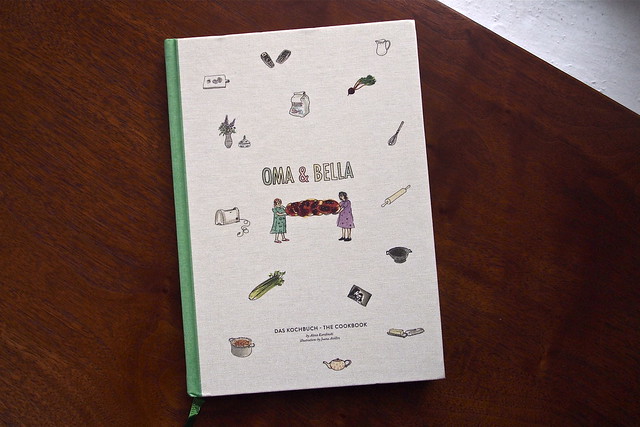
A few weeks ago, Luisa wrote about Oma and Bella, a film about two women--best friends, Holocaust survivors, splendid home cooks--and their life in the kitchen. Regina and Bella (the filmmaker, Alexa Karolinski, is Regina's granddaughter, making Regina her Oma) live together in Berlin and spend their days in bright kitchen smocks hovering over simmering pots of borscht, rolling up stuffed, oversized cabbage leaves, and filling tins to the brim with sparkling cream-cheese cookies. The film, though about their lives now, is permeated with their past. The food that they prepare day-to-day is the same food they grew up eating. Now, I don't have any personal connection to any of this--to that very dark part of history, to post-war Germany, to the culture and traditions that survive with Regina and Bella. But you certainly don't need to to appreciate the film or to want to cook everything from the beautiful little book of recipes that Alexa has put together.
What I find most remarkable about Regina and Bella's cooking is that it is all pieced together from childhood memory. They alone from their respective families survived the camps, and they'd been too young at the time to learn to cook. So, after the war, they taught themselves from the flavours they remembered. And this is the same food that they cook today, that connects them to a past of which there are otherwise very few tangible traces. (In the film,  Regina and Bella tell us that any survivors who were able to save family photos were very lucky.) So leafing through the cookbook, having the sweet smell of slow-roasted onions fill my kitchen (these onions are at the heart of Regina and Bella's cooking), feel to me like something of a privilege. I feel terribly lucky to be able to cook this food at all, and I am so glad that Alexa took on the project of turning their handfuls into half-cups so that we might all share in it.
Onions chopped Onions cooked down Cutting out circles
Regina and Bella are firm believers in keeping their freezer well-stocked--as in, they are always prepared to feed a serious crowd with almost no notice. I really admire that. It always feels reassuring to have at least a few goodies stashed away. My own freezer stock was not (and still isn't) nearly as impressive (chicken stock, pork stock, gelatin purée, ground turkey, two sausages, marrow bones), so when my copy of the cookbook arrived in the mail, I decided to start with Regina and Bella's pierogis, with the hope of adding to it.
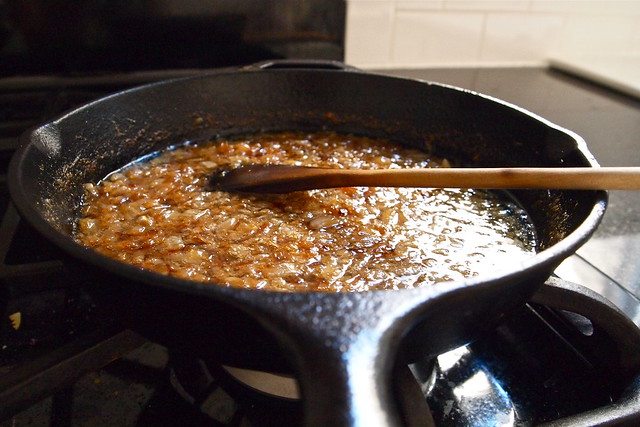
But I'm afraid that my freezer stock of pierogis is already nearly gone. I made a double batch, hoping that the pierogis would turn out well. But really, I should have made a quadruple batch at the very least. These pierogis are so, so good. The filling is super simple, just onion and potato. You cook down diced onions on gentle heat to a golden, sticky mass. This can take some time--over an hour in my case--but the onions don't need your undivided attention. And in the interim, you can also boil and mash a few potatoes for the filling and pull together the pierogi dough. The dough, by the way, isn't at all fussy. It can get a little dry once rolled out if you don't work quickly enough, but that is easily remedied with moistened fingertips. It will hold shut during cooking with some good, firm pinches and doesn't suffer after being handled a lot. Admittedly, with the onions to cook down, the dough to prepare, and the assembly, making these pierogis can feel like quite the production. But they are definitely worthwhile, especially if you make a big batch to stash away.
Pierogi filling Assembled for cooking Pierogi
The cookbook suggests that you serve your pierogis with meatballs. We ate ours alongside braised red cabbage spiked with apple-cider vinegar and caraway seed. Alexa also says in the book that her Oma has been known to chase her pierogis with homemade pickles and shots of vodka. I just don't have the constitution for that sort of thing, but what women Regina and Bella must be!

Potato and Onion Pierogi
Adapted from Oma & Bella, The Cookbook
Note: You may end up with a little extra filling--I had maybe a 1/4 cup leftover--but I wouldn't expect this to be much of a problem. Even cold out of the fridge a day later, it was very good.

FILLING:
2 large yellow onions
125 ml / 1/2 cup vegetable oil
700 g / 1 1/2 lb starchy potatoes (about 3 medium ones)
Salt and pepper to taste

DOUGH:
380 g / 3 cups all-purpose flour + more for dusting
125 ml / 1/2 cup water
2 large eggs
Large pinch of salt

TO FINISH:
Scallions or chives, thinly sliced
Sour cream

Finely dice the onion and fry it in the oil in a large, heavy-bottomed skillet on low to medium-low heat until dark-golden brown, about 1 hour. Meanwhile, peel and boil the potatoes in a large pot of salted water until tender, about 20-25 minutes, depending on the size of your potatoes. Drain the potatoes and return them to their pot with the heat on medium, then mash them (doing things this way will help to rid the potatoes of excess water). Remove the onions from the oil with a slotted spoon (don't toss the oil--save it to fry the pierogis in or for some other use) and combine them with the mashed potato in a large bowl. Season with salt and pepper to taste.
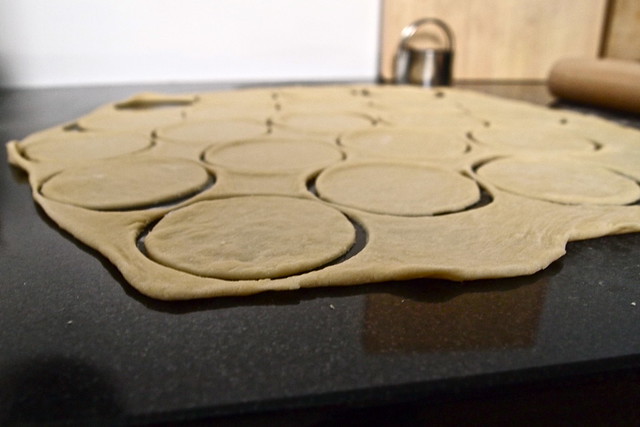
In a large bowl, mix the flour, water, eggs, and salt with a fork until a rough dough forms. Turn the dough out onto a clean surface and knead for 5 minutes as you would pasta dough, pushing the dough away from you across the work surface with your palms and then balling it up and repeating this, using flour as necessary to prevent the dough from sticking. Cover the dough with plastic wrap or an overturned bowl for 5-10 minutes to let the dough relax. Then roll out the dough until it is only a couple of millimetres thick, again using flour as needed (it helps to have a bench scraper handy and to use it lift the dough from your work surface occasionally to prevent sticking). Use the rim of water glass or a biscuit cutter about 3 inches in diameter to cut circles out of the dough.
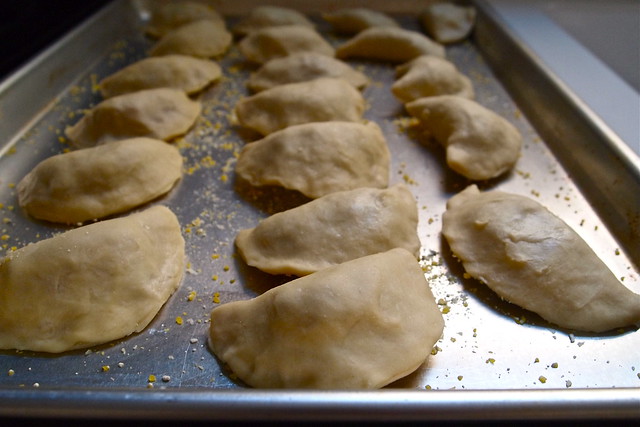
On each circle, place a tablespoon of the potato filling. Fold the dough over itself to form a semi-circle and seal the edges with damp fingers, pinching firmly. Place finished pierogis on a flour- or cornmeal-dusted baking sheet. (Be sure to gather up the dough scraps and re-roll them for a second or even third round of pierogis. Just keep this remaining dough covered while you're busy with assembly.) At this point you can either freeze the pierogis on the baking sheet until firm and then seal them in a bag in the freezer for later use or proceed as follows.
Bring a medium-sized pot of salted water to a boil. Place the pierogis in the boiling water. When they float to the surface, they are ready. Drain in a colander.
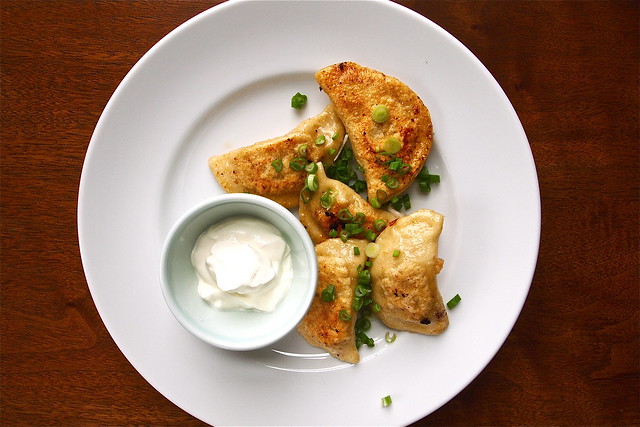
In a skillet over medium heat, fry the cooked pierogis, a few minutes per side, until golden brown. Serve hot with scallions and sour cream.
Makes about 30 pierogis, enough for 4-6 people as part of a larger meal.

Monday, February 18, 2013

You have to engage

Smoked ham hock rillettes 
"We're sensorily deprived right now in modern life. Our eyes are engaged--sometimes our ears--but our bodies? Not so much. These aren't just bags of bones we're carrying around." -- Michael Pollan in Lucky Peach no. 6.
Smoked ham hock rillettes. This one might be a hard sell, not because making a few jars is particularly difficult but because--there's no point in trying to hide it--it's messy and time-consuming, a real process as far as a recipe goes. You cannot but get your hands (and your kitchen) dirty. But that's also what I enjoy about making them.
You might roll your eyes. Grad student. Too much time on her hands. But that's not what this comes down to. On weeknights, I'm all for ease and convenience, for meals that practically cook themselves and hardly leave a trace. But those aren't the meals that draw me to the kitchen. They're not the reason I cook. I cook to engage myself, to use my hands, to make messes and learn a thing or two in the midst of making them. These aren't, of course, the most basic reasons for being in the kitchen, but they are the ones that make cooking a pleasure, whatever night of the week it may be. And it's good, I think, to remind ourselves of this once in a while and cook something demanding, something that draws us in. And these rillettes, they do that.
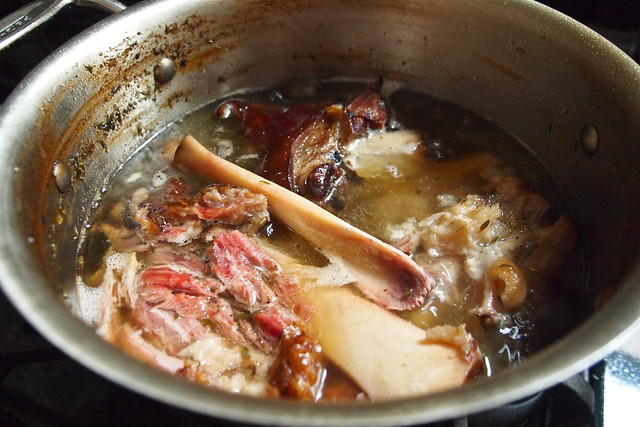
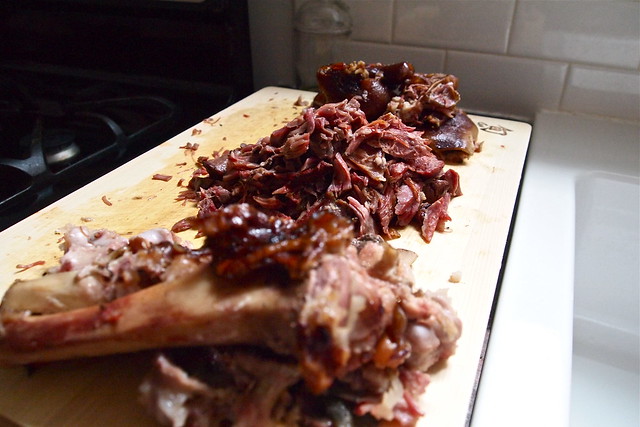
Smoked ham hocks Ham hocks near the end of cooking Ham hocks broken down
Rillettes traditionally are a coarse-textured, rich spread made from a fatty cut of pork, duck, or goose. The meat is gently braised, finely shredded, and then mixed with fresh herbs, spices, and the flavourful liquid in which it was braised. Pretty straightforward. The result is something like pâté but less fussy. These particular rillettes, however,  come from the good people at Mission Street Food and so, unsurprisingly, part with tradition. 
The hock is pretty lean as far as cuts of pork go. In fact, it's mostly skin, bone, and connective tissue. So that's where things start to get messy with these rillettes. Once the hocks have been cooked, you need to get at what little meat there is. And there's no getting around this, you need to use your hands. Bits of  meat are often tangled up with connective tissue and hard to spot, so what you need to do is break down the hocks by hand and feel your way through them, pulling soft tissue from bone, picking out the meat as you go.
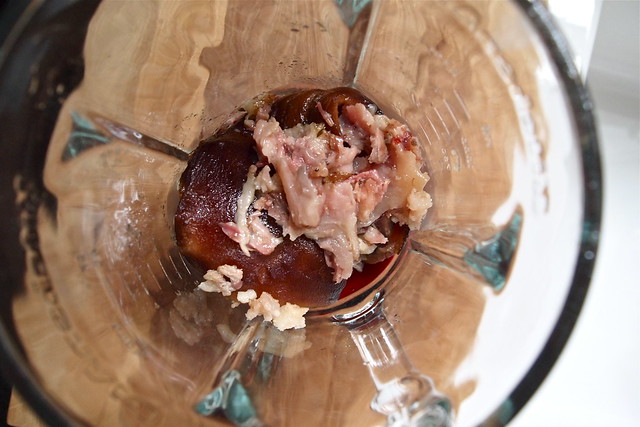
But why use smoked hocks in the first place, why go through all that trouble for so little? Because what smoked hocks lack in flesh and fat they make up for in flavour and collagen. Remember all of that skin, that sticky connective tissue? Even after four hours of simmering, these are still steeped through with woodsy, smoky flavour. And just as important, they're rich in collagen. Collagen is all about texture. It's basically what gelatin is made out of. It's the stuff that gives homemade stocks their satiny, rich mouth-feel. So, naturally, that skin and connective tissue don't go to waste here. You whirl them in the blender with a splash of stock from cooking the hocks and push that through a sieve. And there you have it, smoky gelatin purée.
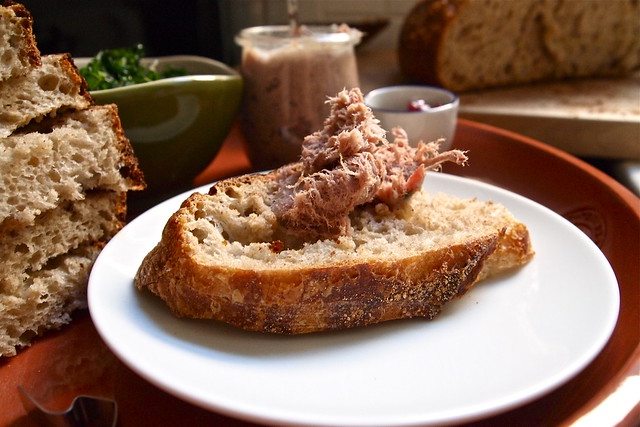
Skin and connective tissue Components collected Rillettes on sourdough
Now, this, I think, is where things get demanding. It isn't that anything gets difficult. It's just that your attention, your judgement is called for. You have to engage. Let me explain. At this point, you'll have all of your components lined up. From the hocks, you'll have meat, pork stock, and gelatin purée. You should also have some rendered pork fat (yes, lard) on hand to supplement what you have, since ham hocks are so lean. Then there are the seasonings. Quatre épices, a blend of white pepper, nutmeg, cinnamon, and clove, is traditional. Crushed garlic, dijon mustard, sherry vinegar, and fresh thyme leaves aren't out of place either. Salt, needless to say, is important. (As printed, the MSF recipe is loosey-goosey. Very helpfully, it calls for 'spices'.) The meat goes into the bowl of your stand mixer fitted with the paddle attachment. What happens next is more or less up to you. Each of the components will contribute a particular flavour and/or texture to the finished rillettes. How you prioritize them is a matter of preference. What this means is that you have to taste and tweak as you go. You have to ask yourself: does this need more fat? Is it getting too dry--should I add some stock? Could it use more acidity, more vinegar, maybe? Like I said, you have to engage. And little by little, you'll get to something that pleases you, that makes you beam.
So what I like about making these rillettes is that it's very physical, very involving. It's all about you feel and what you taste. This is no dump-and-stir exercise. There's no crossing your fingers, hoping that things have turned out. How things go is on you. It's a little scary, for sure. But it's also utterly liberating. I don't cook like this very often. I lean a lot on good cookbooks, regimented quantities. And on most days, that's all I feel I have the time for. But once in a while, I think, this is just the sort of thing you need to do.

Smoked Ham Hock Rillettes
Adapted from the Mission Street Food Cookbook
Note: About the seasoning. I stuck with fairly traditional seasonings, but you shouldn't feel limited to these. Look at other rillettes recipes for guidance. It'll be hard to go wrong. For example, I flat-out forgot to add mustard. My feeling is that juniper might be a nice addition. About the pork fat. There's no need to spring for anything as fancy as leaf lard for these rillettes. Save the good stuff for pies. But do take the trouble to find yourself some good, unprocessed fat. Try your favourite butcher. About the quantity of hocks. I got away with using just over 3 lbs of hocks but only because one of them was extra meaty. It would probably be wiser to use closer to 4 or 5 lbs. Shelf life. Sterilizing your jars will help the rillettes keep for longer in the fridge. Both Nigel Slater and Jane Grigson advise pouring a layer (half an inch or so) of melted pork fat over the rillettes if you're not planning on eating them within a few days.

3-5 lbs meaty smoked ham hocks (see above)
2.5-3 quarts chicken stock, pork stock, dashi, or water
1-2 cups rendered bacon or pork fat, plus more to cover (see above)
2 tablespoons or so sherry vinegar
1 tablespoon thyme leaves
1 1/2 tablespoons or so quatre épices
1 large clove garlic, crushed
Salt

Gently simmer the ham hocks in the chicken stock, pork stock, dash, or water.
After about 4 hours, the meat should be very tender. Cool the entire pot until you can handle the hocks. Drain and reserve the stock. (At the end you'll have plenty of stock left for cooking greens, or just for sipping.)
Pick the ham hocks apart by hand. Separate the meat from the skins and soft collagen. Reserve both. (The edges of the ham hocks can become dried out and tough from the smoking process or from not being fully submerged in liquid. Move the hocks around periodically as they simmer, and discard any parts that may be too tough to rillette. Discard any tough skin, bones, and weird gristle.)
Blend the skins and collagen with just enough stock to get the mix going (probably about 1/4-1/2 cup), creating a gelatin purée. Strain the purée through a fine sieve, using a lade or spoon to push it through.
Combine the meat and some of the purée, fat, vinegar, and spices in a stand mixer. (The ratios of fat-to-meat-to-gelatin will vary, depending on how you prioritize richness (fat), unctuousness (gelatin), and moisture (stock). Taste as you mix; add the salt, vinegar, mustard, and your spices, herbs, or garlic until you reach the desired balance.) Mix using the medium-low setting and the paddle attachment of your mixer. For best results, mix the rillettes at the temperature it will be served.
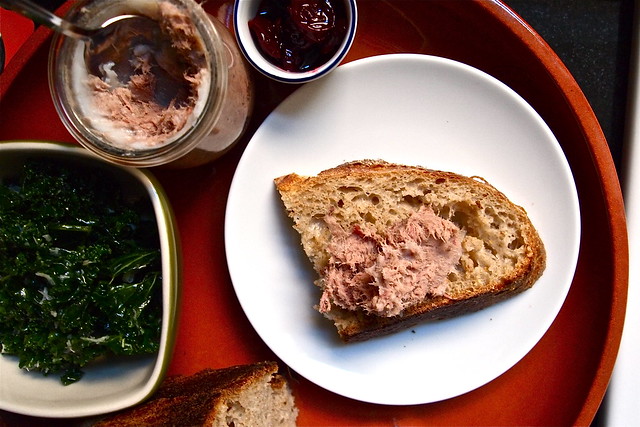
Store in glass or ceramic jars and chill in the fridge until ready to serve. Serve with good bread, pickles, a sharp salad, or even some tart fruit preserves. Consider stuffing any that remains in baked potatoes, as Nigel Slater suggests.
(In addition to the ham-hock stock, there'll be lots of leftover gelatin purée, which you can use to enrich anything from meatballs to gravy. If you're not quite ready to jump into another meat-centric project, it's okay to freeze the purée for later use.)
Serves 12-16 as an appetizer. (Fills about four 200 g jars.)

Thursday, January 10, 2013

It's not always about looks

Smoked pork hock
A smoked ham hock is one of those items off a hog that will never win any beauty contests. It comes to you still wearing its skin, now dark and leathery from the smoker. Sometimes, a few wiry hairs still jut out from the skin, a reminder of its provenance. A thick bone protrudes from its centre, making it obvious that there isn't much to it but bone. I was more than a little intimidated the first time I freed one of these from its butchers' paper. I just wasn't sure that I wanted it in my pot, especially with that hair. Did this thing really belong in a cooking pot? (The one pictured above is a much nicer-looking specimen than my first hock. Hair-free too.)
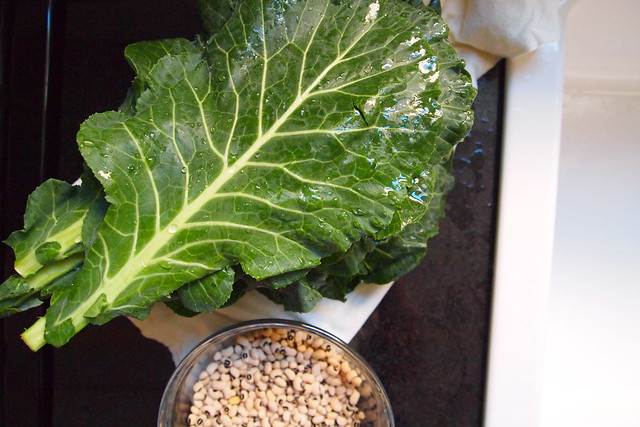
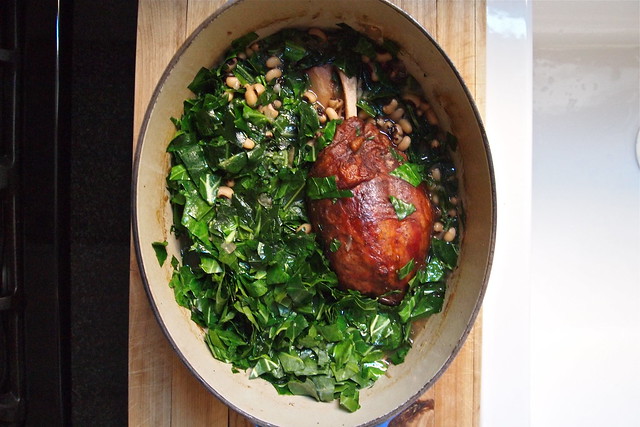
Ham hock and onions Collards and black-eyed peas Collards and the hock
But I quickly came to appreciate a smoked hock for what it was. It isn't always about looks, you know. See, a smoked ham hock is an ingenious thing. The hock is the cut from a hog's hind leg between the foot and the ham proper. Unlike the ham, there isn't much meat to the hock. It's mostly bone, skin, and tough connective tissue. And what meat there is is pretty lean. For these reasons, it's not a much sought-after cut. It takes a little work to get to a hock's goodness--a long, low, simmer. So the smoking is one way to make it worthwhile. As a smoked hock breaks down in its cooking liquid, it gives off a lot of flavour--smoky, porky, woodsy flavour. Like I said, ingenious.
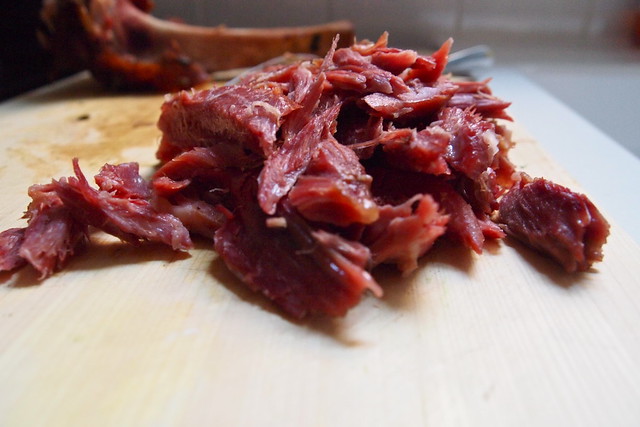
Now, maybe early January isn't the best time to be extolling the virtues of pig parts. But one of things I like most about a smoked pork hock is that a little goes a long way. Drop just one meaty hock (remember, it's mostly bone) into a pot with some onion and water and set it to simmer, and you're on your way to something special. That's the idea, anyway, behind Kemp Minifie's hoppin' John collard stew. You let your hock simmer away the afternoon, returning just to add some black-eyed peas to the pot after an hour and some collard greens an hour after that. It's my favourite kind of winter cooking. You can leave things to bubble merrily on their own and wander off to daydream, read, or do a load of laundry. And when the day's light has faded, you just return to fish out the hock, separate the meat from skin, fat, and bone, return the meat to the pot, and then ladle some of that stew over a plate of rice.
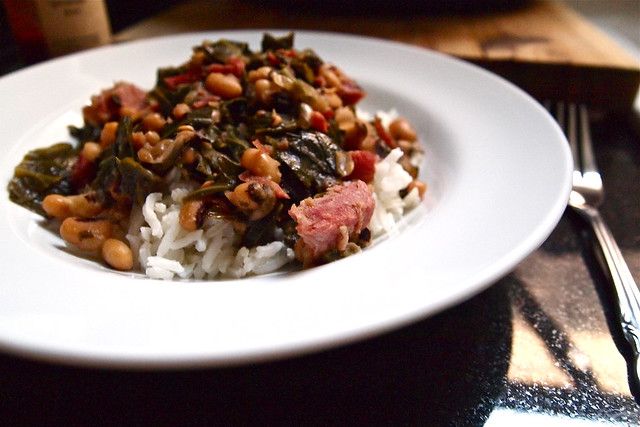
Smoked hock meat Hoppin' John collard stew
Pork and beans and greens might not exactly be your idea of how to start off the new year. But the smoked ham hock and the culinary tradition behind it--the resourcefulness of it, the ingeniousness of it--really appeal to me right now. These are ideas I can get behind, ideas I want to carry with me the  whole year through. And, if nothing else, who doesn't like a pile of silky collards, smoky meat, and creamy beans floating in porky broth on a cold winter's night? Just don't forget to bring your favourite hot sauce to the table too. Happy new year, everyone. 

Hoppin' John Collard Stew
From Kemp Minifie via Gourmet

1 medium onion, chopped
2 tablespoons vegetable oil
1/4 tsp hot red-pepper flakes
1 meaty smoked ham hock, about 1 lb in weight
10 cups water
1/2 lb / 1 1/4 cups dried black-eyed peas, picked over and rinsed (don’t soak)
1 lb collard greens, center ribs discarded and leaves chopped
Hot sauce to serve

Cook onion in oil with 1/2 tsp salt in a deep heavy medium pot over medium heat, stirring occasionally, until lightly browned, about 8 minutes. Add red-pepper flakes and cook, stirring, 1 minute. Add ham hock and water and simmer, partially covered, 1 hour. 
Add black-eyed peas and simmer, partially covered, 1 hour. 
Stir in collards (add water if necessary for a soupy consistency) and simmer, partially covered, stirring occasionally, until greens are very tender, 45 minutes to 1 hour. 
Remove ham hock and chop meat, discarding skin, fat, and bone. Stir into stew and thin with water, if necessary, then season with salt.
Serve over rice and with hot sauce at the table. The acidity of the hot sauce helps to cut through the rich smokiness of the stew.

Serves six.

Sunday, November 18, 2012

Little luxuries

Surprise Tatin
About two weeks ago, a couple of good friends of mine here in Chicago became parents! This, for me, anyway, is still a little mind-blowing. I feel as though, still being in my mid-twenties and a grad student, I only act like a real grown-up about half the time. Sure, I have obligations. But most days, I don't have to be anywhere at any particular time. I can work at home, curled up in an armchair, barefoot, hair still a mess. I can ease my way into the day with a good cup of coffee and buttered toast, when most people are already shuffling off to work. I can pull together a loaf of sourdough pretty well every week, even mid-week, midway through the day, if I want. So I don't quite feel like I live a particularly grown-up life with grown-up responsibilities. And the thought of having that change anytime soon, of giving up little luxuries like late breakfasts and weekly bread-baking--well, let's just say that I think my friends are brave, brave folks.
So with all this in mind, when I heard that my friend had given birth to a beautiful baby boy, one of my first thoughts was that I should make some good, nourishing food for the new parents. With a tiny, helpless, newborn to care for, I thought, they probably had their hands full. (I might have been thinking of this post.) But I didn't know what to make. What do new mothers eat? Do they crave particular foods after those nine long months, those first sleep-deprived days? I really didn't have a clue. But I knew that my friends and I had at least one cookbook in common between our two kitchens--Yotam Ottolenghi's Plenty. So I asked them to pick something from it that they'd been wanting to try out.
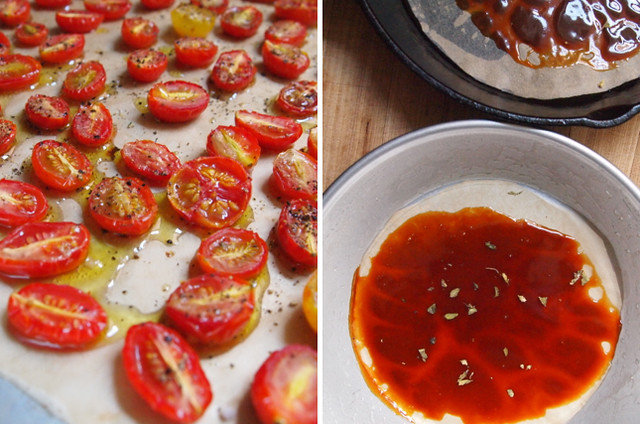
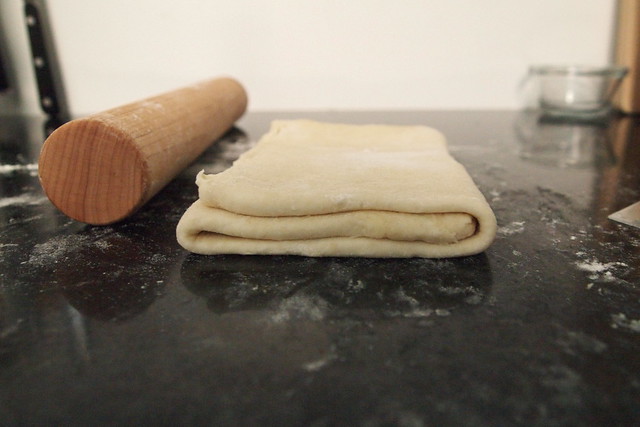
Roasted tomatoes and caramel Rough puff
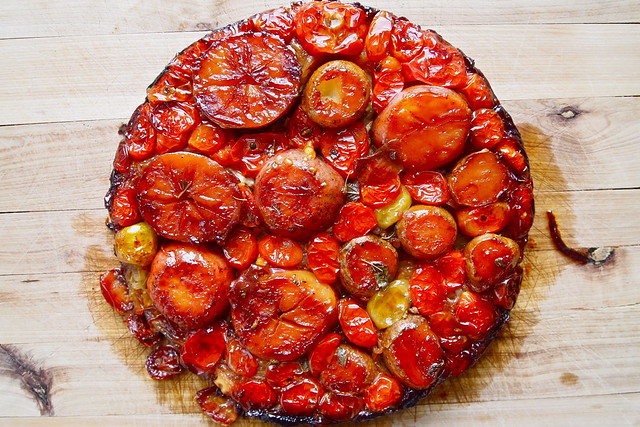
My friends chose well, really well. Ottolenghi's Surprise Tatin is something truly spectacular, a crown jewel for the dinner table. It, much like its sweeter namesake, involves a puddle of dark caramel and pillowy puff pastry. But instead of the usual apples tucked beneath that buttery lid, it's roasted cherry tomato halves, itty bitty potatoes, sweet onions, and semi-firm goat's cheese that bubble away together in the heat of the oven.
One of the things I enjoy most about tarte tatins is the anticipation--the moments leading up to the end of baking and then the big reveal when you turn the tart out of its skillet. I'm the sort of girl who can't keep away from the oven window, even if there isn't much to see. So though those forty minutes or so of baking feel impossibly long, though they keep me in suspense--heady, tantalizing smells, puff pastry ballooning--they make the end all the more worth it--that moment when you finally get to slip on your oven mitts and get your first peek at what's been happening beneath that flakey dome. And in this case, it might just take your breath away. The onions will have reduced to sticky-sweet ribbons. The caramel and tomato juices will have seeped into the potatoes, leaving them ruby-tinged. The tomato halves will gleam, bright and candy-like. Like I said, a real crown jewel.
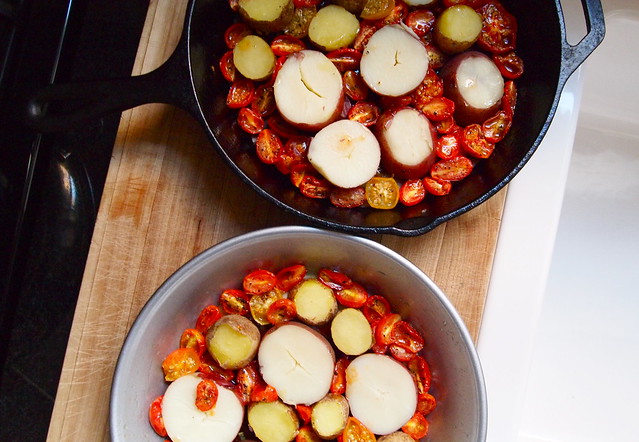
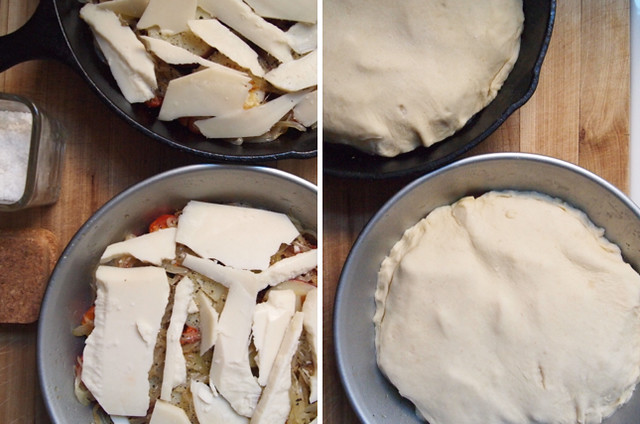
Potatoes in a sea of tomatoes Onions added Goat's cheese and puff pastry
And this tart tastes every bit as good as it looks. With each bite you get something a little different. But each is its own discovery--different textures and flavours, harmonizing together in different ways. Sometimes, what you'll get is the sweet-tart intensity of the tomatoes balanced against the richness of the pastry and the gentle creaminess of the potatoes. With other bites, it'll be goat's cheese and the potatoes--salty, earthy, comforting. My favourite sort of bite is one where the sweetness of onions melts into that of the tomatoes right at the edge of the tart--tangy and sweet with just a little crunch from the pastry.
The process of making this tart, admittedly, is not one that you can just breeze through. The tomatoes, onions, and potatoes all need separate preparation before they get nestled together in their skillet. There's also the caramel to cook and the cheese to slice--all that prep can add up. (But once assembled, you can leave the tart in the fridge until you need it--for up to 24 hours.) And you might end up with a sink full of dishes. But this is another reason why I think my friends chose so well. Elaborate and impractical meals are a bit of a luxury on most nights, and with a newborn to care for, my friends, I thought, could use a little luxury. (Plus, I just wanted to drop something off for an excuse to see the baby.) Likewise, if there's someone in your life that deserves a little pampering, you might want to consider this tart. 
Inverted tart

Surprise Tatin
Adapted from Yotam Ottolenghi's Plenty
Note: About the puff pastry. If you're feeling really ambitious, consider making your own "rough" puff. I like this old Gourmet recipe. It makes enough for two of these tarte tatinsAbout the potatoes. Tinier potatoes tend to make for a better presentation here, I think, but I used what I could find--a mix of red-skinned new potatoes and a variety called German Butterball. About the goat's cheese. My go-to is goat gouda, but feel free to branch out.

150 g cherry tomatoes
2 tablespoons olive oil, plus extra for drizzling over the tomatoes
Salt and pepper
500 g new potatoes, really tiny ones, preferably
1 large onion, peeled and sliced thinly
45 g sugar / 3 tablespoons sugar
10 g / 2 teaspoons butter
1 sprig fresh oregano, picked, or a few big pinches of good-quality dried oregano
100 g aged goat's cheese, sliced
1 sheet (about 250 g) puff pastry, rolled thinly

Preheat the oven to 275 degrees F. Halve the tomatoes and place them skin-side down on a baking sheet. Drizzle with some olive oil and sprinkle with salt and pepper. Place in the oven to dry for 45 minutes.
Meanwhile, cook the potatoes in boiling salted water for 25 minutes or until easily pierced with a knife. Drain and let cool. Trim off a bit of the top and bottom of each potato, then cut into 1-inch-thick discs.
Sauté the onion in olive oil and a little salt for 10 minutes, until golden brown.
Butter a 9-inch cake pan or heavy-bottomed skillet and line the base with a circle of parchment paper. In a small pan cook the sugar and butter on high heat, stirring constantly with a wooden spoon, until you get a semi-dark caramel. Pour carefully into the cake pan and spread out evenly over the bottom. Scatter the oregano on top.
Stand the potatoes close together in the bottom of the pan. Press onions and tomatoes into the gaps, season well with salt and pepper, and cover with goat's cheese. Cut a puff pastry disc that is 1 inch larger in diameter than the pan. Layer the pastry lid over the tart filling and gently tuck the excess around the potatoes inside the pan. (At this stage, you can chill the tart for up to 24 hours.)
Preheat the oven to 400 degrees F. Bake the tart for 25 minutes, then reduce the temperature to 350 degrees F and continue baking for 15 minutes, or until the pastry is thoroughly cooked. Remove from the oven and let settle for 2 minutes only. Hold an inverted plate firmly on top of the pan and carefully but briskly turn them over together, then lift off the pan. Serve the tart hot or warm.
Serves 4.