Tuesday, April 26, 2011

Kitchen Rhythms

Hand-cut pasta
With few exceptions, I'm the kind of girl who always cleans her plate. Thighs be damned, I'm just not one to waste food. And it doesn't stop at the table. Sometimes, when I should be thinking about the page right in front of me or the lecture going on, just briefly, I start turning over dinner possibilities in my head. Spinach languishing in the fridge? Creamed spinach over pasta tonight. Heavy cream about to expire? Biscuits for the morning. I hate to see things go to waste, and it drives the way I cook and eat.
Egg noodles
I'm not sure where it comes from. Maybe it's my family's stories--my mother growing up in a time and place where strict rationing was in effect, my paternal grandmother sharing her childhood dinners with eight hungry brothers and always winding up with chicken necks and fish heads (though, I'm told, that that wasn't necessarily a bad thing--the boys just didn't know it). But wherever it comes from, it's now a solid part of the rhythms of cooking and planning and eating in my kitchen.
Macarons are no exception to this. For every batch of macarons I've made, I've tucked away two or three egg yolks in the freezer with the promise of some later use. And what have I done with the last few of these? Why, put them to use in a seven-yolk pasta dough, of course.
Fresh pasta with olives, spinach, and feta
I'm not particularly experienced with making pasta, but I love working with yolk-rich doughs. The yolks leave the dough appreciably smooth and supple, almost silken, inviting you to run your fingertips over it. And it's a wonder to see how, with a bit of rolling, a bit of flouring, your sunny mass of dough flattens out into near-paper-thin sheets, ready to be rolled up and cut into generous strands. Now, I'm sure that by any Italian grandmother's standards this was an appalling attempt. These noodles are unmistakably ugly. But I can assure you that they made up a blissfully rich and eggy bed for this bunch: caramelised onions, spinach, olives, and feta, with a squeeze of lemon, for good measure.

Seven-Yolk Pasta Dough: find the recipe at Smitten Kitchen, adapted from Thomas Keller's French Laundry Cookbook
Freezing egg yolks: egg yolks tend to get gelatinous after spending some time in the freezer. I advise adding a generous pinch of salt (or sugar, if you're planning to make something sweet) to each yolk you want to save and breaking it up a bit. Stored in an air-tight container, they should be good for another three months. Leave them to thaw in the refrigerator the night before you plan to use them. (Mine, this time, still turned out a little jelly-like--I'll be using more salt next time around--but if this happens to you, don't worry. Just be prepared to add a little extra liquid to whatever you're making to compensate, or reduce the dry component.)

Saturday, April 23, 2011

Sleepy neighbourhood pretzels

Soft rye pretzels!
Where can you get good soft pretzels in Chicago? I have to say--I have no idea. It's embarrassing how little my boyfriend and I venture out into the city beyond the bounds of our sleepy neighbourhood. When we were out with our Toronto friends last week, we knew almost as little about some of the neighbourhoods we visited as they did. Like, when the Publican didn't work out on Saturday night (8 people, no reservation...oops), we had no idea where else we could eat in the West Loop (apart from the other Paul Kahan restaurants, of course). As I said, embarrassing.
But we're students--stipends don't fund a life of luxury, and unstructured schedules along with loads of literature to get familiar with mean that we at least feel as though we should be hard at work all the time. Besides, given where we live, it can be difficult to justify spending two or more hours on the CTA just to get dinner, even phenomenal dinner.
Pretzels, before their bath
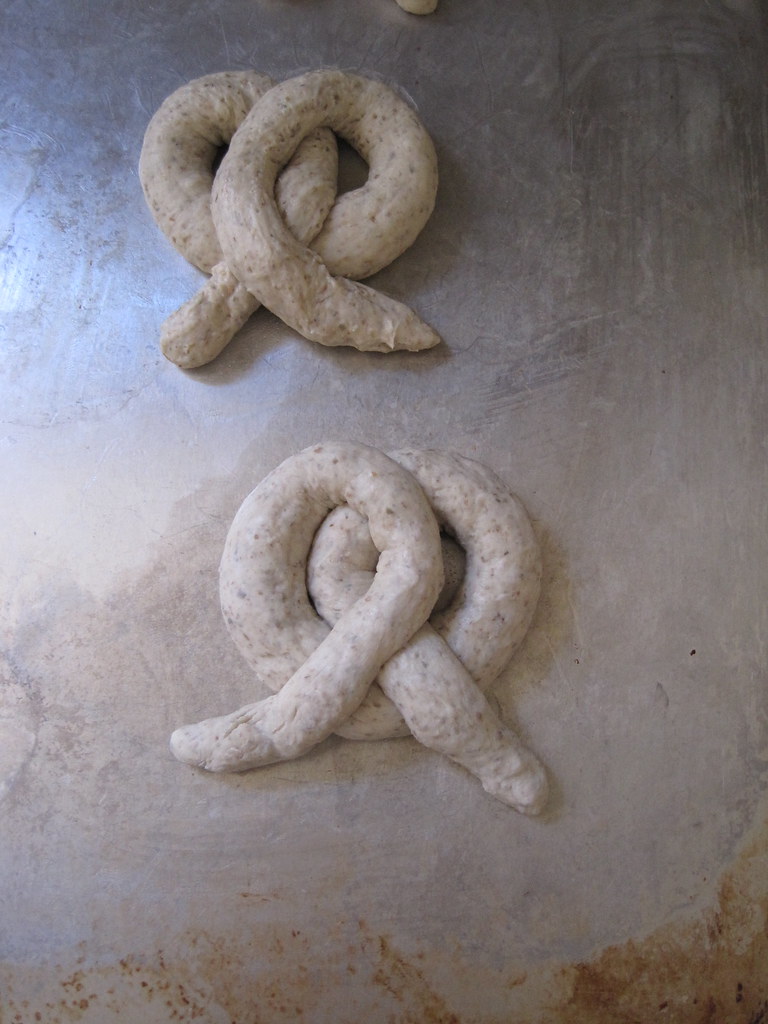
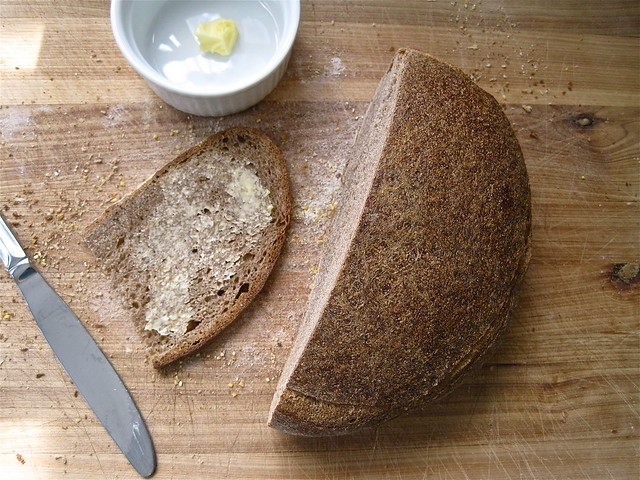
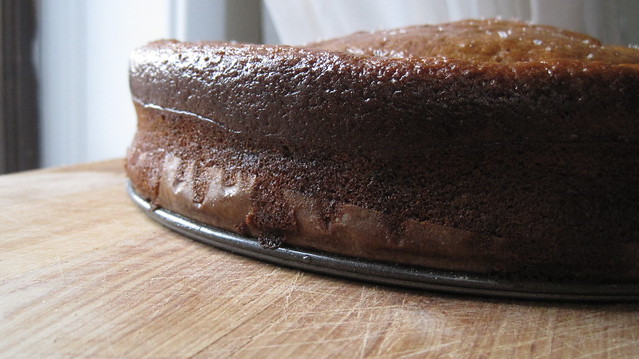
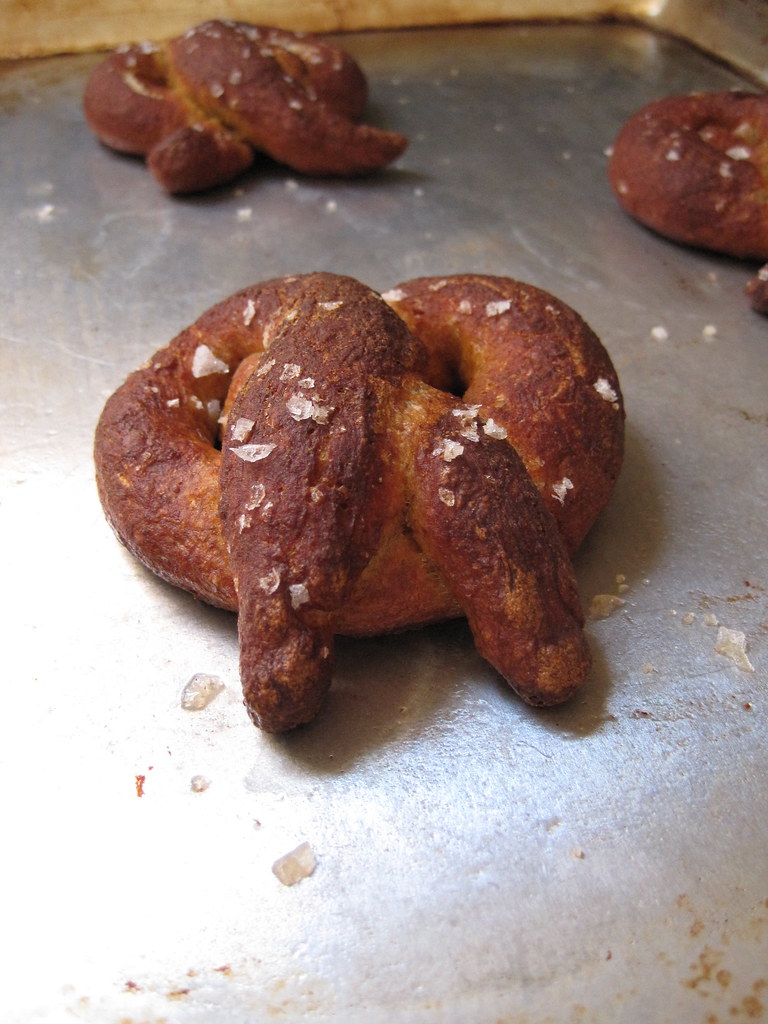
And that's where these gorgeous homemade pretzels come in. Hit with a sudden craving and more or less stranded in my neighbourhood, I knew that the only way to get my fix was to make my own...even if I had to wait a few hours. I turned to Kim Boyce's Good to the Grain for help: soft rye pretzels, yes. And with a bit of mixing and kneading, a quick dip in a baking soda bath, and a little oven time, these mahogany beauties were ready for my whole-grain mustard treatment.
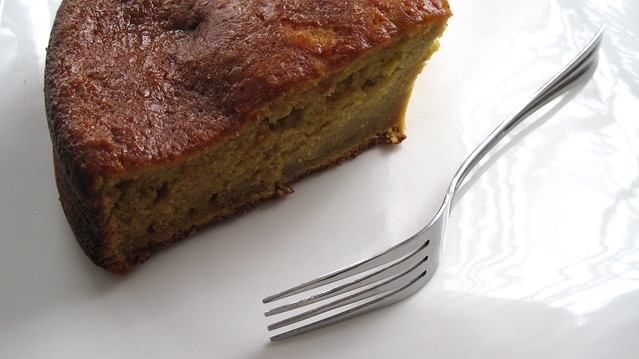
While certainly fine warm from the oven, these pretzels, I found, were best an hour or two later. Sure, they didn't quite have that right-out-of-the-oven goodness that you only get when you grab them from a still-hot half-sheet. But given that time to cool, they took on a different character. They had a little more chew to them, and they were wonderfully buttery and salty, with a slight sweetness and an earthen heft, lent to them from the pumpernickel flour. Seriously worth the wait.

Soft Rye Pretzels
Adapted from Kim Boyce's Good to the Grain
Makes twelve pretzels
From KB: These pretzels are soft, chewy, and flavourful, with a slight sourness that comes from boiling the pretzels in a baking soda bath. The baking soda also gives the pretzels their traditional dark mahogany colour. Be sure to boil only a few pretzels at a time and to use the bath for only a single batch of the recipe--otherwise the baking soda water reduces too far and leaves a metallic bite to the dough. A simple dusting of sea salt, especially flaky Maldon salt, is the best finish to these. Serve a basket of pretzels with a pot of whole-grain mustard.
4 to 5 tablespoons unsalted butter, melted
Dough:
0.25 oz / 1 1/4 teaspoons instant yeast
0.5 oz / 1 tablespoon honey
4.15 oz / 1 cup pumpernickel or another rye flour
10.6 oz / 2 1/2 cups all-purpose flour
0.25 oz / 1/2 tablespoon fine sea salt
Bath:
1/2 cup baking soda
To finish:
Coarse sea salt, like Maldon
In a large bowl, mix together the yeast, flours, and salt. Add the honey and 1 1/2 cups of water. Stir to combine.
Dump the sticky dough onto a floured surface and knead. Add up to a 1/2 cup of all-purpose flour, as needed, until the dough is tacky but not sticky. Knead for about 7 minutes, until the dough is soft and supple. It should pass the windowpane test. (Don't knead for much more than 7 minutes, as rye flours can make a bread gummy if kneaded for too long.)
Lightly brush a large bowl with melted butter. Using a dough scraper, scrape the dough into the bowl, cover with plastic wrap or a damp towel, and let rise for about 1 1/2 hours, or until doubled in size.
While the dough is rising, place two racks at the top and bottom thirds of the oven and preheat to 450 degrees F. Brush two baking sheets generously with butter.
Once the dough has doubled, gently pour it from the bowl onto a lightly floured surface. Cut the dough into 12 pieces (about 2.5 oz each). Take each piece of dough and roll it into a snake about 17 inches long, with thinly tapered ends. Don't flour your surface as you roll; the slight stickiness enables you to roll the dough out evenly and quickly. Form the dough into a pretzel shape by folding one-third of the left side over the centre of the snake, and then one-third of the right side over the left. Place the shaped pretzels onto the prepared baking sheets. Let the pretzels proof for 15 to 20 minutes.
Meanwhile, for the bath, fill a large pot with 10 cups of water and bring it to a boil. Once the pretzels are proofed and the water is boiling, add the baking soda to the water.
To poach the pretzels, lift 2 or 3 pretzels, depending on the surface area of your pot, into the bath. Boil each side for 30 seconds, use a strainer to remove the pretzels, pat any excess water with a towel, and transfer them back onto the buttered baking sheets. Boil the remaining pretzels. Brush with the remaining butter and sprinkle liberally with salt.
Bake for 15 to 18 minutes, rotating the sheets halfway through. The pretzels should be dark mahogany in colour. Transfer them to a rack to cool. These pretzels are best eaten the day they're made, ideally within a few hours.
Don't want to eat all those pretzels in one sitting? After the first proofing, divide the dough between the number of pretzels to be made right away and proceed with the instructions above with that portion of dough. With the rest, press on it gently to de-gas, form it into a ball, and return it to the buttered bowl and cover with plastic wrap. Leave it in fridge for up to two additional days. When ready to make more pretzels, take the dough out and divide it into equal portions (about 2.5 oz each), cover with plastic wrap or a damp towel, and leave for an hour on the counter to take off the chill. Proceed as you did with the others.

Tuesday, April 19, 2011

Never missing a beat

I'm terrible when it comes to keeping in touch with people, even people whom I've known for years and are dear to me. I move to a new city. I promise to call. I get caught up in my work and my new life. You know the story. That's why I'm always overjoyed when I get to spend time with friends I haven't seen for ages and we can just pick up where we left off, never missing a beat.
Like last weekend. I know a bunch of guys in the philosophy department at Toronto through my boyfriend. We met at a conference (here in Chicago, actually) when I was pretty much new to serious philosophy. I was struck by them then and still am now--they're just such fun-loving, hard-working guys who are so excited about philosophy. But since we're in different cities, I almost never see them--unless there's a big philosophy event going on somewhere, like the workshop that my department organised last weekend.
It was great having them around. The night that they arrived, we piled into the car (one of us in the trunk) and hit Belly Shack for a late dinner. If you haven't been, it's this small joint located right beneath Western station on the blue line. I'm usually not excited by the idea of fusion--it can be done so badly--but Korean-Latin-American fusion where fast food meets gourmet eats? Yes. The togarashi-spiced fries are amazing, and I love their brown-rice bowl. I'm not entirely sure about what goes into it all, but there are a lot of wild, wonderful flavours in the mix. Everyone that night found something that hit the spot. I'll definitely be heading back for some huckleberry-lime soft-serve soon.
To my dear Toronto friends: thanks for all of the conversations and company--it's been inspiring--hopefully we'll see you back home soon.

Friday, April 15, 2011

Botched Bread

Midday Snack
In The Bread Baker's Apprentice, one of the breads that Peter Reinhart celebrates is the pain Poilâne, a whole-grain country loaf that world-famous baker Lionel Poilâne and his Paris apprentices make by hand each day, start to finish. Reinhart even shares a recipe that approximates Poilâne's ingredients and techniques for the home baker. Never having had the opportunity to go to Paris and make the pilgrimage, I can't tell you how they compare. Heck, I can't even tell you whether all that kneading (over three pounds of dough!) is worthwhile, Poilâne-like or not. That's because I let my dough seriously overproof, like kneaded-it-together-in-the-morning-and-didn't-make-it-back-until-11-because-of-the-Brad-Mehldau-Trio overproof. Oops. Needless to say, it's very much on the sour side. But, with a few flaky grains of Maldon and a generous slathering of butter, it's still quite enjoyable. And what wouldn't be?

Friday, April 8, 2011

So you may have already heard...

..but two of my very favourite things are coming together in print in June. Meet McSweeney's latest: Lucky Peach, a quarterly food journal edited by only some of the finest in food writing--Anthony Bourdain, David Chang, Peter Meehan, and Chris Ying. I love McSweeney's dearly--they've brought such spectacular things to print as Dave Eggers' Zeitoun, Darin Strauss' Half a Life, and, of course, the McSweeney's Quarterly (the last issue of which came boxed in a delightfully pink head)--and the announcement made today is just one more reason to gush like a school-girl about the quirky brilliance that is McSweeney's. The first issue's theme is ramen. Naturally, there will be recipes and gorgeous photography. It will also feature pieces by such luminaries as Ruth Reichl and John T. Edge. And, of course, bearing Bourdain's stamp, it couldn't be without "a booze-fueled rant on mediocrity in American cuisine." Needless to say, I've already put in for a subscription.

Tuesday, April 5, 2011

A Farewell to Oranges

Orange Olive-oil Cake
People around here tell me that this city doesn't really do spring. In these in-between months, they say, it can't really make up its mind about just what season it is. The weather flip-flops between extremes--we'll get warm, sun-drenched days that remind us of what summer is like, only to have winter howl in again and dust us all with snow. In June, I'm told, summer finally sets in, but until then, it's anyone's guess what the coming days will bring. So, given the irresoluteness of seasons here, I hope that you'll forgive me one last wintry cake. I'm longing for rhubarb and strawberries with the rest of you, but for now, consider joining me in giving the waning season's oranges one last hurrah.
Remains of the cake
Now, I know that some of you might think that citrus olive-oil cakes have already had their day and that we all ought to move on to better, or at least different, things, but I think that there's something special about the combination of orange and olive oil. They make a good pair--both fruity, both bitter, but each in its own way--and especially in this particular cake. You start it off with nearly the whole orange--two of them, actually, zest, pith, membranes, and all. That's what drew me to the recipe. Even after a bit of boiling, I thought, the orange would lend this cake just a hint of bitterness--and it does. Together, with the olive oil and a dusting of coarse sea salt, it makes for a wonderfully aromatic, complex, and silky cake.
But my favourite part about it, I have to admit, is how well it keeps. Sometimes, my boyfriend and I don't feel like sharing with others. I'll bake a cake one afternoon, and we'll just keep it to ourselves--have a slice after dinner, maybe sneak one for breakfast, another with an afternoon espresso...over the next few days or for however long it lasts. This cake is perfect for our little habit. It doesn't dry out and even gets a bit better as the sea salt melds with everything else. As good a way as any for the last oranges of the season to go.

Orange-scented Olive-oil Cake
Adapted (barely) from the May 2010 issue of Saveur

2 oranges, preferably organic
6.85 oz  / 1 cup + 9.2 oz / 1 1/3 cups granulated sugar
unsalted butter, for greasing
10.6 oz / 2 1/2 cups flour, plus more for the pan
0.3 oz / 2 teaspoons baking powder
0.25 oz / 1 teaspoon baking soda
0.05 oz / 1/4 teaspoon salt
1 teaspoon vanilla extract
4 eggs
6 tablespoons extra-virgin olive oil

1 oz / 2 tablespoons fresh orange juice (about half an orange's worth)
0.5 oz / 2 tablespoons confectioners' sugar
coarse sea salt, for garnish
  1. Trim about 1/2" from the tops and bottoms of the oranges; quarter oranges lengthwise. Bring 6 cups of water to a boil in a 4-qt. saucepan, add oranges. Bring water back to a boil; drain. Repeat boiling process twice more with fresh water. Put oranges, 1 cup sugar, and 4 cups water into the same saucepan over medium-high heat. Cook, stirring often, until sugar dissolves and orange rind can be easily pierced with a fork, about 30 minutes. Remove pan from heat and let cool to room temperature.
  2. Heat oven to 350 degrees. Grease a 10" round cake pan (or a 9" spring-form pan, like I did) with butter and dust with flour; line pan bottom with parchment paper cut to fit. Set pan aside. Whisk together flour, baking powder, baking soda, and salt in a medium bowl and set aside. Remove orange quarters from syrup, remove and discard any seeds, and put oranges into the bowl of a food processor. Pulse until oranges form a chunky puree, 10-12 pulses. Add remaining sugar, reserved flour mixture, vanilla, and eggs and process until incorporated, about 2 minutes. Add olive oil; process until combined. Pour batter into prepared pan, bake until a toothpick inserted in center comes out clean, 40-45 minutes (or between 60 and 70 minutes, if using a 9" spring-form pan). Let cool for 30 minutes.
  3. In a small bowl, whisk orange juice and confectioners' sugar to make a thin glaze. Remove cake from pan and transfer to a cooling rack for glazing. Using a pastry brush, brush orange glaze over top and sides of cake; let cool completely. Garnish cake with salt.
Serves 10-12.