Friday, November 11, 2011

An Ugly Duckling

Sunchoke
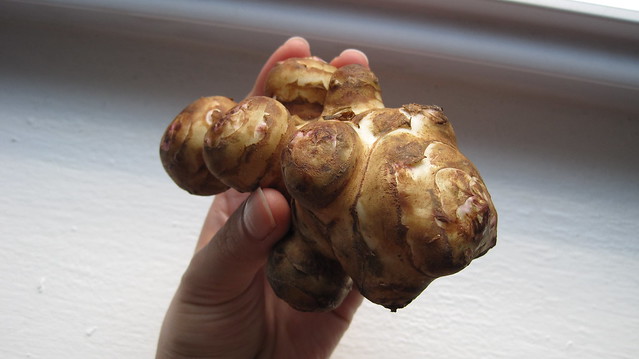
Meet my favourite root vegetable, the sunchoke. I know, set alongside the season's other abundances--the acorn squash, the honeycrisps, the sweet potatoes, even--he's not much to look at. In fact, you could say that he's a bit of an ugly duckling. But don't be put off by his strange, knobbly appearance. He's a good one to have around--mildly sweet and just a tad earthy, reminiscent of mushrooms and artichokes. I think he'd play well with other root vegetables, maybe roasted with coarse sea salt, thyme, and lots of olive oil. But I've never had the chance to attempt something like that. See, the thing is, sunchokes are hard to come by, at least in my experience. I used to get them from one particularly adventurous farmer at the market back home. She was always selling some weird and wonderful vegetable that I'd never heard of, and she convinced me to give her sunchokes a try one day. I was back for more the next week. I loved them. That was a couple of years ago. I've only seen them around a few times since.
So whenever I have gotten my hands on some sunchokes in the past year or so, I've done one of two things. The first is really the best way to have them if you're new to them. You'll get to see what they're all about. Once you've peeled them, just slice them into coins a quarter-inch thick and sauté them in a good amount of butter. They're ready when they've turned crisp and thoroughly golden and have sweet and creamy centres. This is the way to enjoy them when they're in season. Sometimes I fold them into omelettes this way.
The second is for the long haul, for those long months in which you won't see a single sunchoke anywhere. Simmer your sunchokes in lemony water until tender, then drain and purée in a food processor until smooth. Transfer your purée to a zip-top bag and tuck it in the freezer. Then, at your leisure--in a week, or even four or five months from now--you'll be able to make Yotam Ottolenghi's sunchoke soufflé.
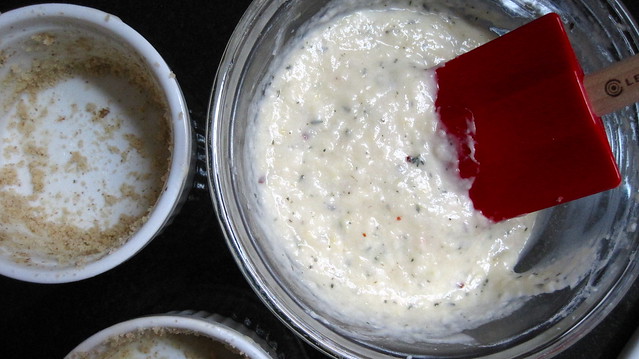
Béchamel mixtureSunchoke Soufflé
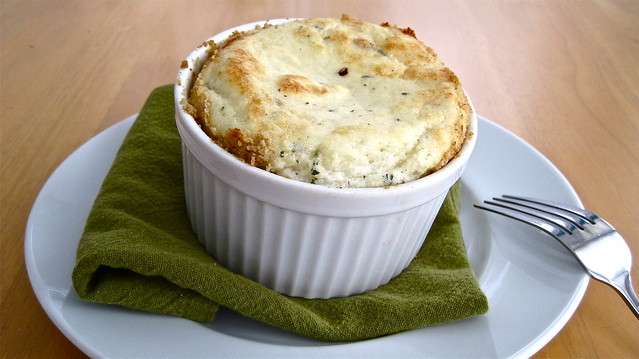
This soufflé has been a favourite of mine for a while now. I've made it four or five times since early spring--basically, whenever I could find enough sunchokes for the purée. I always make more purée than the recipe calls for and divide it into batches (enough for two or four individual soufflés) for the freezer. You never know when you'll need to impress someone. This soufflé has you covered. It's luxurious on the tongue but without being heavy. Its flavours are fittingly delicate--wisps of lemon, sunchoke, thyme, and goat's cheese held aloft, as it were, in a creamy cloud-mass of egg white and béchamel. And with its pretty, puffed, golden cap, you'll almost hesitate to take your fork to it. But don't--dig up those soft, creamy mounds, those buttery, walnut-crusted edges. It'll be marvellous.
I'm not sure why soufflés have been made out to be so difficult to prepare. They're not--you just need to know a thing or two about beating egg whites. A lot of it is just preparation--make sure that your whites are at room temperature (they beat better this way) and that your bowl and tools are perfectly dry and clean (any fat will interfere with the process). The rest is a matter of care--start out slow to break down the protein bonds, increase your speed once the whites have turned bubbly and greyish, start checking your peaks when the whites have turned foamy, thick, and glossy. And finally, be gentle with your beaten egg whites when you fold them into the other ingredients. Using a broad, flexible spatula, turn the mixture over onto itself, give your bowl a quarter turn, fold again, and repeat, just until everything is combined. Let the oven do its magic. Your work is done.
A few things about sunchokes: sunchokes are also commonly known as Jerusalem artichokes, though the plant of which they are tubers is actually a species of sunflower native to North America. Sunchokes are typically available starting in October, but you can find them as late as March--farmers still dig them out of the ground in early spring. They seem to come in two basic varieties--the really knobbly ones, like those I found at the grocery store a couple of weeks ago, and the long, tapered ones that kind of look like parsnips. The difference doesn't go much further than that--the latter are just less of a pain to peel, so count yourself lucky if you can find that kind. Choose sunchokes that are firm, smooth, and unblemished. If they're pinkish in some spots, that's okay. It's an effect of the soil they grew in. If you live in the Chicago area, I've ordered sunchokes from this grocery delivery service. It hasn't offered them so far this season, but they were available for a few weeks last March.

Sunchoke Soufflé
Adapted from Yotam Ottolenghi's soufflé at The New Vegetarian
Note: About doneness. If the photo that accompanies the original recipe is any indication, your soufflés should have deeply golden caps when they're ready. I've always baked mine for the full 18 minutes, and they've always been just a touch golden. This might be due to the fact--I'm a little embarrassed to say--that I've completely overlooked the instructions about preheating the sheet pan and baking the soufflés in the top-third of the oven every time I've made them. I don't know how that happened, but I'll update these headnotes once I've followed the recipe properly. Update 01-06-12: I pre-heated a sheet pan as directed, and it made no difference to the appearance or doneness of the soufflés! About the goat's cheese. Ottolenghi doesn't specify what kind of cheese to use, only that it should be hard. I've stuck to goat's milk gouda, since that's what's most readily available in my neighbourhood, but feel free to experiment and tell me about it. The gouda, by the way, is pleasantly goat-y but milder than chèvre. About quantities. Call me obsessive, but I weighed my sunchokes before peeling and trimming, after peeling and trimming, and, finally, after simmering and puréeing, just to see whether your really needed to buy 300 g of sunchokes to get 130 g of purée. I don't think you do. I lost about 100 g of sunchoke to peeling and trimming (all those knobbly bits) or about 20% of their total weight (507 g), and I lost about another 75 g during cooking or about 18% of the remaining weight. So count on losing about 35% of the sunchokes you buy. That means, you should be able to scrape by with just 200 g of sunchokes to make four individual soufflés. About freezing. I try to get my sunchokes cooked and puréed as soon as I can after bringing them home from the store, so usually, they end up in the freezer. I've made soufflés with purée that had been frozen for about five months. The flavour and quality weren't noticeably different. Freeze your purée in freezer-safe zip-top bags and thaw it in the refrigerator the night before making the soufflés.
Grated zest and juice of half a lemon
300 g sunchokes (see headnotes)
30 g walnuts
60 g / 4 tablespoons unsalted butter
25 g / 2 tablespoons + 2 1/2 teaspoons all-purpose flour
1 cup milk
2 large eggs, separated (egg whites at room temperature)
1/4 teaspoon chilli flakes
1/2 tablespoon chopped thyme
120 g hard goat's cheese, grated (see headnotes)
1/4 teaspoon salt

Preheat the oven to 400 degrees F. Move an oven rack into the top-third of the oven and put a baking sheet on it; this will help the soufflés rise.
Pour the lemon juice into a medium saucepan and add enough water to half-fill the pan. Peel the sunchokes and immediately drop them in the water so that they don't discolour. Once they're all peeled, bring to a boil and simmer for 40 minutes, until soft. Drain and transfer to a small food processor bowl. Work to a purée, adding a little water, if needed, to bring it together. You will need exactly 130 g of purée.
Put four 10-ounce ramekins in the fridge to chill. Blitz the walnuts until powdery in a clean coffee mill. Melt half the butter and brush the insides of the ramekins. Spoon walnut powder into each ramekin and turn the dishes so it coats the base and sides. Tip out any excess powder.
Over moderate heat, melt the remaining butter in a medium pan. Stir in the flour, cook for a minute, then gradually add the milk, stirring, until the sauce is thick and bubbles appear on its surface.
In a large bowl, mix the 130 g of sunchoke purée, the egg yolks, chilli, thyme, cheese, lemon zest and salt. Add the sauce and stir until smooth. Set aside to cool down.
Put the egg whites in a large, clean copper or glass bowl and whisk until stiff but not dry. Add a little of the egg white mix to the sunchoke base and stir to loosen, then fold in the remaining egg whites with a large, flexible spatula, taking care to retain as much air as possible. Fill up each ramekin with the soufflé mix so it comes up 1.5 cm short of the top.
Place on the heated baking sheet, and bake for 12-18 minutes, until golden brown and risen well. Serve at once.
Serves four.

Sunday, November 6, 2011

It brought me right back

Momofuku Milk Bar Peanut Butter Cookies
Bakers don't get enough respect for what they do. I've heard it from people who don't cook at all. I've heard it from people who've worked in professional kitchens. It seems to be a pervasive attitude in some circles. You've heard them. They're disdainful of bakers and baking. They say things like: "Baking is what your grandmother does," or "Pastry chefs aren't hardcore enough." Well, try telling that to Christina Tosi. She's the amazing woman behind Momofuku Milk Bar, the outpost of all things good and sweet in the Momofuku empire. She's let loose such weird, wild, and delightful things on New York City as Crack Pie™, Cereal Milk™, and cake truffles. She is a one-woman force of nature, and she doesn't bake like your grandmother (which is not to say that you shouldn't love what grandmothers bake). In David Chang's words: "Don't let her nice demeanour and southern charm fool you; underneath she is a ruthless killer...just like her recipes [...] where simple flavours and ingredients combine in ways that make grown men whimper. Resistance to her sugar manifesto is futile." If anyone can take on that totally unwarranted disdain for bakers and baking, it's Christina Tosi. Let her at them.
Between the Milk Bars and the pastry programs at the other Momofukus, Tosi's reach has been limited mostly to those lucky enough to live or work in Manhattan. But as of last week, the game has changed. The Momofuku Milk Bar cookbook is out! Now we can all taste a bit of Tosi's sugary genius.
Peanut brittle
Peanut brittle shards
I got my copy about a week ago, and I've been giddy ever since. I've barely been able to put the book down. Chocolate-chip layer cake? Red-velvet ice cream? Cinnamon-bun pie?  Liquid cheesecake? It doesn't get any better than this. Christina Tosi taps into our childhood memories with her desserts and re-imagines the things we loved in strange and wonderful ways. Their flavours evoke the familiar and the comforting, the simple and sinful pleasures of childhood eating. (Tosi was one of those kids that snuck more than a spoonful of cookie dough when someone's back was turned.) In making and eating Tosi's desserts, you will be transported to simpler days--to the days in which you didn't pooh-pooh birthday cake from a box, in which it was okay to eat as much ice cream as you wanted, in which eating a handful of pretzels followed by a handful of chocolate chips was just the right thing to do. Tosi has no pretensions. She makes it okay for us to love these things again. She indulges us. She gives us her favourite birthday cake from a box, re-engineered by her and her team from scratch. What a woman.
Because Tosi's desserts are Momofuku-grade productions, most will be a bit of a project for us at home. The layer cakes, for example, typically involve five or six separate components to be made--but they totally look worth it (I have a feeling that birthdays this year are going to be especially fun). It helps that each of the recipes is derived from one of the Milk Bar's "mother" recipes. Once you're practiced at making Cereal Milk™, for example, a range of ice creams and pies calling for it or a variation on it will be at your fingertips. And you shouldn't worry about any leftovers you might end up with (though, I don't really see why you'd ever end up with leftovers). Tosi encourages the use of scraps and leftovers in subsequent baked goods. Cake truffles just are leftovers--scraps from layer cakes, whatever sort of leftover curd or cake filling there is lying around, and chocolate plus something crunchy to coat. How awesome is that?
Liquid glucose
Cookie dough!
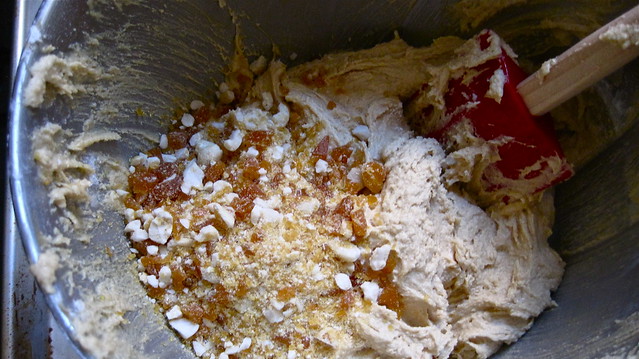
For my first crack at the book, I opted for something far less elaborate--Milk Bar's peanut butter cookie. It only calls for two components, a peanut brittle and a cookie dough, and it's amazing. It might just be my favourite cookie ever. It has that perfect ratio of crisp edge to dense, chewy interior. And it's wonderfully balanced--when you make the recipe, it will strike you that you're adding what seems like an awful lot of salt for a cookie, but when you taste the dough (Tosi encourages it!) or take your first bite of cookie, you'll understand. The salt makes a difference--think salted-butter caramel and the difference the salt makes there. But best of all, maybe, is the peanut brittle. Tosi has you smash it up into little pieces and add it to the dough right at the end. In the cookie, these wind up as little toffee-like pockets of sweetness and chew. Beautiful, just beautiful.
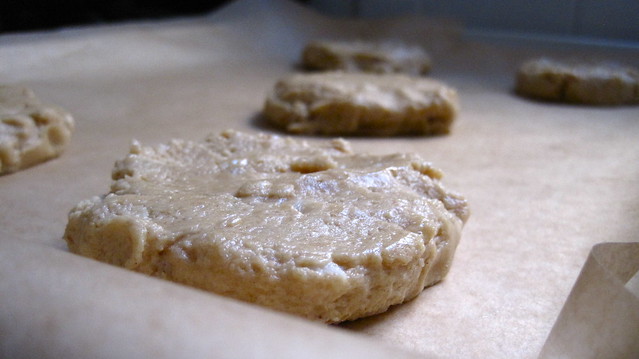
Peanut butter cookies awaiting the oven
I'm not usually one for eating cookie dough. I was an obedient child and took salmonella very seriously. But I couldn't help but eat more than a little while making these. It's that good. My favourite part of making the cookies, though, was opening the jar of Skippy Peanut Butter and spooning it out for the dough. I hadn't had Skippy in years. I'd forgotten how good it smelled. It brought me right back. There were days when I didn't care what was in my peanut butter or how many cookies I'd eaten. It was nice to have a little of that again.

Peanut Butter Cookies
Adapted from the Momofuku Milk Bar Cookbook
Note: About the brittle. I don't recommend grinding it down in the food processor. The team at Milk Bar does, but I found that (a) it's easier to control what size your brittle pieces end up being when you break them with a rolling pin and (b) the brittle, because it's just sugar peanuts, is very hard--the brittle flying around at high speeds in my food processor actually scratched up the bowl a fair bit. Bread flour. The Milk Bar team found that they liked using King Arthur Bread Flour best for their cookies, and I always have a few pounds of it on hand, so that's what I used. Just listen to the recipe and don't overwork your dough. Liquid glucose. The liquid glucose has a role in the texture of the cookie--remember those fudgy centers and crisp edges I was talking about? In a pinch, you can substitute 2 tablespoons (35 g) of light corn syrup for it, but the corn syrup will add more sweetness to the cookies than you really want. I bought my liquid glucose here for a reasonable price. About the cookie scoop. Milk Bar specifically recommends this 2 3/4-oz ice cream scoop specifically, and I can understand how it would be handy if you were making a lot of Milk Bar cookies, but for one batch, you can probably manage without. Baking times. It is crucial that you don't overbake this cookie. If you do, you won't get that perfect fudgy center, and you'll shrug the cookie off and wonder what the big deal is. That's what happened with the first few that I baked. Don't do it!

170 g / 12 tablespoons (1 1/2 sticks) butter, at room temperature
300 g / 1 1/2 cups sugar
100 g / 1/4 cup glucose
260 g / 1 cup Skippy creamy peanut butter
2 eggs
0.5 g / 1/8 teaspoon vanilla extract
225 g / 1 1/3 cups bread flour
2 g / 1/2 teaspoon baking powder
1 g / 1/8 teaspoon baking soda
9 g / 2 1/4 teaspoons sea salt
1/2 recipe Peanut Brittle (recipe below)

Place the brittle in a large zip-top bag and break it into small pieces with a meat pounder or a rolling pin. The pieces should be about the size of short-grain rice.
Combine the butter, sugar, and glucose in the bowl of a stand mixer fitted with the paddle attachment and cream together on medium-high  for 2 to 3 minutes. Scrape down the sides of the bowl. Paddle in the peanut butter, then add the eggs (one at a time, incorporating completely before adding the next) and vanilla and beat for 30 seconds on medium-high speed. Scrape down the sides of the bowl, then beat on medium-high speed for 3 minutes. During this time the sugar granules will dissolve and the creamed mixture will double in size.
Reduce the mixer speed to low and add the flour, baking powder, baking soda, and salt. Mix just until the dough comes together, no longer than 1 minute. (Do not walk away from the machine during this step, or you will risk overmixing the dough.) Scrape down the sides of the bowl.
Still on low speed, mix in the peanut brittle pieces until incorporated, no more than 30 seconds.
Using a 2 3/4-ounce ice-cream scoop (or a 1/3-cup measure), portion out the dough onto a parchment-lined sheet pan. Pat the tops of the cookie domes flat. Wrap the sheet pan tightly in plastic wrap and refrigerate for at least 1 hour, or for up to 1 week. Do not bake your cookies from room temperature--they will not bake properly.
Heat the oven to 375 degrees F.
Arrange the chilled dough a minimum of 4 inches apart on parchment- or Silpat-lined sheet pans (seriously, these cookies sprrreeaad--you probably shouldn't bake more than 4-6 at a time on a standard-sized half-sheet). Bake for 17-18 minutes. The cookies will puff, crackle, and spread. After 17 or 18 minutes, they should be tan with auburn specks throughout. Give them an extra minute or so if that's not the case.
Cool the cookies completely on the sheet pans before transferring to a plate or an airtight container for storage. At room temp, cookies will keep fresh for 5 days; in the freezer, they will keep for a month.
Makes 15-20 cookies.

Peanut Brittle
From the Momofuku Milk Bar Cookbook
Note: I'm still terrified of making caramel on the stove, especially dry caramel, even though I've been making quite a bit recently. If you're new to the process, David Lebovitz has some very helpful tips  here--his photos are a good guide for the colour your caramel should be. If you have a tendency to panic and overstir the sugar like I do--creating annoying shards of sugar that refuse to melt--stop panicking, turn down the heat to low, and keep cooking the caramel. Break the shards up with your spatula, and they will melt. Continue as instructed.

1 cup / 6.8 oz sugar
1/2 cup / 2.95 oz blanched, unsalted peanuts

Line a sheet pan with a Silpat (parchment will not work here).
Make a dry caramel: Heat the sugar in a small heavy-bottomed saucepan over medium-high heat. As soon as the sugar starts to melt, use a heatproof spatula to move it constantly around the pan--you want it all to melt and caramelize evenly. Cook and stir, cook and stir, until the caramel is a deep, dark amber, 3 to 5 minutes.
Once the caramel has reached the target colour, remove the pan from the heat and, with the heatproof spatula, stir in the nuts. Make sure the nuts are coated in caramel, then dumb the contents of the pan out onto the prepared sheet pan. Spread out as thin and evenly as possible. The caramel will set into a hard-to-move-around brittle mass in less than a minute, so work quickly. Let the brittle cool completely.
Eat or cook with it at will. Store your brittle in an airtight container, and try to use it up within a month.

Monday, October 31, 2011

Comfort food, plain and simple

Lemon Risotto
It used to be that I only made risotto when I was out to impress someone. I'd rush over to potlucks in oven mitts, carrying a saucepan with a still-warm batch. I'd win over my few distinguished dinner guests (that is, real adults, not like me and my college friends, still playing at being adults) with a splash or two of wine and a generous bowlful. But then I realised recently, when I hadn't made any risotto in well over a year, that it was really something that I should just make for myself now and then. It was food for a laid-back Sunday afternoon. I could turn up the radio, chop some aromatics, leisurely add stock to arborio, and wind up just a little while later with something warm, rich, and creamy to savour while watching the leaves outside fall and flutter about. Risotto, I realised, doesn't need an occasion. Sure, white wine and reggiano make it a little luxurious, but really, risotto at its best is just comfort food, plain and simple.
So when I turned to an old favourite last weekend and read the recipe's headnotes, I had to laugh. Nigella Lawson had had it right all along--I just hadn't payed enough attention: "This is comfort food on so many levels. For one, risotto has to be one of the most comforting things to eat ever. What's more, although everyone goes on about the finicketiness and crucial fine-tuning involved, I find risotto immensely comforting to make: in times of strain, mindless repetitive activity--in this case, 20 minutes of stirring--can really help." The lady knows what she's talking about.
And her lemon risotto is good too, really good. It's the risotto I've been making since those first days of cooking for myself, the one I usually made when looking to impress--and it's still the one I like best. It doesn't look like much, I know--just a bit of lemon, rosemary, celery, shallot, and butter for flavour--but it's splendid. It always surprises me. Just this last time, I was convinced that it couldn't be as good as I remembered it being, that I'd surely outgrown it at this point. But then I had my first bite and thought: no, it is just that good. It was lemony and bright but, with that splash of cream and egg yolk at the end, also positively indulgent. I was ecstatic. It's good when something turns out to be just as you remembered it.

Lemon Risotto
Adapted from a Nigella Lawson recipe
Note: About the wine. Depending on the wine you're using, you might just want to use a half cup of wine and add more stock to make up for the volume. I love tart things, but I can see how the risotto could be a touch too tart with a full cup of wine and the lemon juice. Of course, another splash of cream or a more generous dusting of parm will also cut the acid. Feel free to replace all of the wine with stock if you don't have any wine on hand, though it does make the risotto especially nice. About the stock. The amount of stock you'll need really depends on your arborio. Originally, I had only three cups of stock on the stove, and when I was down to the last ladleful, my arborio was not at all cooked through. So, I suggest having four cups on hand just in case. When you're down to about a cup of stock, start tasting the arborio for doneness and add or withhold stock accordingly. About the cream. Good risotto should be creamy without the help of any cream, but it does help cut the acidity of the wine and lemon. Add as few as two tablespoons or as many as four, depending on how indulgent you're feeling. Four tablespoons might be over-the-top luxe, but they do make the risotto very satisfying.

2 shallots, very finely chopped
1 stalk of celery, very finely chopped
2 tablespoons / 30 g unsalted butter
1 tablespoon olive oil
1 1/2 cups / 300 g arborio rice
1 cup white wine (see headnotes)
3-4 cups good quality vegetable or chicken stock
Zest and juice of half a lemon, preferably unwaxed and organic
Needles from 1 large sprig of rosemary, finely chopped
1 egg yolk
1/4 cup parmigiano reggiano, grated
2-4 tablespoons heavy cream
 Flakey sea salt and freshly ground pepper

Warm the butter and olive oil in a wide saucepan over medium heat. Add the shallot and celery and cook until softened, about 5 minutes. Meanwhile, heat the stock in another saucepan and keep it at a simmer.
Then, add the arborio to the shallot and celery, stirring well to coat with the oil and butter. Toast until translucent, 1-2 minutes.
Pour about half of the wine into the arborio and keep stirring until the wine has absorbed. Then add the other half and stir again. Continue doing this with ladlefuls of stock until the arborio is al dente. You may not need all of the stock.
Stir the lemon zest and rosemary into the risotto. In a small bowl, beat the lemon juice, egg yolk, parmesan, cream, and pepper (to taste).
When the risotto is ready--when the arborio is no longer chalky but still has some bite--take it off heat and stir in the bowl of eggy, lemony mixture. Salt to taste and serve immediately (with more parmesan, if you'd like).
Serves two very hungry people or just three.


P.S. I got my copy of Momofuku Milk Bar late last week, and I am so psyched to bake from it. Christina Tosi, I'm pretty sure, is my new hero. I'm just waiting for FedEx to deliver the big bucket of liquid glucose I ordered yesterday. Yes, I am really getting 2.2 lbs of inverted sugar delivered to my door. Then I will bake up a storm and report back. I promise.

Saturday, October 22, 2011

Cake was a must

Brown-butter financier sans quenelle
Two nights ago, we had over our first dinner guests since the move to the new place. It felt good to finally have a proper dinner party, drinks, dessert, and all. Our guests were a couple I've mentioned before--the two who stayed with us in March for the philosophy department's prospectives' week and who came back to the new place day after day late this summer to help with painting. They've become good friends--loving food as much as we do probably didn't hurt. Between that first week in March when they showed up on our doorstep and now, we've shared a lot of food together--everything from cold lentils shovelled down between coats of paint to the best bacon ever (where else but at the Publican). They're always up for pretty much anything, especially if there's something delicious involved. We get one another out of our sleepy neighbourhood and into the city. They're good friends to have. So it was only appropriate that they were our first dinner guests.
Dinner was a warm, stewy collard cobbler, which you can read all about over here--perfect for the end of a wet and blustery day like the one we had, straight-up comfort food. Dessert was pretty much the opposite. You'll have to forgive me. I don't get nearly as many excuses (or have as much time) as I'd like to play with dessert, okay? And besides, this happened to be a belated-birthday dinner too. Cake was a must, the fancier, the better.
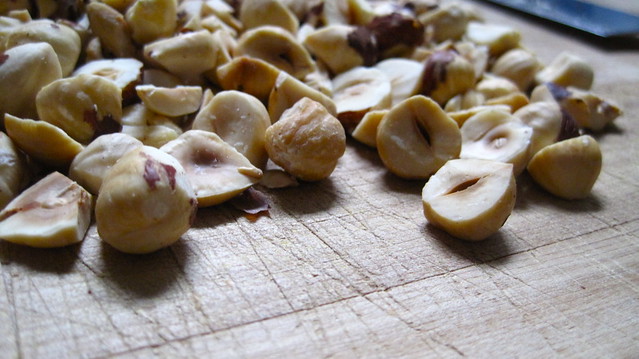
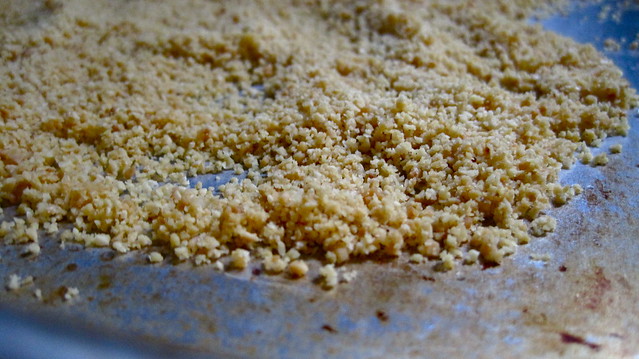
Hazelnuts, skin off
Ground almonds, toasted
I went with something from a cookbook I've been meaning to talk about for a while now, Mission Street Food. Now, most cookbooks are not good reads, not even the good cookbooks. I don't mean this as a complaint--they are cookbooks, after all. But MSF is a great read. There's a pretty wild story behind the food (think: Bar Tartine cook and his grad-student girlfriend serving gourmet eats out of a borrowed taco truck and then, when that doesn't work out, out of a borrowed Chinese restaurant one night a week while the restaurant is still doing take-out), and the writing is hilarious. But, maybe, what I like best about it is how no-nonsense and matter-of-fact it is. Anthony Myint and Karen Leibowitz are not out to warm your heart. They tell it like it is, and often, it just happens to be funny. Even the instructive bits of the book make for good reading. Take this bit about sauces: "Armed with a powerful blender, you can make a lot of the components that separate fine-dining from Schmapplebee's or SchmeeGIFriday's. [...] If you start on a setting that's too high, your contents will splash and you'll have to wipe down the edges of the pitcher with a spatula, so be cool, but not too cool, because you're on the clock and there's no point in blending on Medium-Low for eight seconds while you build up the courage to shift to Max. After all, it's called the Vita-Prep 3, not Prince Wuss-o-Matic the Third." See, instructive and entertaining.
One more thing: MSF is not an everyday sort of cookbook--though Myint and Leibowitz were not exactly working in ideal conditions, the MSF team cooked serious restaurant food. They were practically minded (they even list an approximate cost for every recipe in the book) and couldn't quite do everything the "right" way, but they still managed to do some wild stuff. Peking duck, anyone? Mozzarella mousse? Triple-fried potatoes? A little out of my league for the moment, which was why I stuck with dessert.
Oh right, dessert--I made MSF's brown-butter financiers and served them with a rosemary-infused chocolate ganache and hazelnut-brittle pebbles. Sound complicated? Let me let you in on a little secret: it isn't really. There are three parts to it, none of which are particularly technically challenging. Block your time properly, have a little patience, and soon you'll find yourself left with just the plating to do. Make it pretty.
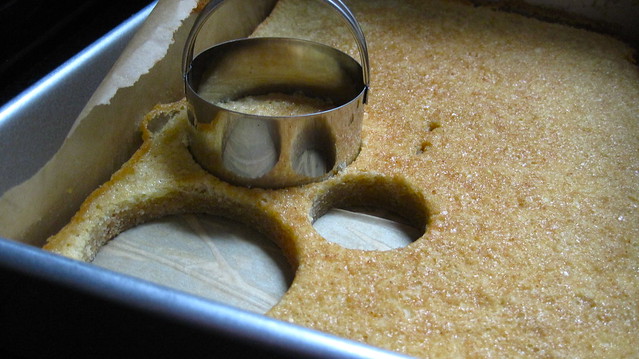
Financier cut-outs
First component, the financier--if you've never had one before, a financier is a delicate but intensely nutty French cake. With all of the egg whites in it, it's kind of like sponge cake. You start by browning a good amount of butter over the stove. Meanwhile, you toast some almond flour. Two kinds of nutty goodness! Then it's just a matter of those egg whites, some cake flour, and some powdered sugar. Bake all of that in a 9 x 13 inch pan for a half hour, and you're set. Grab your favourite biscuit cutters and stamp out pretty shapes to your heart's delight. (If you eat the scraps while you're working, I won't tell.) By the way, Mission Street Food estimates that the financiers will run you about $8 for all the ingredients.
Hazelnut brittle
Second component, the hazelnut-brittle pebbles--making brittle is a pretty quick and painless process. You just need a bit of nerve (boiling sugar always scares me a little) and a candy thermometer. Have your ingredients measured and ready at hand to add to the mix--toasted hazelnuts (skins off, as best you can manage) and baking soda (for texture)--and don't walk away from the stove. The sugar can get hot fast. If you manage not to drop your wooden spoon on the floor and splatter bits of hot candy all over the place, you'll have done better than I did. Pour the brittle over a half-sheet, wait for it to cool, and break it into cute, bite-sized pieces. You'll have a lot of extra to snack on. Treat yourself.
Brown-butter financier
Final component, the rosemary ganache--this one is really easy. When you're just about ready to impress your guests, drop a modest sprig of rosemary into a saucepan with some heavy cream, bring it to a boil, pour it over your best finely chopped chocolate, and stir. The ganache should be luxuriantly smooth and shiny. Don't forget to pick out the rosemary. Grab an angled spatula and smooth the ganache over your financiers.
Financiers? Check. Hazelnut brittle? Check. Rosemary-infused ganache? Check. Now, arrange all of it prettily on some clean plates and finish them off with some vanilla ice cream. And, if you want, you can get really fancy and make quenelles out of the ice cream. All you need are two spoons and some practice (there's a good instructive video here--one thing that it doesn't mention is that dipping your spoon in hot water really helps. If you're really good, like this guy, you don't even need two spoons.). And there you have it, delicious, fancy-pants dessert. Lick the ganache off your fingers and pat yourself on the back.

Brown-Butter Financiers
Adapted from Mission Street Food: Recipes and Ideas from an Improbable Restaurant
Note: About the almond flour. I blanched and ground my own raw almonds for the batter, and the cake turned out fine. I suspect, however, that it would have had an even more delicate crumb with proper almond flour. Grinding almonds into flour at home is always a bit tricky--you don't want to end up with almond butter. But if you can't be bothered with buying almond flour, blanch your raw almonds in boiling water for 1-2 minutes and drain. The skins will slide right off after that. Just give the almonds a squeeze. Let them air dry or pop them in the oven for a few minutes, then grind them as fine as you can manage in a food processor. Make ahead. As MSF says, the cake batter will keep just fine in the fridge for a couple of days. Leftover cake will be good for a day or so, tightly wrapped at room temperature.

2 sticks / 8 oz unsalted butter
1 1/4 cups / 5 oz almond flour (alternatively, try hazelnut or chestnut flour)
3/4 cup / 3.15 oz cake flour
2 1/4 cups / 9.75 oz powdered sugar
8 egg whites

Heat the butter in a saucepan over medium heat until it turns brown and nutty, stirring frequently. Set aside.
Place the almond flour on a parchment-lined tray and bake at 350 degrees F until golden, about 12 minutes.
Grease a 9 inch by 13 inch pan with butter and line with parchment.
Sift the cake flour and combine with the toasted almond flour.
Mix in a stand mixer with the whisk attachment for 30 seconds.
Add the egg whites and mix for a few minutes, until thoroughly incorporated.
Add the butter (including browned bits) and mix thoroughly. Then add the powdered sugar.
Once the sugar is incorporated, pour the batter into the lined baking pan.
Bake for about 30 minutes at 350 degrees F. The cake is done when it has developed a golden and pleasingly crusty exterior. A toothpick inserted in the middle should come out clean. Let cool.

Hazelnut Brittle
Adapted from Tina Ujlaki at Food & Wine
Note: If you're starting with raw hazelnuts, toast them at 340 degrees F for 15 minutes on a half-sheet. Then, collect them into a large sieve and, using a clean dish towel, roll them against the surface of the sieve to remove their skins. This never works perfectly, so don't obsess about it.

1 cup / 6.85 oz sugar
1/4 / 2 oz cup water
4 tablespoons / 2 oz unsalted butter
2 tablespoons + 2 teaspoons / 2 oz light corn syrup
1/4 teaspoon baking soda
1 1/4 cups / 6 oz toasted hazelnuts, skins removed, roughly chopped
Fleur de sel or crushed Maldon sea salt

Generously butter a half-sheet.
In a large saucepan, combine the sugar, water, butter and corn syrup and bring to a boil. Cook over moderately high heat, stirring occasionally, until the caramel is light brown and registers 300° on a candy thermometer, about 10 minutes.
Remove from the heat and carefully stir in the baking soda. The mixture will bubble. Stir in the nuts, then immediately scrape the brittle onto the buttered half-sheet. Using the back of a silicone spatula, spread the brittle into a thin, even layer. Sprinkle with salt.
Let cool completely, about 30 minutes. Break the brittle into large shards. Stored in an airtight container at room temperature, the brittle will keep for a month.

Rosemary Dark-Chocolate Ganache
Note: Make the ganache at the very last minute before you need it. If for whatever reason you do find yourself with leftover ganache, you can keep it covered in the fridge and reheat it the next day. Gently melt in a heat-proof bowl over simmering water. If the ganache starts breaking, you've applied too much heat--but don't worry, just whisk it vigorously, and it should come back together.

3 oz good bittersweet chocolate, finely chopped
2.75 oz heavy cream
1 modest sprig of rosemary

Place the chocolate in a medium heat-proof bowl.
Bring the rosemary and cream to a boil in a small saucepan over medium heat. Pour the cream over the chocolate and stir until the ganache is smooth and glossy. Remove the rosemary sprig.

Final Notes on Assembly, Etc. Cake. Cut the cake however you'd like. I thought concentric discs would be fun, so I took out my biscuit cutters. Think of it as sculpture. Stack your financiers. Lean them against one another. You've got a lot of cake, so go crazy. MSF says that you can get 12 servings out of the cake, but I think it really depends on how you want to present it. I'd say that you can probably get six 8-inch discs out of it, plus an assortment of smaller ones. Save the scraps for snacking on. They're tasty. Brittle. Make the brittle ahead of time and feel good about yourself. It will keep for up to a month. For plating, break it into small, bite-size pieces and scatter those. Ganache. Spread a thin layer of ganache on some of the financiers before serving, just enough to cover them. You don't want to overwhelm everything with chocolate.
Finish with a few rosemary needles as garnish. Serve with vanilla ice cream. Make quenelles, if you like.
Variations: MSF notes that the financiers play well with most things, especially fruit. They, for example, suggest blueberries, pine-nut brittle, mint leaves, and mint ice cream. I think vanilla poached pears would do it for me at this time of the year. This cake is versatile.

Monday, October 10, 2011

Bread with butter in it

Buttery, flaky goodness
There are few things I like better than bread and butter, plain and simple, but every now and then, the thought of having something fancier gets into my head, and I have to stop and bake, even if I don't really have the time. This weekend, for example, I thought to myself: bread and butter is fine and good, but what about bread with butter in it, lots of butter?
Now, I had a few options: slipping in the butter in soft gobs and making a glossy brioche dough (which would be good for doughnuts as well as brioche), pulling out my rolling pin and laminating it between thin layers of dough, as you would for croissants (there's some great PBS footage of Julia Child and Michel Richard making puff pastry this way here), or cutting in cold flecks of it and (again) layering the dough.
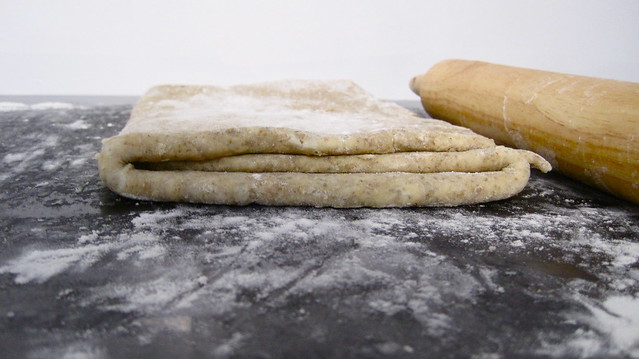
Turned dough
A quick glance through Kim Boyce's Good to the Grain decided it for me. I was going to have to go with the final option if I wanted her maple danishes. Now, before you shy away from the idea of making pastry at home, let me say this: don't be intimidated by the directions, making a "rough puff" like this one is really not all that hard to do--you just have to remember to keep your butter cold. Really, it's like making pie crust, except those are made all the more complicated by fillings and par-baking and potentially soggy bottoms. All you need to make these danishes is cold butter, a metal bench scraper, and some nerve. Setting aside a few quiet hours one morning is pretty important too. You don't want to feel rushed.
Roll
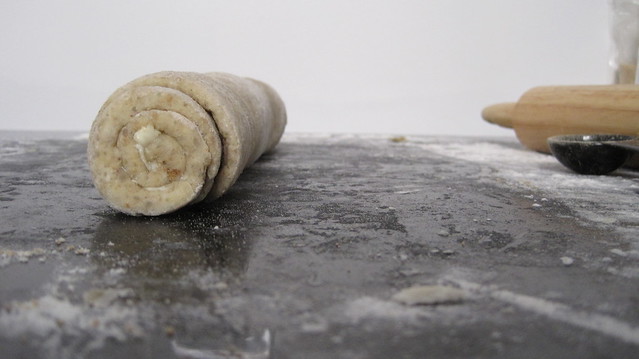
You start the night before by grating frozen butter into the dry ingredients. Easy-peasy. You don't even have to cut the butter to size and decide for yourself what "pea-sized" really means. The grater does the work for you. Just remember to toss the ribbons of butter with the dry ingredients every now and then as you're grating. There's no point in making all those pretty ribbons if they're just going to get warm and clump together in the bowl. Next, you add an egg and some milk, stirring just to get everything a little wet--don't be tempted to overwork things. The dough will be a bit rough-looking, but breathe easy--you've gotten past the first stage.
Proofed spirals
In the morning, it's time for the messiest bit--turning the dough. Basically, what this comes to is rolling the dough out, folding it over itself into layers, then rolling it out again, and making more layers. Repeatedly folding the dough onto itself like this layers the flecks of cold butter. And just as with pie crust, when the butter hits the hot oven, it'll melt, and its water content will escape as steam, leaving little pockets in the dough. With the butter layered so, what you'll get are layered pockets of buttery, flaky goodness. Just remember to keep the butter cold. If between turns you find that the dough is getting warm and more difficult to handle, feel free to cover it in plastic wrap and chill it in the fridge for 15 or 20 minutes before moving on. And don't be shy with the flour--flour your work surface generously before rolling out your dough, and while you're rolling it, gently lift the dough at the edges with your bench scraper occasionally, peel it back from your work surface a bit, and throw down some more flour. It can't hurt.
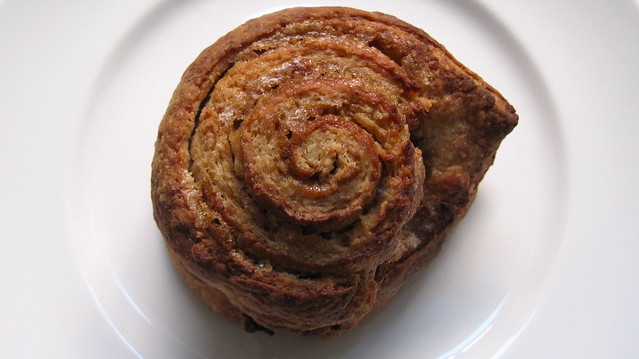
Maple danishes
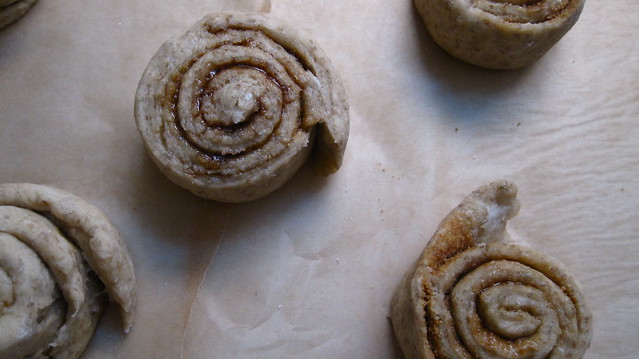
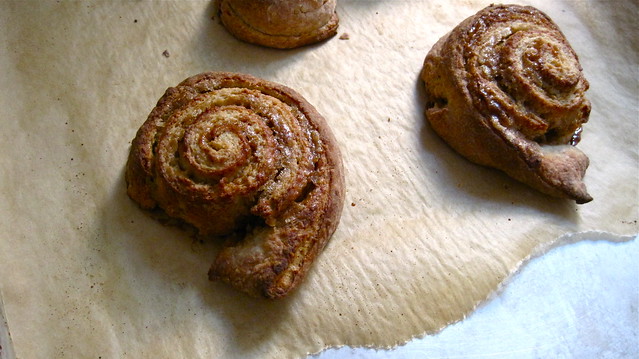
When you've rolled out the dough for the final time, rest easy. The worst is over. Spread a bit of softened butter across the dough, sprinkle it with brown sugar and maple sugar, roll it up, and cut it into pretty spirals--ready for proofing and baking. Leave the rest to the oven. Soon, you'll have a plate piled high with burnished and buttery beauties that you can be proud of.

Maple Danishes
Adapted from Kim Boyce's Good to the Grain
Note: About making these in advance. As the recipe says, these pastries are best eaten pretty much right out of the oven. If you want to make the whole batch (and you may as well, if you're going to go through the trouble of making them at all) but don't have twelve (or maybe just six, realistically) takers waiting for your oven timer to go off, you can freeze what you don't want to eat right away. Set the danishes destined for freezing on a separate half-sheet and let them proof with the rest. When the two hours are up, put them in the freezer for about an hour, just until they harden. Then, remove them from the half-sheet and return them to the freezer in a freezer bag. The night before you need them, thaw them on a half-sheet covered with plastic wrap in the refrigerator and bake them as the recipe directs the next day. About maple sugar. Reduce maple sap far past the syrup stage very, very carefully, and you get maple sugar. I bought mine from KAF.

PASTRY:
1 cup rye flour
2 cups all-purpose flour
1/4 cup sugar
3/4 teaspoon fine sea salt
2 1/2 teaspoons instant yeast
6 oz unsalted butter, frozen
3/4 cup whole milk
1 large egg

FILLING:
3 tablespoons unsalted butter, softened to room temperature
4 tablespoons maple sugar
2 tablespoons dark brown sugar

Sift the rye and all-purpose flours into a large bowl, pouring back into the bowl any bits of grain that remain in the sifter. Stir in the sugar, sea salt, and yeast. Using the large holes on a box grater, quickly grate the frozen butter into the dry mixture--this will ensure that the butter stays cold. With your hands, very briefly stir the strands of butter into the mix.
Whisk together the milk and egg in a small bowl. Add the liquid to the dry ingredients and stir just to moisten the flour. There will still be some drier bits of dough; that's fine. Cover the dough with plastic wrap and chill overnight.
The next day, take the dough out of the refrigerator and scrape it onto a well-floured surface. It will be quite rough, but don't worry; it will come together as you work with it.
Flour the top of the dough and use your hands to shape the dough into a rough square, pressing the loose bits together as you go. Using a rolling pin, roll the dough into a rectangle about 9 inches by 15 inches, keeping the longer side closest to you.
For the first turn, fold the rectangle of dough into thirds like a letter. Then turn the dough to the right once, so that the longer edge is closest to you and the seam is at the top. As the dough is still quite rough, a metal bench scraper will help you lift the dough to make these folds.
Flour the surface and the dough and repeat the step above two more times, for a total of three turns. As you do the turns, the dough will become more cohesive and streaks of butter will begin to show throughout. The dough will also soften as the butter begins to warm and the yeast begins to react. (If the dough is getting too warm and difficult to handle at any point, cover it in plastic wrap and chill it in the refrigerator for 15-20 minutes before continuing.)
To shape the dough, cut it in half with a knife or a bench scraper. Roll each piece of dough into a 12-by-8-inch rectangle, keeping the shorter side closest to your body. Rub the softened butter over the rectangles, dividing it equally between the two. Sprinkle the sugars evenly over the butter.
Roll up the dough, one rectangle at a time. starting with the shorter edge closest to you and keeping a tight spiral as you roll. Slice the log into 6 even slices and lay them on 2 parchment-lined half-sheets, spiral side up, 6 to a sheet.
To proof, cover each half-sheet with a towel or plastic wrap and allow to rest in a warm area for 2 hours. While the dough is proofing, preheat the oven to 425 degrees F. After 2 hours, the spirals will be slightly swollen but will not have doubled in size.
Bake for 15-18 minutes, rotating halfway through. The pastries are ready to come out of the oven when the sugars are caramelized and the tops of the danishes are golden-brown. These pastries are best eaten the day they're made, ideally within the hour.

Psst. Fellow Canadians out there, Happy Thanksgiving.

Monday, October 3, 2011

A good excuse

Wild rice and mushroom casserole
It's been awfully chilly in Chicago lately. Sweaters have been in order. I'd turn up the heat, but that's not how things work in my building. The steam radiators sort of just cycle at their whim, and right now, that means not very often at all. So, I've been looking for just about any excuse to fire up the oven.
It feels good just to be able to say that. When my boyfriend and I got back from Romania, we called up the gas company so that they could turn on our gas (there just wasn't any time before the trip) only to find out that there was a major leak in our apartment somewhere. Plumbers came, replaced everything between the stove and the floor, and still no luck. These were dark times. All we had was a slow cooker and an electric kettle to prepare our meals. So the plumbers came back to find the real source of the leak. It turned out that it was in the ceiling. My building is old, like really old, like originally-had-gas-lighting old. The pipe running from the main gas line to the old gas lighting in the kitchen had never been properly cut off and capped. Oops.
But all of that has been fixed now, which brings me back to excuses to fire up the oven. Here's a really good one: Heidi Swanson's wild rice and mushroom casserole. I've been a fan of Heidi's blog, 101 Cookbooks, for a long time. Hers was the very first food blog I'd ever stumbled upon, and it was just when I had started taking seriously the idea of cooking for myself. So, you could say that following her blog and cooking from it were formative experiences. I made my first batch of quinoa, my first vegan chocolate pudding, my first from-scratch veggie burgers, etc. encouraged by her firm and reassuring words (the gorgeous photos helped too). Though that was ages ago, I still turn to Heidi for inspiration when I'm looking for something original, wholesome, down-to-earth, and delicious. This casserole from her new(ish) cookbook, Super Natural Every Day, is all of those things.
Wild rice and mushrooms lend the casserole a little heft and earthiness. Sour cream, cottage cheese, and a couple of eggs add a bit of richness and hold it all together. Then there are a few French-inspired flourishes--Dijon mustard, gruyère, and a sprinkling of thyme. I added a few more of my own--port for some more depth, hazelnuts for crunchiness, kale for a bit of green. The result is spoonful after spoonful of warm, gooey, and comforting goodness. So when you're ready for a sweater, think about curling up with a bowlful of this too.

Wild Rice and Mushroom Casserole
Adapted from Heidi Swanson's Super Natural Every Day
Note: To make three cups of wild rice, bring 3 cups of water to a boil and add a pinch of salt. Stir in 1 cup of wild rice, return it to a boil, and then bring it down to a simmer. Cook covered for about 50 minutes. Drain and fluff. You'll have a little more than the three cups you need. Baking dishes: I divided the casserole mixture between six 10-ounce ramekins and popped them on a half-sheet, which worked out really well. My boyfriend and I tended to divide a third ramekin between the two of us, since we weren't feeling fancy enough to make any sides.

2 large eggs
1 cup / 8 oz cottage cheese
1/2 cup / 4 oz sour cream
1 teaspoon Dijon mustard
Pinch of chili flakes
Fine-grain sea salt
1-2 tablespoons unsalted butter
1/4 cup / 2 oz port
8 oz cremini mushrooms, chopped
1 large yellow onion, finely chopped
3-4 medium kale leaves, stems removed and finely chopped
3 cloves of garlic, finely chopped
3 cups cooked wild rice and/or brown rice, at room temperature
1/3 cup / 0.5 oz freshly grated gruyère cheese + more for sprinkling
2 tablespoons hazelnuts, chopped
1 teaspoon fresh chopped thyme or tarragon

Preheat the oven to 350 degrees F with a rack in the top third of the oven. Rub a medium-large baking dish with a bit of butter. Alternatively, you can use individual baking dishes.
In a large bowl, whisk together the eggs, cottage cheese, sour cream, mustard, chili flakes, and a scant 1/2 teaspoon of salt.
In a large skillet over medium heat, melt the butter with a few pinches of salt. Stir in the mushrooms and port. Cover and cook for five minutes, allowing the mushrooms to take in the port. Then uncover the skillet and let the liquid evaporate, about another five minutes. Continue to cook and stir every couple of minutes until the mushrooms are browned. Add the onion and cook until the onion is translucent, another two or three minutes. Stir in the kale and cook until just wilted, another couple of minutes. Then, add the garlic and cook for a minute or so, just until fragrant. Finally, add the rice to the skillet and stir until combined.
Add the rice mixture to the cottage cheese mixture, stir until well-combined, and turn into the prepared baking dish. Sprinkle with the half-ounce of gruyère and hazelnuts. Then, cover with aluminium foil.
Bake for 30 minutes. Remove the foil and bake for another 20-30 minutes, until the casserole takes on a lot of colour. If you are in a rush, you can finish it under a broiler for a couple of minutes, but watch carefully so the top of your casserole doesn't burn; it can happen quickly. The finished casserole should be hot throughout and golden along the edges. Sprinkle with the chopped thyme and a bit of grated gruyère.
Serves six.

Sunday, September 25, 2011

Romanian Holiday

Moldova
My summer, for a number of reasons, was hectic. But earlier this month, my boyfriend and I finally hopped on a plane, vacation-bound...sort of. You see, my boyfriend grew up in Romania and hadn't been back to see his extended family in fourteen years. So, he decided that it was about time to pay all of those great aunts, first cousins once removed, and grandmothers a visit, and he thought that I should come along to meet them all. So, with bags packed, off we went.
I wasn't sure what to expect. My only preparation for the trip came in the form of my boyfriend's occasional anecdotes about his childhood and a couple of Romanian films set in the pre-revolution era, all of which led me to believe that it wouldn't be much of a vacation. I was wrong. It was a great trip--one I imagine that might even have made Tony Bourdain proud (there is a No Reservations Romania episode, but it isn't terribly good). We ate a lot and well. We drank far more than we should have, encouraged as we were by our generous hosts. We caught a few good glimpses of Romanian life. It was all very satisfying.
Constanța
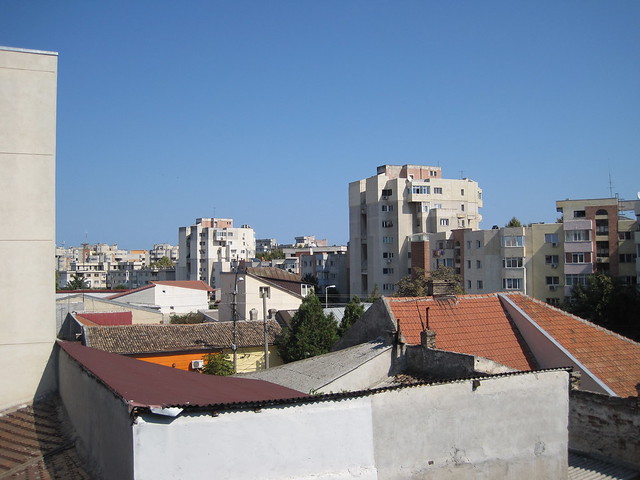
Now, you couldn't mistake Romania for one of its western European neighbours, but that's part of its charm. It has that distinctive post-communist feel to it (think East Berlin or urban China)--the drab, utilitarian apartment complexes whose concrete faces have not weathered the decades well, the old government buildings with their hulking, megalomaniacal grandeur--but step inside and most of it (at least in Bucharest, the capital) has been transformed. Part of the old House of the People (a seriously hulking monument to communism--the only building bigger in the world, apparently, is the Pentagon), for example, is now a contemporary art museum. All of Romania, it seemed to me, was like this, a hodgepodge of the old and new, a place with serious history now starting to find its modern identity--Roman ruins alongside 20th century war memorials, a once-opulent seaside casino looking out on today's beach-goers.
The best food, however, was straight-up peasant fare--tripe soup, cabbage rolls, pickles of all sorts, sausage, grilled meat, fresh cheese, fish just pulled out of the Black Sea. (Yes, we put our vegetarianism on hold for the trip--its status now is a bit up in the air.) We ate at a fair number of good restaurants in a couple of different cities--Bucharest, the lively, very urban capital, and Constanța, a smaller, coastal city in the southeast--but my favourite meals were definitely the ones we had at home with family and friends, serious multi-course meals, presided over by one or another of my boyfriend's grandmothers. As I said, a great trip.
Now, I was only there for about ten days, so I'm hardly an authority on all things Romanian. Our trip was limited to a few cities in the east, where my boyfriend's friends and family are scattered--Bucharest and Constanța, which I've mentioned, as well as Iași, a city in the northeast. But here's a list of ten highlights from my trip, in no particular order.
Mici on the grill
View from the hammock
The people: everyone I met on my trip was incredibly welcoming and generous. Old friends of my boyfriend opened their homes to us and took us around for glimpses of their cities and tastes of Romanian life (and food, of course). We were taken to markets, to the seaside, and even to an old, decrepit factory in Bucharest whose rooms were being rented out as inexpensive artist's studios. In turn, both my boyfriend's grandmothers fed us only as grandmothers can--think warm bowls of comforting, stewy goodness and three kinds of dessert at the end of every meal. And, towards the end of the trip, one of my boyfriend's uncles hosted a ridiculously good barbecue. There was so much great food and drink that I needed a nap between the main course and dessert. Luckily, there was a hammock on the rooftop terrace just waiting for me.
Sarmale: now, cabbages rolls are hardly anything exotic. Even my grandmother used to make them for Christmas dinners, and my family isn't at all Eastern European. The cabbage rolls (or sarmale) that I had in Romania, however, were something else--basically, elegant little cigar-sized packets of fatty, meaty, flavourful goodness (the ones we had in Iași especially so). Eaten with a little sour cream and a side of polenta and fresh farmer's cheese, there are few things better.
Mici
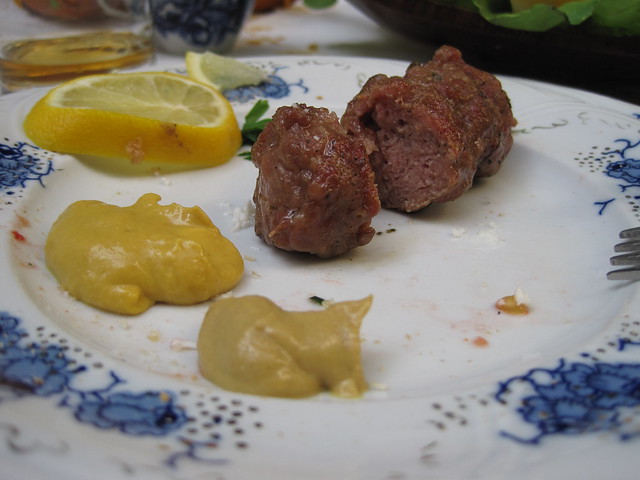
Mici: When we decided that we were going to eat whatever my boyfriend's family put on our plates in Romania--animal or vegetable--he got especially excited about one thing, mici. There isn't quite anything like them that most North Americans would be familiar with--the closest thing might be Turkish kebabs. But all you really need to know about mici is that they're an amazing blend of fatty ground lamb, beef, and pork marinated in beef stock and heavily punctuated with garlic that are shaped into generous oblong parcels and grilled over charcoal--in other words, delicious meat in tube form. We had these a couple of times at restaurants (they're more of a restaurant thing than an at-home thing), but the best were definitely the ones that my boyfriend's uncle grilled up at the barbecue. They lived up to my boyfriend's childhood memory.
The Black Sea
The Black Sea: where my boyfriend grew up, he was just a short walk from the Black Sea. He would spend his summers swimming in it, and his grandfather would take him fishing on the weekends. We didn't have a chance to take a dip, but we walked along the beach and got our fill of the tiny fish he used to catch at a nearby restaurant.
Inner courtyard
Eating outdoors: a Berlin-based philosophy professor complained to us recently with his usual wryness that Americans didn't seem to enjoy spending time outdoors, that there weren't any places in and around the university, for instance, where you could sit outside and enjoy a beer or a coffee. I tried to defend our neighbourhood at the time, but having spent some time in Romania, I think he might be right...at least about Chicago. Apart from some family meals, we pretty much only ate outside in Romania, and it was great. Even the heart of Bucharest, restaurants managed to make room for good-sized patios, little havens from the bustle of the city out in the open air.
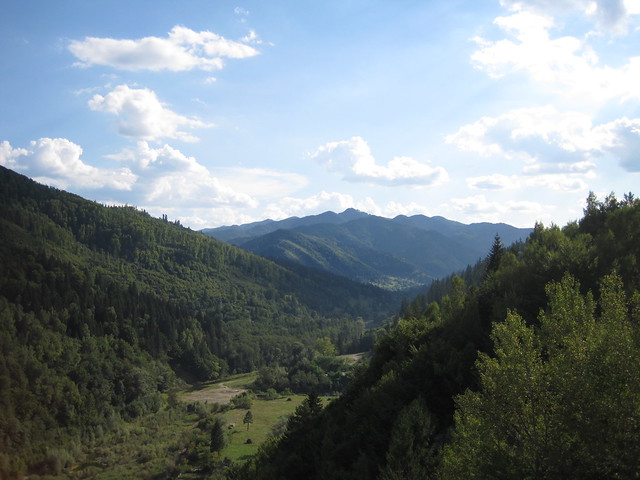
Moldovian mountains Orthodox church entrance
Driving through the mountains: I was a little sceptical when my boyfriend's uncle in Iași announced that we were going to spend the day visiting the many Orthodox churches and monasteries in the region. But, when I stepped out of the car after a couple hours of driving and found myself in a small village, I was struck by the stillness and serenity there. When you live in a city, you forget what silence is really like. Visiting the churches, which were rather beautiful, by the way, (the walls of Orthodox churches are always covered with gorgeous murals depicting biblical scenes and the lives of saints), was restorative. One of my favourite bits of that day was driving from one particular church to another--we took an old, narrow, densely wooded trail that took us from one side of a mountain to the other. It was bumpy, precarious, and thrilling. The air was thick with the scent of evergreens.
Ţuică: every culture, it seems, has its own clear, distilled, and fiery liquor. The Romanians' is ţuică, a sweet but hair-raising spirit made from plums. I'm sure that were it not for the supervision of one grandmotherly figure or another, the rest of the family would have insisted that we drink more of it. But, after too much wine and whisky already, one shot was definitely enough.

Column top
Roman ruins: the Romans annexed the territory on which present-day Romania sits before the 1st century AD and held it for a couple hundred years. As a result, broken columns and bits of Roman masonry are pretty common all over the place. I didn't get to run around a playground with two-thousand-year-old ruins just lying around when I was a kid. Did you?
Nicolae Comanescu: when we headed to the National Museum of Contemporary Art in Bucharest, I didn't really feel up to contemplating much art. I was happy to nurse cappuccinos on the warm, sunny terrace outside. But I'm glad that we went in. I'm not usually one for contemporary art, but I love Comanescu's work. Some of his pieces that we saw were bold, vivid, and playful collisions of beach scenes and familiar cityscapes. Others were sombre and atmospheric glimpses of Berceni, a neighbourhood in Bucharest. I would love to have one of his pieces hanging my living room.
The produce: pretty much all of the produce we ate in Romania was really fantastic, and the Romanians were nonchalant about it. There was no hype about heirloom varieties of peppers or tomatoes--a pepper was a pepper, and you ate them now, just as they were coming into the markets, or you roasted them and brined them by the bushel for the rest of the year. Everyone we met seemed to have something pickled or preserved for us to try. My favourite of the lot was definitely my boyfriend's aunt's raspberry preserves. After my much needed hammock nap at the barbecue, she brought me a little bowl of them made from raspberries she had picked in the mountains earlier this summer. They were incredible. (I suspect that the recipe my friend Oana posted here would make something just like them, if you could find yourself some wild raspberries.)