
There are few things I like better than bread and butter, plain and simple, but every now and then, the thought of having something fancier gets into my head, and I have to stop and bake, even if I don't really have the time. This weekend, for example, I thought to myself: bread and butter is fine and good, but what about bread with butter in it, lots of butter?
Now, I had a few options: slipping in the butter in soft gobs and making a glossy brioche dough (which would be good for doughnuts as well as brioche), pulling out my rolling pin and laminating it between thin layers of dough, as you would for croissants (there's some great PBS footage of Julia Child and Michel Richard making puff pastry this way here), or cutting in cold flecks of it and (again) layering the dough.
A quick glance through Kim Boyce's Good to the Grain decided it for me. I was going to have to go with the final option if I wanted her maple danishes. Now, before you shy away from the idea of making pastry at home, let me say this: don't be intimidated by the directions, making a "rough puff" like this one is really not all that hard to do--you just have to remember to keep your butter cold. Really, it's like making pie crust, except those are made all the more complicated by fillings and par-baking and potentially soggy bottoms. All you need to make these danishes is cold butter, a metal bench scraper, and some nerve. Setting aside a few quiet hours one morning is pretty important too. You don't want to feel rushed.
You start the night before by grating frozen butter into the dry ingredients. Easy-peasy. You don't even have to cut the butter to size and decide for yourself what "pea-sized" really means. The grater does the work for you. Just remember to toss the ribbons of butter with the dry ingredients every now and then as you're grating. There's no point in making all those pretty ribbons if they're just going to get warm and clump together in the bowl. Next, you add an egg and some milk, stirring just to get everything a little wet--don't be tempted to overwork things. The dough will be a bit rough-looking, but breathe easy--you've gotten past the first stage.
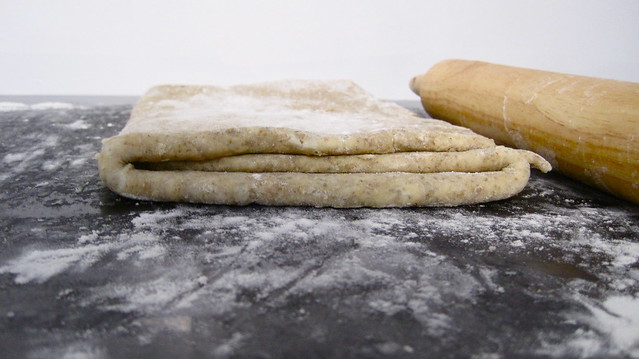
In the morning, it's time for the messiest bit--turning the dough. Basically, what this comes to is rolling the dough out, folding it over itself into layers, then rolling it out again, and making more layers. Repeatedly folding the dough onto itself like this layers the flecks of cold butter. And just as with pie crust, when the butter hits the hot oven, it'll melt, and its water content will escape as steam, leaving little pockets in the dough. With the butter layered so, what you'll get are layered pockets of buttery, flaky goodness. Just remember to keep the butter cold. If between turns you find that the dough is getting warm and more difficult to handle, feel free to cover it in plastic wrap and chill it in the fridge for 15 or 20 minutes before moving on. And don't be shy with the flour--flour your work surface generously before rolling out your dough, and while you're rolling it, gently lift the dough at the edges with your bench scraper occasionally, peel it back from your work surface a bit, and throw down some more flour. It can't hurt.
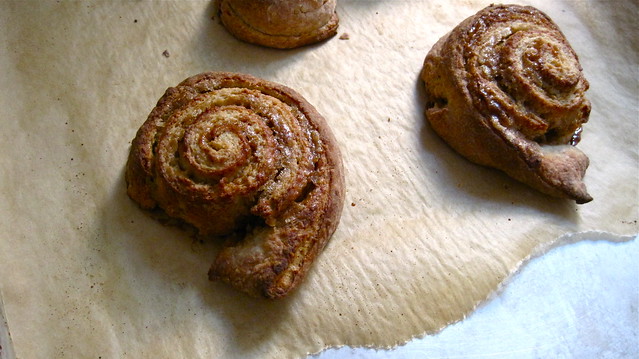
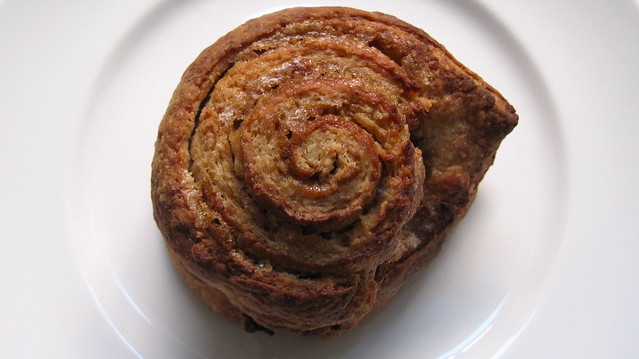
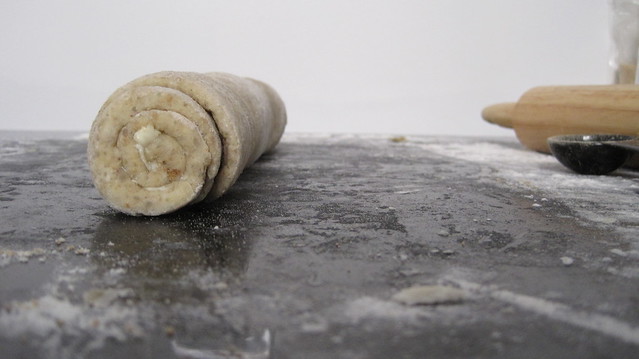
When you've rolled out the dough for the final time, rest easy. The worst is over. Spread a bit of softened butter across the dough, sprinkle it with brown sugar and maple sugar, roll it up, and cut it into pretty spirals--ready for proofing and baking. Leave the rest to the oven. Soon, you'll have a plate piled high with burnished and buttery beauties that you can be proud of.
Maple Danishes
Adapted from Kim Boyce's Good to the Grain
Note: About making these in advance. As the recipe says, these pastries are best eaten pretty much right out of the oven. If you want to make the whole batch (and you may as well, if you're going to go through the trouble of making them at all) but don't have twelve (or maybe just six, realistically) takers waiting for your oven timer to go off, you can freeze what you don't want to eat right away. Set the danishes destined for freezing on a separate half-sheet and let them proof with the rest. When the two hours are up, put them in the freezer for about an hour, just until they harden. Then, remove them from the half-sheet and return them to the freezer in a freezer bag. The night before you need them, thaw them on a half-sheet covered with plastic wrap in the refrigerator and bake them as the recipe directs the next day. About maple sugar. Reduce maple sap far past the syrup stage very, very carefully, and you get maple sugar. I bought mine from KAF.
PASTRY:
1 cup rye flour
2 cups all-purpose flour
1/4 cup sugar
3/4 teaspoon fine sea salt
2 1/2 teaspoons instant yeast
6 oz unsalted butter, frozen
3/4 cup whole milk
1 large egg
FILLING:
3 tablespoons unsalted butter, softened to room temperature
4 tablespoons maple sugar
2 tablespoons dark brown sugar
Sift the rye and all-purpose flours into a large bowl, pouring back into the bowl any bits of grain that remain in the sifter. Stir in the sugar, sea salt, and yeast. Using the large holes on a box grater, quickly grate the frozen butter into the dry mixture--this will ensure that the butter stays cold. With your hands, very briefly stir the strands of butter into the mix.
Whisk together the milk and egg in a small bowl. Add the liquid to the dry ingredients and stir just to moisten the flour. There will still be some drier bits of dough; that's fine. Cover the dough with plastic wrap and chill overnight.
The next day, take the dough out of the refrigerator and scrape it onto a well-floured surface. It will be quite rough, but don't worry; it will come together as you work with it.
Flour the top of the dough and use your hands to shape the dough into a rough square, pressing the loose bits together as you go. Using a rolling pin, roll the dough into a rectangle about 9 inches by 15 inches, keeping the longer side closest to you.
For the first turn, fold the rectangle of dough into thirds like a letter. Then turn the dough to the right once, so that the longer edge is closest to you and the seam is at the top. As the dough is still quite rough, a metal bench scraper will help you lift the dough to make these folds.
Flour the surface and the dough and repeat the step above two more times, for a total of three turns. As you do the turns, the dough will become more cohesive and streaks of butter will begin to show throughout. The dough will also soften as the butter begins to warm and the yeast begins to react. (If the dough is getting too warm and difficult to handle at any point, cover it in plastic wrap and chill it in the refrigerator for 15-20 minutes before continuing.)
To shape the dough, cut it in half with a knife or a bench scraper. Roll each piece of dough into a 12-by-8-inch rectangle, keeping the shorter side closest to your body. Rub the softened butter over the rectangles, dividing it equally between the two. Sprinkle the sugars evenly over the butter.
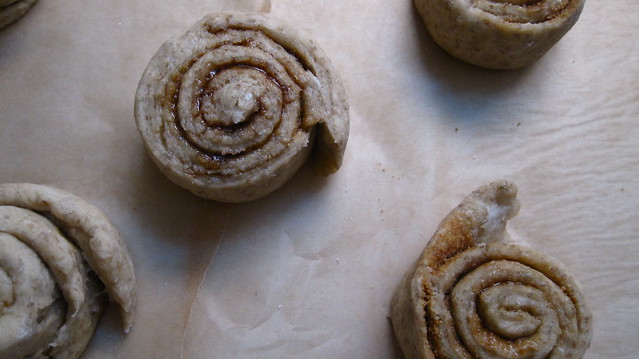
Roll up the dough, one rectangle at a time. starting with the shorter edge closest to you and keeping a tight spiral as you roll. Slice the log into 6 even slices and lay them on 2 parchment-lined half-sheets, spiral side up, 6 to a sheet.
To proof, cover each half-sheet with a towel or plastic wrap and allow to rest in a warm area for 2 hours. While the dough is proofing, preheat the oven to 425 degrees F. After 2 hours, the spirals will be slightly swollen but will not have doubled in size.
Bake for 15-18 minutes, rotating halfway through. The pastries are ready to come out of the oven when the sugars are caramelized and the tops of the danishes are golden-brown. These pastries are best eaten the day they're made, ideally within the hour.
Psst. Fellow Canadians out there, Happy Thanksgiving.
this is a really lovely idea. i've been looking for something like these to make nearer to december. i'd probably add some sort of dried fruit to the filling too :D
ReplyDeleteThanks, Zoe. I think that these danishes would be great for the holidays, especially since you can do most of the work ahead of time. Dried fruit would be nice--maybe golden raisins or chopped apricot or, even, cranberries? I bet you could even slip a layer of preserves between the butter and the sugars, if you wanted to. For some reason, apricot preserves sound really appealing to me.
ReplyDeleteI love the method of grating the butter--I've only used that once in a scone recipe but it turned out great.
ReplyDeleteI must admit, I've only tried one of Kim Boyce's recipes (the buckwheat and fig scones) and it was pretty troubling to work with so I've been intimidated by her recipes! I know that's a bad bias to have though (especially because I've heard so much good about her). Anyway, these looks really, really good. And I loved the bread with butter, bread in butter part, ha ha.
Amy, I've made the figgy buckwheat scones too. It was awhile ago, but I don't remember having any trouble with them. I think the fig butter alone is worth the trouble. It's now one of my favourite spreadables of all time, so I'm sorry you had trouble with the recipe! Admittedly, KB's recipes aren't what I would think of as ones for everyday baking projects. A lot of them are time-consuming and require expensive or specialty ingredients. So, I think they're best set aside for a special occasion for the most part. I think I've been pleased with almost all of the recipes I've tried from the book (probably about 6 or 7), though I've definitely been more impressed with the more pastry-like recipes than the cakes.
ReplyDeleteI definitely recommend the maple danish recipe. Again, it's probably not a recipe you can decide to follow on a whim or when you're in a hurry, but it's pretty straightforward once you get a hang of handling slightly temperamental pastry dough. Maple sugar is also a little on the pricey side, but at least you can freeze the extras and bake these whenever you want, so you know they won't go to waste.
That's true, Katie. I think I might give them a go then, I know the recipes have really done wonders for some people. Have you made her whole wheat chocolate chip cookies before? I'm curious about those.
ReplyDeleteOh, and the fig butter! No no that was heavenly, I spread that on toasts and ate it straight by itself. I think I might make that part again, I loved it so much. But the part of spreading it on on the soft buckwheat dough and trying to roll it up (I think my temps. were all off--I'm too impatient) was just messy. I still thought they were tasty, just maybe not as much as the frustration I put into them, haha.
I have made KB's whole-wheat chocolate-chip cookies, but I'm not sure if I'm in the best position to speak for the recipe for two reasons: first, I'm not really much of a chocolate-chip-cookie person (I know, it's weird), and second, I'm not sure that I actually used 100% whole-wheat flour. I bought my flour at this natural-foods store, and it wasn't clearly labelled, though it definitely had some wheat bran in it. So, given those two things, I thought the cookies were good, but I wasn't bowled over or anything. I might try making them again sometime.
ReplyDeleteIf you weren't too frustrated by that first experience with the buckwheat scones, I'd say that you should try again, though the fig butter definitely is the best part of the recipe. From what you've said, it just sounds like your dough got a little too warm, which can be really annoying. I try to avoid making pastry on really hot days. It's just not worth fighting the temperature. Think of the cooler weather that's hit us as prime pastry time.
Oh neat, you made them! And they turned out beautiful. I just got a bucket of maple syrup from my co-op, so I'll have to put this recipe in rotation. Fall and winter are worth it for the appropriateness of maple syrup alone!
ReplyDeleteThanks, Kari. I agree--winter can get dreary, but maple syrup goes a long way in making up for that.
ReplyDeleteJust a word of warning--this danish recipe doesn't actually call for maple syrup. And I don't think it would work well, given that you're supposed to roll up the dough and cut it into spirals. Syrup would just pool at the bottom of each danish, and you'd wind up with a burnt, sticky mess. Unfortunately, you're going to have to find yourself some maple sugar to make these, but I'm sure there are plenty of other delicious things out there that you can use that syrup for.