Friday, June 22, 2012

It took me by surprise

Chickpea sauté with yogurt
Since having moved to Chicago--that was almost two years ago now--I've somehow gotten out of the habit of making weekly trips to a farmers' market. Last summer, I found myself at the Logan's Square market only once, and that was by accident--I was in the neighbourhood for brunch with a friend from out of town, and it happened to be in full swing right around the corner. I've been really busy since last spring, but have I really been that busy? Probably not. Tomorrow, I will make it to the market in my neighbourhood bright and early. Cross my heart.
A few weeks ago, I was really desperate for a trip to the market. It was stiflingly hot in the apartment, and I was tired of the rich, heavy, stewy things that had been my winter staples. I wanted something fresh, something that tasted like the season. But I was still scrambling to meet a deadline and couldn't tear myself away from my work for too long. So, for dinner that night, I settled on something that looked practical, something that I could shop for just down the street.
Rinsing chard Yogurt-dolloped
Yotam Ottolenghi calls this dish a chickpea sauté with greek yogurt. On paper, honestly, it looked pretty unremarkable to me, a warm salad of Swiss chard, carrots, chickpeas, lemon, and herbs. I wasn't expecting anything spectacular. So it took me by surprise. It was everything that I'd been wanting. It was refreshing and bright, evocative of early summer. The chard stems and carrots still had some of their crunch and initial sweetness, as though just pulled from someone's garden. The yogurt, mint, and cilantro, I'm sure, helped with that, cooling and fresh on the palate. I could almost forget that I hadn't been anywhere near a farmers' market that day. And even though I will get myself to the market tomorrow, I might just look for more chard and carrots there with this dish in mind.

Update 2013-05-22: Having made this recently again, I have to say that I actually prefer using regular full-fat yogurt to Greek here. Greek is just a little too dry. Regular yogurt gives the chickpeas and vegetables a welcome bit of sauce.

Chickpea Sauté with Yogurt
Adapted from Yotam Ottolenghi's Plenty

1 large bunch Swiss chard (about 8 cups)
5 tablespoons olive oil, plus more to finish
4 medium carrots, peeled and cut into 1/2-inch dice
1 teaspoon caraway seeds
1 1/2 to 2 cups freshly cooked chickpeas (canned are fine too)
2 garlic cloves, crushed
1 tablespoon mint, chopped
1 tablespoon cilantro, chopped
1 tablespoon lemon juice
1/2 cup Greek or other full-fat yogurt
Salt and freshly ground pepper

Separate the chard stalks from the leaves. Blanch the stalks in plenty of boiling salted water for 3 minutes. Add the leaves and continue cooking for 2 minutes, then drain everything. Refresh under cold running water and squeeze dry, then chop roughly.
Heat up 4 tablespoons of the olive oil in a large, heavy saucepan. Add the carrots and caraway seeds and sauté for 5 minutes on medium heat. Add the chard and chickpeas and continue cooking for 6 minutes. Now add the garlic, herbs, and lemon juice and some salt and pepper. Remove from heat and cool down a little. Taste and adjust the seasoning.
To serve, mix together the yogurt, olive oil, and some salt and pepper. Pile the vegetables on serving dishes and spoon the yogurt on top. Sprinkle with freshly ground pepper and drizzle over more olive oil.
Serves 4.

Friday, June 1, 2012

Falling into place

Coconut flan
Everything has to be up in the air for anything to fall into place. I read that a little while ago in an Ed Roberson poem, when everything really did feel up in the air for me. I was struggling to write and distracted by questions. What am I doing here, anyway? Where am I going from here? How am I going to get any of this done? It all had to do with these being the very last few weeks of my second year here. You see, when you're a graduate student, you can't just go on taking classes, writing suggestive twenty-page papers at the end of each, and then moving on. Eventually, you have to find something to commit to, something that you can't get out of your head, something that keeps you up at night. A dissertation certainly isn't the best or last thing a graduate student hopes to write, but like people say, it's work that defines you for some time to come. So, for a while, I was doing a lot of writing, a lot of handwringing, a lot of searching, and didn't have time for much else.
And our meals definitely suffered for it. The both of us were too busy, too tired, to cook with much thought, much excitement. We ate lots of hurried, uninspired dinners together after which we went straight back to work. Cooking and cleaning up were toilsome tasks. Our hearts and minds were elsewhere.
Caramel
But just recently, things began to feel as though they were finally falling into place. Passages that I had been struggling with for a while suddenly made sense. I was able to write steadily and with satisfaction. And I made some progress with deciding on what I want to do next. I stumbled on a philosopher's work not much appreciated, not widely read, that struck me in a way that little philosophy tends to these days. I was thrilled. And I had a meeting with one of my advisors that was so reassuring. I was so relieved. I almost wanted to hug him, but that would have been weird.
Around the same time, Octavian and I invited a couple of friends over, and we had one of those deeply satisfying, memorable meals that just sticks with you. The day before, we'd just come home with Ferran Adrià's The Family Meal, so we decided to take our chances and cook the whole meal out of it: saffron risotto, a sharp salad of ribboned carrots and mint, sausages fried with thyme and garlic, and coconut flan. We were a little disorganized, and we didn't get food on the table until pretty late, but all of us, I think, were happy and full at the end of the night.
If you've heard anything about Ferran Adrià before, you might not think that he'd put out a cookbook that was of any serious interest to most home cooks. He was the man behind the Spanish restaurant El Bulli for nearly twenty years and, while there, more or less revolutionized fine dining with new techniques and playful presentations. He's probably best known for his foams,  which involve familiar liquids combined with a stabilizing agent and shot through a siphon (like you'd use for whipped cream)--not really the stuff of home cooking.
Baked flan
But The Family Meal is definitely a book that home cooks should embrace. It is practical, well thought-out, accessible, and beautiful. A "family meal" in the restaurant world is the daily meal that all a restaurant's staff members sit down to and have together. And even at El Bulli, that meant simple and nourishing food. The book is organized into 31 three-course meals that were made for the staff at the restaurant. For each meal in the book, there's an ingredient list, a timeline that shows you when to start preparing what, and step-by-step directions for the dishes, each step accompanied by a photograph. There are even multiple scalings of each recipe--for serving 2, 6, 20, or 75 people. Everything is beautifully laid out and very well organized.  And the dishes themselves are pretty down to earth for the most part--lots of familiar, comforting things, like pork ribs with barbecue sauce and roast chicken, as well as restaurant classics, like Waldorf salad and pasta bolognese. (There are also a good number of more upscale and unusual dishes, including a caramel foam and a potato-chip omelet.) What makes them stand out, at least as we've found so far, are the sometimes unorthodox methods with which they're prepared. Take the risotto we made--Adrià has you add white wine to the pan before the rice goes in. In part, it's just for deglazing, but it also helped along the rice, getting it to that chalky stage at which you add the stock. It was just one little thing among others, but it made for an incredible risotto.
That said, the dish that I want to share with you today isn't Adrià's saffron risotto but his coconut flan. This dessert is one that I think every home cook should have in his or her arsenal. It's simple to prepare and can be made a few days in advance. It calls for a short list of inexpensive ingredients and can be scaled for as many people as will fit around your table. And it also happens to be marvellous.
A few bites later
My favourite moment in making it is preparing it for the table. When you tip the flan out of its ramekin, some of the dark caramel that had been at the bottom seeps out onto the plate, creating an impromptu sauce. It, like the flan's caramel crown, has a bitter edge to it and complements the coconut custard perfectly.
Like I said, things have begun to feel as though they're falling into place.

Coconut Flan
Adapted from Ferran Adrià's The Family Meal
Note: Cooking the caramel. Typically, for cooking caramel, you'd want to boil the sugar at a higher temperature, but because of just how little caramel is required for this recipe, you won't be able to control the heat of the sugar if you cook it at a higher temperature. It may be perfect when you take it off heat but burnt by the time it hits the ramekins. If you're new to cooking caramel, consider looking over these tips from David Lebovitz. Cooking times. Adrià actually instructs you to cook individual flans for 15-20 minutes, but I found that mine were still completely liquid at the 20-minute mark. I recommend checking on your flans every 5 or 10 minutes after 20 minutes have passed. In the meantime, I should really check the accuracy of my oven. Serving. In the book, Adrià bakes his flan in a long loaf pan and then serves the flan in slices. If you're cooking for a large enough crowd--I'd say, at least 15 people--you too could do away with individual ramekins and make your life easier. A round cake pan, if your crowd is a little smaller, would probably also do nicely.

CARAMEL:
18 g / 4 teaspoons water
65 g / 5 tablespoons sugar

FLAN:
2 eggs
145 g / 1 cup coconut milk plus more for serving
20 g / 3 tablespoons unsweetened coconut flakes
25 g / 2 tablespoons sugar

Preheat the oven to 350 degrees F.
Lay out four 3-inch ramekins. Put the water and sugar in a small saucepan over low heat. Stir until the sugar has dissolved. Increase the heat to medium. In a few minutes, the sugar will boil and start to take on colour. Adjust the heat as necessary to prevent it from burning. The caramel is ready when it is a dark, coppery colour and starts to smoke. Working quickly, divide the caramel between the ramekins--it's easiest just to pour from the saucepan directly into each--and give each ramekin a swirl so that the caramel coats its bottom evenly. Set aside to cool.
Break the eggs into a bowl and whisk until frothy. Put the coconut milk, coconut flakes, and sugar into another bowl and whisk until the sugar dissolves. Add the eggs and whisk until incorporated. Ladle the mixture into the caramel-coated ramekins.
Cover the top of each ramekin with a square of tin foil and transfer all of them to a roasting pan. Pour enough cold water into the pan to come up halfway up the sides of the ramekins. Bake for 35-45 minutes (see note above), making sure the water does not boil. Once the flan is cooked (it will be just firm to the touch), let cool in the water. Remove from the water and chill in the fridge. It will keep there covered for up to 3 days.
When ready to serve, run a small, sharp knife around the edges of each flan to loosen it from the ramekin. Gently invert onto a plate for serving. Serve each with a spoon or two of the remaining coconut milk.
Serves 4.

Wednesday, May 16, 2012

Of course, there was cake

Chocolate-chip Layer Cake
This past weekend, we celebrated Octavian's birthday. We put down our books. We strolled out in the sunshine. We sipped on dulce de leche milkshakes. We cleaned decades' worth of dust off the LPs that belonged to Octavian's late grandfather. We let the needle drop and sat back as Ella's voice filled the room. It was a wonderful moment. These records had sat untouched for years in Octavian's grandparents' home in Romania. Many of them were British pressings of 1960s pop and jazz smuggled into the country during the Ceaușescu regime. It felt good to be able to give them a new life in our home.
And, of course, there was cake. The folks at Momofuku Milk Bar call this one a chocolate-chip layer cake, but that, I think, hardly captures it. What makes this cake worthy of a chorus of oohs and aahs are the bright ribbons of passion-fruit curd running through it, bold, tart, and unmistakably tropical. The curd plays brilliantly with the other elements--coffee frosting, chocolate crumb, chocolate-chip cake--and lingers just a little in the mouth, exotic and floral. It is wonderfully good stuff.
First layer Chocolate crumb layer
Without a doubt, in fact, it's the best stuff I've made out of the Milk Bar cookbook. I am crazy about this curd. I wish I'd made more last week--enough to smear on toast, to swirl into yogurt, to sandwich between bittersweet-chocolate-wafer cookies, to eat by the spoonful. It is that good.
Admittedly, this curd does demand a little more of you than the typical curd. You'll need a blender and some gelatin. But it's worth it. The addition of gelatin gives this curd serious body. Most curds rely only on eggs for thickening, and while that's fine for toast, curd made that way won't hold up in a cake or sandwiched between cookies. This curd, by comparison, is versatile. Let your imagination run wild. Whatever you come up with, this curd will not be out of place.
Chocolate chips! More fillings
And if you're wondering, Octavian and I really liked the cake as a whole. Passion fruit, coffee, and chocolate are amazing together (and make for a far more balanced cake than the chocolate-malt, if you ask me). But in our heart of hearts, we're still apple-pie layer cake people.
Crowned with chocolate chips The remaining slice

Passion-fruit Curd
Adapted from the Momofuku Milk Bar Cookbook
Note: About the passion fruit puree. There are a number of online vendors that sell very high-quality frozen fruit purees, but with overnight shipping and the quantity of puree recommended to ensure that it all stays cold, it can add up. I recommend that you check the freezer aisle of Latin markets in your area first. Chicagoans, I found more than enough El Sembrador passion fruit puree for this recipe for about $3 at Tony's Finer Foods in Logan Square. I was pleased with the quality.

100 g / 1/2 cup passion fruit puree
65 g / 1/3 cup sugar
2 eggs
1 gelatin sheet or 1/2 teaspoon powdered gelatin
170 g / 12 tablespoons (1 1/2 sticks) butter, very cold
2 g / 1/2 teaspoon fine sea salt

Put the passion fruit puree and sugar in a blender and blend until the sugar granules have dissolved. Make sure to scrape under the blender's blades--granules tend to deposit there. Add the eggs and blend on low until you have a bright-orange-yellow mixture. Transfer the contents of the blender to a medium saucepan. Clean the blender canister.
Bloom the gelatin. Soak the sheet in a small bowl of cold water. The gelatin is bloomed when it has become soft, after about 2 minutes. If the gelatin still has hard bits to it, it needs to bloom for longer. If it is so soft it is falling apart, it is overbloomed; discard the gelatin and start over. Gently squeeze the bloomed gelatin to remove any excess water before using.
Heat the passion fruit mixture over low heat, whisking regularly. As it heats up, it will begin to thicken; keep a close eye on it (this can take awhile--at least 15 minutes, in my experience). Once it boils, remove it from the stove and transfer it to the blender. Add the bloomed gelatin, butter, and salt and blend until the mixture is thick, shiny, and super-smooth.
Transfer the mixture to a heatproof container and put it in the fridge until the curd has cooled completely, at least 30 minutes. The curd can be refrigerated for up to 1 week. Do not freeze.
Makes about 1 cup.

Technical Notes for Milk Bar's Chocolate-chip Layer Cake

The directions for this cake were, for the most part, straightforward. Below are a few points of obsessive detail that you might find helpful when making the cake.
  • Passion-fruit curd: when you're dissolving the sugar into the puree in the blender, give the underside of the blades a scrape with a spatula before proceeding on. Sugar tends to deposit there, and you want that sugar in your curd.
  • Cake mixing: be warned--the chocolate-chip cake has far more liquid than the other Milk Bar cakes, so you really need to mind Tosi's mixing instructions with this one. I mixed my cake batter for the six minutes required, and still my cake almost baked out of its quarter-sheet. It was also less dense than it should have been and was more difficult to work with as a result. The lesson: mix, mix, mix!
  • Chocolate chips: I'm not really sure why Tosi wants you to scatter the chips over the batter just before baking. Why not just fold them in by hand before spreading the batter over the quarter-sheet? Nearly all my chips stayed at the surface of the cake. I think the final cake would have had more visual appeal if you could see the chips in the profile of each of the cake rounds.
  • Serving: This cake was by far the easiest to cut slices out of. With previous Milk Bar cakes, I've had the slices collapse on me while trying to transfer them to a plate. Keep this cake cold enough, and it will slice beautifully. That said, I recommend, if you can manage, waiting for the cake slices to come up to temperature a little before digging in, at least 10 minutes. Cold, hard mini chocolate chips just don't have that much appeal.
  • Height: This layer cake was noticeably more stout than other Milk Bar layer cakes I've made. I chalk that up to the cake's components--they don't give the cake as much height as some others.

P.S. If you're looking to make the whole cake, you can find the recipe posted here.

Sunday, May 6, 2012

Those first few minutes were glorious

Grapefruit jelly filling!
Common sense recommends that you not fry doughnuts in your kitchen when it's 82 degrees F out or when you're planning to attend a rather technical philosophy talk in a few hours or when the only ventilation in your kitchen is an open window. It also recommends that you not down four or five such doughnuts (as modestly sized as they might be) within seconds of one another. But some considerations tend to drown out that sober, well-meaning voice in your head--for example: grapefruit-jelly doughnuts! Just the idea of them--it's like bells ringing in your head. It chimes and crashes 'til you wake up one day thinking, "Common sense--what's that?" and then find yourself juicing grapefruits in the kitchen.
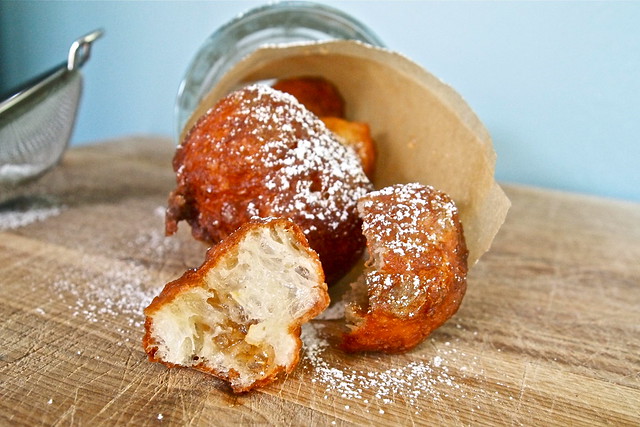
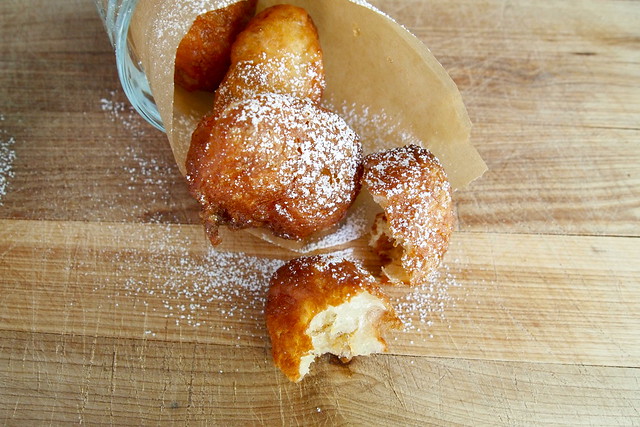
So it was under the spell of these doughnuts that a few friends and I gathered in my sweltering, cramped kitchen this past week, dropping bits of brioche dough into hot, shimmering oil to have them sizzle, puff, and blister golden. It got pretty sticky and greasy in there, but that didn't matter to us. Warm doughnuts filled with grapefruit jelly--the idea kept us going.
Squeezing grapefruits Grapefruit jelly
And when we were through, those first few minutes were glorious. We stood there together in the thick air of the kitchen, just eating. We reached for one doughnut, then another, then another. Whatever sense we had had left us. We blissfully gorged ourselves. It was not, perhaps, our finest moment. Five or six doughnuts in, we started to feel the grease on our fingertips, the sugar going to our heads, and had to stop ourselves. But I maintain that those first few minutes were glorious. The aftermath--not so much. Octavian and I, anyway, were headache-stricken and drowsy for the remainder of the day. Doughnut coma is a phrase that comes to mind.
But I don't mean to discourage you from making your own doughnuts at home. It's a good way to spend an afternoon with friends (you should just round up more than I managed to to help you with the eating), and these doughnuts are really good. Make a party of it. Your friends will thank you.
That said, making these doughnuts in particular does require a bit of planning ahead and a few extra hands (remember those friends?). It's easiest, I think, to spread the work over two days. On the first day, you should put together the brioche dough. This is my favourite part. You start by mixing together a basic yeasted dough. Then you add butter, a lot of butter, to the dough, bit by bit, until it's satiny and yielding. This process takes a while, and you may find it tedious, but I am all for the waltz of dough and butter whirling around the bowl of my stand mixer. I find it mesmerizing.
Leaven and poolish Butter and zest Proofed dough
Brioche dough is not typically what you'd use for jelly doughnuts. By weight, the butter-to-flour ratio in brioche ranges from 1:2 to 4:5, which makes the dough far richer than what you find in most doughnuts. But this, I think, makes these doughnuts all the better--airy, delicate, meltingly tender. (I wouldn't have thought to do this myself. I came across the idea in Tartine Bread.) And the grapefruit jelly does help tame some of that richness.
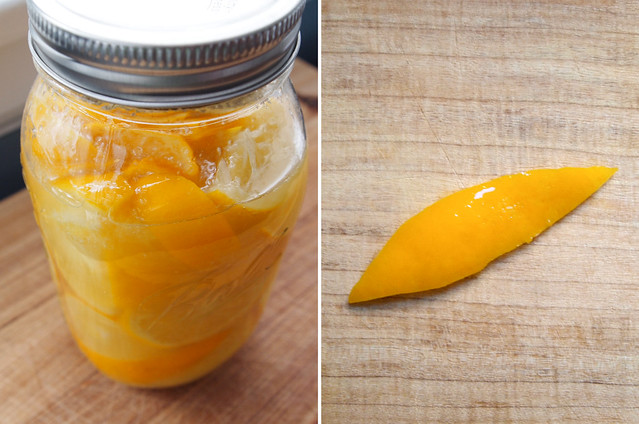
You should make the jelly on the first day too, if not beforehand. It's a cinch and can be made well in advance (I made mine several weeks ago, when it was still legitimately grapefruit season)--just transfer it to a clean jar and store it in the freezer until you need it.
On the second day, gather your friends and put them to work (what else are friends for?). You should at least have one other person on hand. You'll have a much easier time with the deep-frying that way--maintaining the oil temperature, keeping track of the time, and turning the doughnuts in the oil are a lot for one person to do, given how quickly the doughnuts fry. And if you have more friends willing to help, all the better. Make yourselves a little assembly line. You'll definitely need a second set of hands when filling the doughnuts. (Try holding a pastry bag full of jelly and piercing a doughnut with the filling tip--no good can come of it.)
Doughnuts! Doughnuts
So, these doughnuts do call for a good deal of effort, and many of them will disappear into your friends' mouths seconds after you've put your pastry bag down. But I can think few better things to do with friends when you've got an afternoon.

Grapefruit Jelly Doughnuts
Adapted from the December 2011 Bon Appétit and Tartine Bread
Note: About the grapefruit jelly. The first time I cooked the jelly, it didn't set. I failed to note the importance of using a large saucepan. If this happens to you, just return the mixture to a large saucepan and bring to a boil. Let it boil for 3-4 minutes and pour it back into the shallow dish. You do not need to let the jelly reach 220 F while on the stove--it will set too hard if it reaches this temperature. If the jelly has set too hard, return it to a saucepan and cook over medium heat. Add up to 1/2 cup more of fresh grapefruit juice and whisk to incorporate. Bring it to a vigorous boil and then pour it back into the shallow dish to cool and set. And if you find yourself with extra jelly, it's wonderful on toast. About the brioche dough. I used Tartine Bread's brioche recipe for my doughnuts, which involves using sourdough starter and poolish for leavening. I'm pretty confident, however, that just about any brioche dough with a similar butter-to-flour ratio, 1:2, will produce good results. I like this Dorie Greenspan recipe. You might also consider using this brioche dough (but without all of the savouries, of course). Or, if you have Peter Reinhart's Bread Baker's Apprentice, you could also use his recipe for "middle-class" brioche. Whichever recipe you settle on, it will most certainly make more dough than you'll want for doughnuts. Scale the recipe and portion out the dough so that you have just as much as you need or bake a loaf of brioche with the extra like I did. Follow your chosen recipe's directions up to and including bulk fermentation (the first rise) and then chill the dough (for up to a day) until you're ready to follow the procedure below. About the safflower oil. Depending on the size of the pot in which you're deep-frying, you may need up to 1 quart of oil. Once you've finished the frying, you can let the oil cool and then filter it through a fine-mesh sieve or a coffee filter to get at least one more use out of it. Store it in the fridge until then.

GRAPEFRUIT JELLY
2 cups sugar
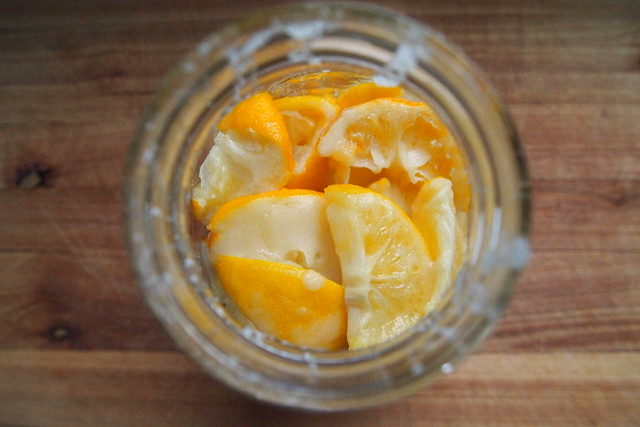
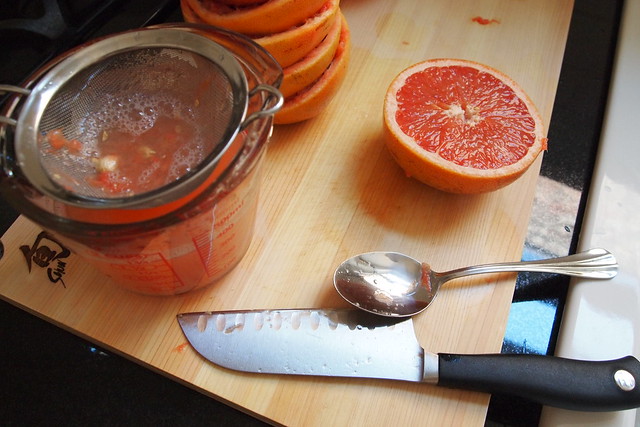
1 1/2 cups fresh grapefruit juice (from about two and a half grapefruits)
1/4 cup liquid pectin
1 vanilla bean, split lengthwise

DOUGHNUTS
700 g brioche dough, chilled (see note above)
Safflower oil for deep-frying
Powdered sugar for dusting

SPECIAL EQUIPMENT
Long-handled slotted spoon
Deep-fry/candy thermometer
Stand mixer
1 1/2-inch biscuit cutter
Pastry bag fitted with a Bismarck tip (no. 230)

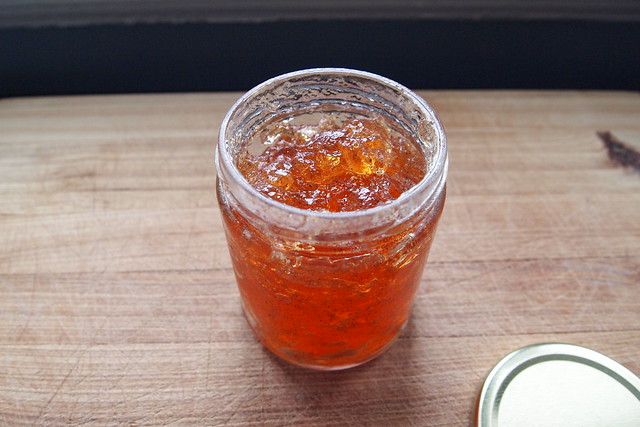
Make the grapefruit jelly. Combine the sugar, grapefruit juice, and pectin in a large saucepan (the mixture tends to foam as it heats up--a larger saucepan will allow it to properly boil and release enough of its water content to set into a jelly). Scrape in the seeds from the vanilla bean and add the pod. Cook over medium heat, stirring, until the sugar dissolves. Increase the heat to high and whisk until mixture boils vigorously, about 6 minutes. Pour mixture into a shallow, heat-proof dish. Remove the vanilla bean pod. Let cool completely at room temperature. Cover and chill until set, at least 2 hours. The jelly should have a consistency similar to preserves--thick enough to cling to the end of a spoon. The jelly can be made up to a week in advance (or earlier if stored in the freezer in a clean jar).

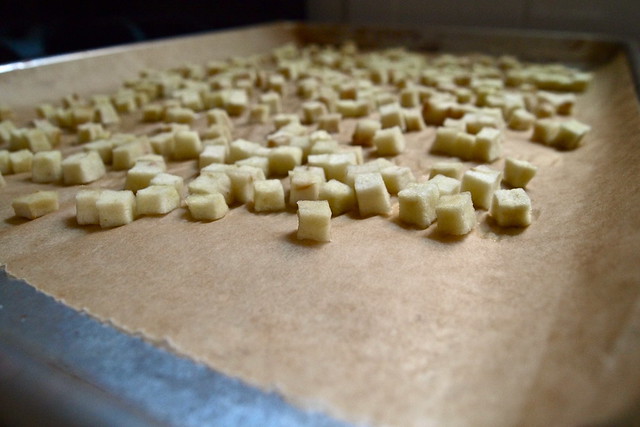
Shape the doughnuts about 2 hours before serving. Lightly flour the dough and the work surface. There are two options for shaping the dough. (i) divide the dough into 3 equal portions and roll each portion into a cylinder about a 1/2 inch in diameter. If the dough feels as if it will not stretch further, let it rest for 10 minutes and continue rolling. Transfer the dough to a cutting board and set in a draft-free place or cover with a kitchen towel. Let rise until the dough looks soft and inflated, 1 to 2 hours. Cut the dough into on the diagonal into pieces about 2 inches long or as you prefer and then place near the stove. (ii) Roll the dough out to a thickness of 1/2 inch. Cut circles out the dough with a biscuit cutter. Transfer the circles to two lightly floured half-sheets and set in a draft-free place or cover with a kitchen towel. Let rise until doubled, 1 to 2 hours. Place near the stove.
Pour oil into a heavy, high-sided pan to a depth of 2 to 3 inches. Heat the oil over medium-high heat until it registers 375 degrees F on a deep-frying thermometer.
When deep-frying it's best to set up your prep area like an assembly line so you can work safely and efficiently. Set a rack near the stove and under it place a layer or two of papers towels.
Carefully slip four pieces of dough into the hot oil and fry until golden brown, about 1 minute. Using the slotted spoon, turn the dough and fry until brown on the second side, about 1 minute.
Carefully remove the doughnuts from the oil and transfer to the wire rack. Fry the remaining pieces of dough, checking the temperature of the oil intermittently. If necessary, allow a couple of minutes for the oil to return to 375 degrees F in between batches.
Transfer the grapefruit jelly to a pastry bag fitted with a Bismarck tip. Filling the doughnuts is a two-person job--you need one set of hands to hold the pastry bag upright and to pipe out the jelly and another set of hands to insert the Bismarck tip into the doughnuts. A squeeze bottle fitted with a 1/4-tip would also work. Fill each doughnut with about a 1 teaspoon of jelly. 
Dust the doughnuts with powdered sugar and serve immediately.
Makes 40-50 two-bite doughnuts.

Tuesday, April 24, 2012

For the Big Day

Macaron Frivolité
I wasn't planning on making macarons this past weekend. But then a good friend of mine called on Friday morning and asked apologetically if I could make a little dessert for his wedding reception. The wedding, I knew, was taking place on Sunday, just two days from then. Over the phone, I could here the chaotic clanging of pots and sheet pans. Clearly, the happy couple already had their hands full. I assured him that I'd have something put together for then and wished him luck.
Macarons seemed fitting for the occasion. When the couple had first gotten together, Octavian and I had had them over for dinner, and we finished the meal with a few Hermé macarons in the sweltering summer heat. And marriage--well, that seemed another beginning of sorts, so I set about separating some eggs and blanching some almonds.
8mm apple cubes Piped shells
Given that I only had a day or so, there was no time to suss out offerings at the farmers' market. I had to make do with what I already had at hand. Being April, that meant winter apples, butter, sugar, and cream--all that you really need to make Pierre Hermé's macarons frivolité.
And these macarons might just be my favourite yet. There are two parts to their filling: apples diced into tiny gems and then cooked gently in the oven and a deep, dark salted-butter caramel chilled and then whipped up cloud-like with butter. Together in the macarons, the effect is something like apple tarte tatin made fleeting, ethereal--there and then gone before you know it.
Baked macaron shells Salted-butter-caramel cream
The wedding, if you're curious, went beautifully. I got a little teary-eyed seeing the two of them at the altar. They were perfect. And afterwards, there were grapefruit mimosas, small savoury bites, marzipan, zserbó szelet, macarons, and tons of cake. The macarons were a hit with the guests. They were being snapped up in kitchen even before the desserts had been laid out. The bride admitted later that she'd secretly hoped that I would bring macarons. I was glad to have done my little part for the big day.
Overhead Macarons


Macarons Frivolité 
Adapted from Pierre Hermé's Macaron
NOTE: For more general macaron advice, see this postEquipment. You'll need at least two heavy-duty half-sheets to bake the shells. You can bake them in two batches, about 36 shells per sheet--Italian meringue is stable enough to stand for an hour or longer. You do, however, need to double up on half-sheets when you bake the shells--otherwise, the shells will crack during or after baking. The second half-sheet insulates the macarons from the oven's heat. (If you double the recipe as I did, the going is easier with three half-sheets on hand.) You'll also need a pastry bag and a no. 11 tip for piping the shells and filling, a candy thermometer for the meringue and caramel, and a mixer for the meringue and the buttercream. Aged egg whites. Egg whites that have been left in the fridge for 5-7 days, covered with plastic wrap with a few holes poked, will be easier to whip up for the Italian meringue. This allows some of their moisture to evaporate and their proteins to relax. Baking times. Hermé has you bake the shells for 12 minutes, but the time will vary depending on your oven. I've found that at 14 minutes, the feet on my macarons are better formed, and the shells no longer stick to the parchment on removal. Apples. You need at least 144 apple cubes, give or take, if you're making 36 macarons and putting 4 apple cubes in each. From Hermé's directions, I wasn't really clear on what to look for to determine whether the apples were ready. I baked mine for about an hour and 25 minutes, basically until the heat had taken away their raw edge. At this point, they're sort of pale and a little spongy. Not very pretty, but not to worry, no one will really see them. Colour. Before baking, my macaron shells were more or less the colour of mustard. Baking improved their colour. Even so, I might just skip out on the yellow food colouring all together next time. Trablit. Trablit is a French coffee extract. I don't know how it compares to more common coffee extracts from personal experience, but I'm sure that Hermé and other bakers favour Trablit because it's really just super-concentrated espresso with a little added sugar. (As a result, you don't need to worry about very much extra liquid interfering with the other ingredients.) In the macarons, the coffee flavour isn't very pronounced--though it's certainly there if you try the shells on their own. I can't really say quite what it added to the macarons overall. But I found a reasonably priced bottle of Trablit here at L'Epicerie. Buttercream. I wouldn't recommend making the buttercream on a very hot day. The butter might melt out of it. If you're worried about it, pop it in the freezer for 5 or 10 minutes before proceeding. But don't let it harden--otherwise, your piping won't be very pretty. The consistency of the buttercream should be airy and mousse-like. You may find yourself with leftover filling. Let your imagination run wild.
(These aren't the prettiest macarons I've ever made. I think my problem is a combination of letting the Italian meringue get too stiff and not mixing the meringue with the almond mixture thoroughly enough. The macaron batter holds its shape too well, which leaves the shells with little tails from piping. I'm a little out of practice.)

OVEN-DRIED APPLES
2-3 granny smith apples (or any other tart, baking apple)
15 g lemon juice
10 g granulated sugar

MACARON SHELLS
150 g powdered almonds
150 grams powdered sugar
55 g aged egg whites
7.5 g yolk-yellow food colouring
7.5 g Trablit coffee extract
+
150 g granulated sugar
37 g water
55 g aged egg whites

TO FINISH
Coarse-grain sugar

CARAMEL BUTTERCREAM
150 g granulated sugar
167 g heavy cream
33 g butter
2 big pinches of good-quality sea salt
145 g unsalted butter, softened

The night before, prepare the oven-dried apples. Peel and core the apples. Cut into 8 mm cubes and toss in the lemon juice as you go. Coat with the sugar.
Preheat the oven to 90 degrees C / 194 degrees F. Spread the apple pieces over a parchment-lined half-sheet in an even layer. Slide them into the oven and let them dehydrate for about an hour, depending on the variety of apple. The cubes should look somewhat dry when they're ready. Leave them at room temperature until the next day.
The next day, prepare the macaron shells. Sift the powdered sugar with the almonds. Mix the food colouring with one of the 55 g portions of egg whites. Add the egg mixture to the sugar and almonds without mixing.
Bring the sugar and water to a boil. When the syrup reaches 99 degrees C / 210 degrees F, begin whipping the second 55 g portion of egg whites. When the syrup reaches 118 degrees C / 244 degrees F, slowly pour the syrup into the whites, letting the syrup run down the sides of the bowl so that it doesn't splatter. The whites should have barely formed soft peaks at this point. Continue whipping the whites on high speed for one more minute. Reduce the speed of the mixer to medium and continue whipping the whites for about 2 minutes. The whites are ready when they've cooled to 50 degrees C / 122 degrees F. Add the whites to the powdered almond mixture and fold together quickly, in as few strokes as possible. The batter is of the right consistency when it falls off the end of the spatula in a thick ribbon. Put the macaron batter in a pastry bag fitted with a no. 11 tip.
Pipe shells around 3.5 cm in diameter, spaced at least 2 cm apart on a parchment-lined half-sheet (doubled with another half-sheet for insulation). Let the shells stand for 30 minutes. Partway through, sprinkle each shell with a pinch of coarse-grain sugar.
Preheat the oven to 180 degrees C / 356 degrees F. Slide the macaron shells into the oven. Bake for 12-14 minutes, opening the oven door quickly twice towards the end of this time. Let the shells cool for at least 30 minutes before lifting them from the parchment.
Prepare the caramel buttercream. Bring the heavy cream to a boil. Pour about 50 g of sugar into the bottom of a medium saucepan. Let it melt over medium heat. Then add 50 g more sugar and do the same. Repeat with the final 50 g of sugar. Let the sugar caramelize until it is dark amber.
Remove from heat. Minding the hot caramel, add the 33 g of butter. It will spatter and foam. Stir with a spatula and then pour in the cream in a few rounds, stirring until incorporated. Return the caramel to the flame and heat it until it reaches 108 degrees C / 226 degrees F. Pour it into a wide dish. Cover the caramel with plastic wrap, touching the wrap to the surface of the caramel. Leave in the refrigerator until cold.
Place the softened butter in the bowl of a stand mixer fitted with the whisk attachment and whip the butter for 8 minutes until airy. Add the cooled caramel in a few rounds and whip with the butter until uniform. Work quickly at this point. Put the buttercream into a pastry bag fitted with a no. 11 tip. Pipe a generous amount of buttercream onto half of the macaron shells. Gently press 4 or 5 apple cubes into the buttercream. Top with the remaining shells. Leave the macarons in the refrigerator 24 hours. Let stand at least 20 minutes at room temperature before serving.
Makes about 36 macarons.

Monday, April 16, 2012

It has its charms

Chocolate-malt layer cake
Yes, dear reader, you are looking at another chocolate cake, and yes, I still maintain that I am, for the most part, indifferent to chocolate. But what can I say? Chocolate-loving friends deserve birthday cakes too, and how can anyone resist a cake stacked three layers high and filled with gooey, charred marshmallows?
The cake, as you might have guessed by the looks of it, was another one of those layer cakes, wacky and wonderful, dreamed up by the lovely folks at Momofuku Milk Bar. I say was. You're a little too late to meet this particular chocolate-malt layer cake. It was three layers of buttery chocolate cake dripping malt fudge sauce. It was topped with malted milk crumb and torched marshmallows. It was utterly over-the-top. But, as Saturday night slipped into Sunday morning, it was also utterly demolished. All that we left the birthday boy with at the end of the night were a few marshmallows and a mound of chocolate rubble.
Malted milk crumb Fudge sauce components Fudge sauce!
And though chocolate usually doesn't do it for me, even I have to admit that this cake had its charms. Digging into a slice was just that--an excavation. One forkful might be all buttery, chocolate crumbs and gooey fudge, but with the next, you'd crunch down on some cookie-like milk crumb or find a few toasty marshmallows. Buried treasure. Oh the marshmallows! It was a fun cake to eat.
But even more so, (I think, anyway) it was a fun cake, a marvellously fun cake, to put together. I got to play with liquid glucose and Ovaltine. I got to beat butter, eggs, and sugar into a dreamy cloud-mass. I got to set a half-sheet spread with marshmallows ablaze. Nothing too complicated, just good, messy kitchen fun.
Charred marshmallows Chocolate cake batter First layer
And if you're thinking about taking the plunge and putting together your very own Milk Bar layer cake, either this cake or the apple-pie layer cake might be the place to start. Neither requires anything particularly difficult of you (you really just need to read carefully and do what Tosi tells you), and apart from the liquid glucose in this cake, which you can replace with light corn syrup in a pinch, their ingredients are ones that you should be able to source at your local grocery store. Oh, and they're both spectacularly good, (though I, of course, am rather more fond of the apple-pie than the chocolate-malt).
A couple of years ago, Bon Appétit did a feature on Christina Tosi and published a version of the recipe for this cake. You can find it here. It's a little more home-cook friendly but maybe not quite as awe-inspiring from the looks of it. It'll give you a sense of what making this cake involves, though.
Marshmallows!
Technical Notes for Milk Bar's Chocolate-malt Layer Cake

The directions for this cake were, for the most part, straightforward. Below are a few points of obsessive detail that you might find helpful when making the cake.
  • Fudge sauce: you only need three tablespoons of fudge sauce for the cake batter, but unless you have a jeweller's scale, it might be hard to scale down the recipe to that amount. I used the leftovers on some malt ice cream. If you're making this ahead of time, be sure to give it some time, at least half an hour, to warm up a little on the counter. Alternatively, you can give it a short zap in the microwave to loosen it up. Otherwise, the fudge sauce will just cling to the paddle of your stand mixer and won't incorporate properly.
  • Sifting the cocoa powder: I know, I know, Christina Tosi thinks that sifting is generally a waste of time. But cocoa powder can be ridiculously difficult to incorporate unless you've already broken up the clumps it tends to form itself into. Maybe, if you're lucky enough to have Valrhona cocoa powder lying around (I didn't), this isn't as much of a problem. I didn't sift my cocoa powder, and it didn't incorporate into the cake batter properly. I ended up having to use an immersion blender on the batter. The cake didn't seem to suffer much from all that overmixing--there were just a few more air bubbles in it than there might have otherwise been.
  • Malt fudge sauce: much like the plain old fudge sauce, this malt one stiffens up pretty quickly as it cools. I made mine right before assembling the cake and left it in a bowl over some simmering water until I was ready to use it. It was a little difficult to eye five equal portions from the bowl, so I poured it into a 2-cup glass measuring cup for assembly purposes.
  • The unveiling: the malt fudge stuck to the acetate, so peeling back the plastic on this cake was a little more difficult than with others, but I don't think there's much that you can do about this. The cake still looked fine for the most part.
  • Storage: As Tosi says, the fudge sauce will stick to plastic. If, like me, you don't have a cake carrier or a giant bowl to cover your cake while it thaws in the fridge, you can, like me, tape together a few sheets of acetate and build a plastic ring around the cake or the plate that it's sitting on. Pull some plastic wrap over that, and you've got a temporary cover for your cake. 

Saturday, April 7, 2012

You'll be in luck

Blanched meyer lemons
I think I'll always be a city girl. But sometimes, I do dream of living somewhere with room enough for a backyard full of swishing collards and an old lemon tree heavy with more fruit than I'd know what to do with. Maybe I'd even have a few chickens.
Right now, though, I'm happy enough to pretend. And last weekend, that wasn't too difficult to pull off. Just down the street, the last of the season's Meyer lemons were going for sixty-five cents a pound, so, naturally, I carted as many home as I could manage. And then I had more lemons than I knew what to do with.
I considered making my favourite lemon curd--my standby when Meyer lemons are in season--but I was afraid that with so many lemons that much curd would spoil before Octavian and I could possibly eat it all, as much as we love the stuff. So I decided to take things in an entirely different direction and preserve the lemons.
Lemons in salt
Jarred
Preserved lemons are lemons that have been packed in a jar with salt and their own juices and left out to soften for a few days or weeks (depending on the specifics of the process). After that, with all that salt and acid, the lemons will keep in their jar refrigerated for about a year. So when you're longing for sunny, mouth-puckering citrus in high summer, you'll be in luck.
I was introduced to preserved lemons for the first time at Prune in New York City. They came diced--bright, tart little gems--studding a creamy, ricotta-slathered tartine. It was one of those simple but incredible lunches--nothing fancy, just beautiful ingredients thoughtfully put to use. I've been thinking about preserved lemons and summer-vegetable tartines ever since.
Jar and slice
Marinated sardines
You should think of these lemons as a savoury seasoning that will lend salty, lemony-bright notes to your dishes. So far in my kitchen, they've made their way into a lunch of marinated sardines and buttered bread. And I'm thinking that they'll do wonders in parchment-roasted asparagus or stirred into quinoa or rubbed into a chicken awaiting the oven...and maybe even in a cocktail or two. An abundance of lemons, all through the summer! For now, at least, I'm good without a lemon tree.


Moroccan-Style Preserved Lemons
Adapted from Paula Wolfert via Epicurious
Note: the number of lemons you need will really depend on their size. The Meyers I had were rather smallish, so I needed 22 in all to fill up my jar and cover the lemons with juice.

6-8 organic Meyer lemons + 5-15 additional Meyer lemons for their juice
150 g / 2/3 cup fine sea salt or kosher salt
2 tablespoons olive oil

Blanch the lemons in boiling water for 5 minutes, then drain. This step hastens the softening of the lemons. When cool enough to handle, cut each lemon into 8 wedges, discarding seeds. Toss the lemons with salt in a bowl, then pack the lemons, along with their salt, tightly into a clean 1-quart jar.
Squeeze enough juice from the additional lemons to cover the salted lemons. The lemons may float a little, but this is okay--you should just turn the jar upside down and let it rest that way occasionally while the lemons are curing. Seal the jar and let the lemons stand at room temperature, shaking gently or turning once a day, for 5 days.
Add the oil to the jar and refrigerate. The lemons will keep chilled for up to a year. To use, remove flesh and discard. No need to rinse the lemons.