Saturday, April 7, 2012

You'll be in luck

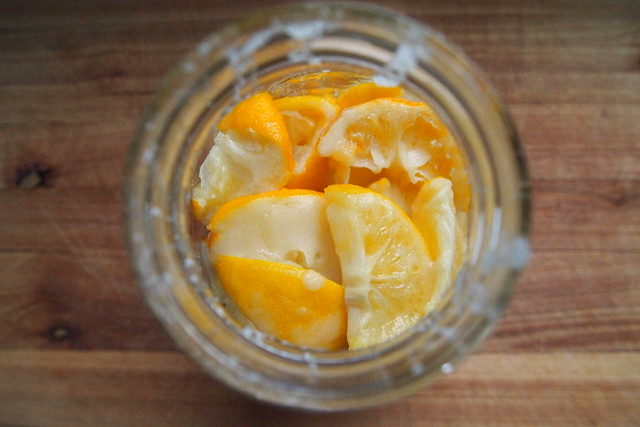
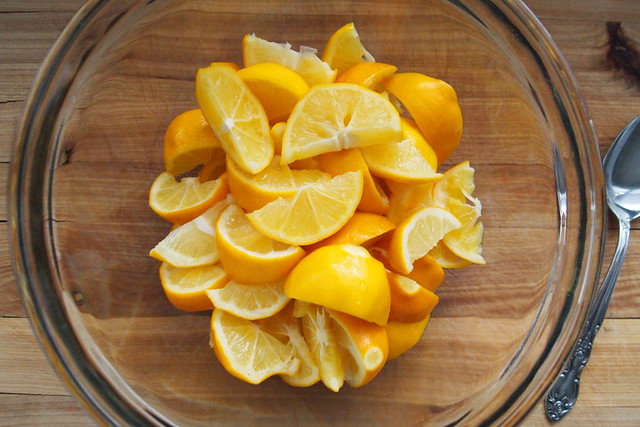
Blanched meyer lemons
I think I'll always be a city girl. But sometimes, I do dream of living somewhere with room enough for a backyard full of swishing collards and an old lemon tree heavy with more fruit than I'd know what to do with. Maybe I'd even have a few chickens.
Right now, though, I'm happy enough to pretend. And last weekend, that wasn't too difficult to pull off. Just down the street, the last of the season's Meyer lemons were going for sixty-five cents a pound, so, naturally, I carted as many home as I could manage. And then I had more lemons than I knew what to do with.
I considered making my favourite lemon curd--my standby when Meyer lemons are in season--but I was afraid that with so many lemons that much curd would spoil before Octavian and I could possibly eat it all, as much as we love the stuff. So I decided to take things in an entirely different direction and preserve the lemons.
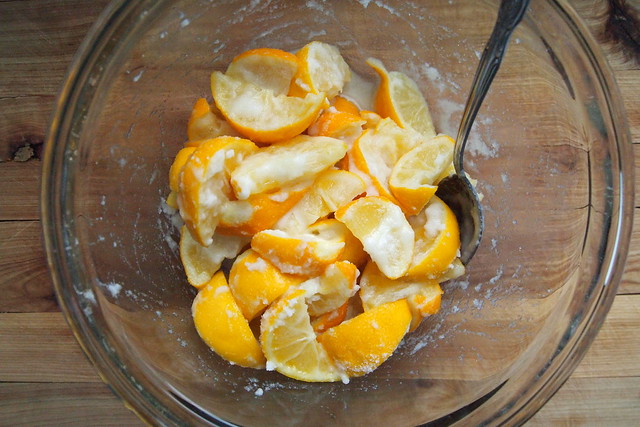
Lemons in salt
Jarred
Preserved lemons are lemons that have been packed in a jar with salt and their own juices and left out to soften for a few days or weeks (depending on the specifics of the process). After that, with all that salt and acid, the lemons will keep in their jar refrigerated for about a year. So when you're longing for sunny, mouth-puckering citrus in high summer, you'll be in luck.
I was introduced to preserved lemons for the first time at Prune in New York City. They came diced--bright, tart little gems--studding a creamy, ricotta-slathered tartine. It was one of those simple but incredible lunches--nothing fancy, just beautiful ingredients thoughtfully put to use. I've been thinking about preserved lemons and summer-vegetable tartines ever since.
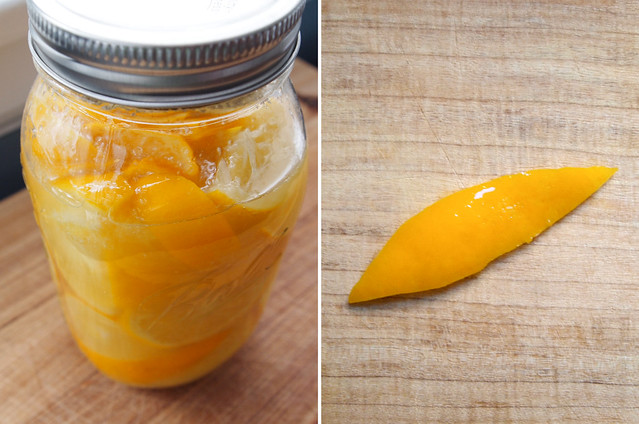
Jar and slice
Marinated sardines
You should think of these lemons as a savoury seasoning that will lend salty, lemony-bright notes to your dishes. So far in my kitchen, they've made their way into a lunch of marinated sardines and buttered bread. And I'm thinking that they'll do wonders in parchment-roasted asparagus or stirred into quinoa or rubbed into a chicken awaiting the oven...and maybe even in a cocktail or two. An abundance of lemons, all through the summer! For now, at least, I'm good without a lemon tree.


Moroccan-Style Preserved Lemons
Adapted from Paula Wolfert via Epicurious
Note: the number of lemons you need will really depend on their size. The Meyers I had were rather smallish, so I needed 22 in all to fill up my jar and cover the lemons with juice.

6-8 organic Meyer lemons + 5-15 additional Meyer lemons for their juice
150 g / 2/3 cup fine sea salt or kosher salt
2 tablespoons olive oil

Blanch the lemons in boiling water for 5 minutes, then drain. This step hastens the softening of the lemons. When cool enough to handle, cut each lemon into 8 wedges, discarding seeds. Toss the lemons with salt in a bowl, then pack the lemons, along with their salt, tightly into a clean 1-quart jar.
Squeeze enough juice from the additional lemons to cover the salted lemons. The lemons may float a little, but this is okay--you should just turn the jar upside down and let it rest that way occasionally while the lemons are curing. Seal the jar and let the lemons stand at room temperature, shaking gently or turning once a day, for 5 days.
Add the oil to the jar and refrigerate. The lemons will keep chilled for up to a year. To use, remove flesh and discard. No need to rinse the lemons.

Sunday, March 25, 2012

I made a beeline

Les brioches
I don't often get nostalgic about my undergraduate days. I'll admit it--I was an awkward, geeky kid coming out of high school. I was nowhere near ready for the droves of rowdy frat-boy types, the 11 am beer pong, the near constant party going on somewhere down the hall. This, of course, wasn't all there was to college, but when I lived in a dorm it seemed like it, and I was miserable. It took me a long while to find my place.
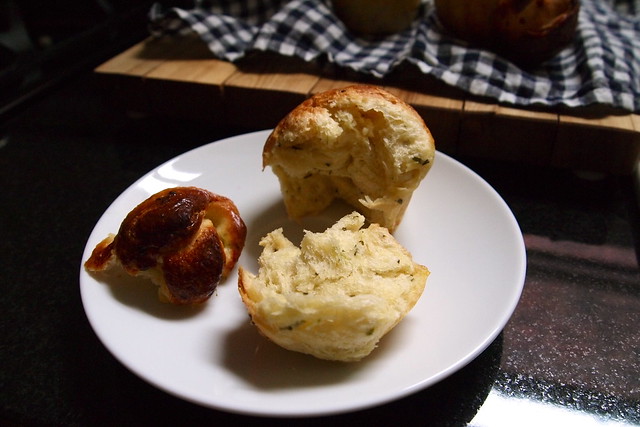
But one of the things I do remember fondly about those days (once I found a real place to live) is the splendid bakery downtown, Pan Chancho. Octavian and I would often wander in on Sunday afternoons to admire the rows of burnished sourdough boules and enjoy a cup of soup. I was doing most of our baking at home at the time, but there were a few things we always found hard to resist taking with us, like a couple of the savoury brioches. They were our favourite--lofty, buttery, herb-flecked--and just perfect with a sharp, lemony salad on a warm day. When it came time to move, I knew I'd miss them. 
The savouries
Brioche block
Proofing
And clearly, I still haven't stopped thinking about those brioches. When Octavian and I were visiting this past December and popped into Pan Chancho, I made a beeline for the cookbooks. The bakery had published a collection of its recipes a few years ago, including one for the savoury brioches. I was determined to have those brioches, wherever I happened to be.
Getting the recipe to work for me took some tinkering. The translation from professional bakery to home kitchen has got to be a little tricky. So, while the first attempt was a little disappointing, the second--when I did what made the most sense to me--turned out brioches just as we remembered them--gleaming, golden, buttery, and tender.
If there's anything challenging about making brioches à tête like these (tête is just French for head), it's in the shaping. You want to make each round of dough as smooth and uniformly round as possible, and you want to place each tête dead-centre on top of its round. (You also don't want to handle the dough for too long and have the butter melt out on you.) Imperfections will be obvious once the brioches hit oven and start rising. Misaligned and unevenly shaped têtes will bake off-centre. (You can see from my photos that I haven't quite mastered the technique!) It just takes a little practice, and even if your brioches are a bit wonky looking, I don't see anyone complaining once they've taken a bite or two.
Proofed, egg-washed
Split brioche
I planned to have the brioches with a modest soup over a few lunches, but I never quite got around to making any soup before all of the brioches disappeared. (We gave some away...I didn't eat all of them!) But I can say that these brioches are not out of place at breakfast and definitely make for an outstanding afternoon snack. I can even see them taking the place of dinner rolls if anyone wants to have me over for something that needs a little mopping up.

Savoury Brioche
Adapted, somewhat liberally, from The Pan Chancho Cookbook
Note: Mixing. It might be possible to mix the dough by hand, but I wouldn't recommend it. It will be difficult to pull the dough together, I think, and using your hands to knead the dough will warm the butter too much. Shaping. It takes a bit of practice to get the technique down for shaping the brioches. Alternatively, you can use the method that Dorie Greenspan uses here for bubble-top brioches, which is more forgiving.

375-500 g / 3-4 cups all-purpose flour
1 teaspoon fine sea salt
3 tablespoons sugar
2 sticks / 225 g unsalted butter, soft but still cool
5 large eggs
1 tablespoon instant yeast
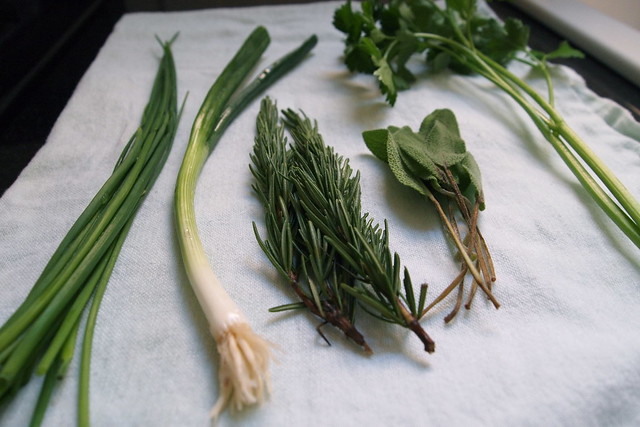
1 tablespoon fresh Italian parsley, finely chopped
1 teaspoon fresh sage, finely chopped
2 teaspoons fresh chives, finely chopped
2 teaspoons rosemary, finely chopped
1 scallion, thinly sliced
60 g sharp cheddar, grated (about a 1/2 cup)
1/2 teaspoon freshly ground black pepper
1 large egg + 1 teaspoon water

Sift 375 g / 3 cups flour, the salt, and the sugar together. In a stand mixer fitted with a paddle attachment, cream the butter. Paddle in three of the eggs and scrape down the bowl. Incorporate the flour mixture at low speed, 1 cup at a time, and scrape down the bowl. Paddle in the remaining eggs at medium speed, one at a time. Add in the yeast and beat for 1-2 minutes. The dough should have pulled away from the sides the bowl at this point. If it's too wet and hasn't, mix in as much of the remaining flour as necessary on low. 
Re-fit the stand mixer with the dough hook and knead the dough at medium-low speed for about 5 minutes. Knead in the herbs, cheese, and pepper at low speed. The dough should be smooth and elastic enough to pass the windowpane test. Press it into an even rectangle and wrap it tightly in plastic wrap. Refrigerate for 6 hours or overnight to firm up the butter.
Butter 16 of the cups in two muffin tins or 16 small brioche moulds if you have them. Place the dough on a lightly floured surface. Divide into 16 equal pieces, about 65-70 g each. Cut a bit of dough off each piece, about 1/5 of the total, for the tête. You don't want the tête too small, or it will dry out while baking. 
Working quickly, shape all 32 pieces into rounds--cup your hands around each and press the edges of your palms into the edges of the dough and pull them in and towards the work surface, rotating the dough and repeating this motion until you have a smooth, even round; pinch the round from the bottom to tighten it. Place the large rounds into the greased muffin cups seam-side down. Press a well 3/4 of an inch deep into the centre of each round. Gently press a tête into each well. Cover with a damp tea towel and let rise for about 90 minutes or until doubled in size. The brioches should pretty much fill the muffin cups, their têtes clearing the tin. 
Meanwhile, preheat the oven to 375 degrees F. Beat the remaining egg with the water for egg wash and brush the brioche. Bake for 18-20 minutes. The brioche should be golden and their têtes a deep mahogany. Unmould immediately and cool on a wire rack for at least 10 minutes. The brioche are best eaten the day they're baked but will keep for another day in a zip-top bag.
Makes 16 brioches.

Thursday, March 15, 2012

With abandon

Bagel Bombs
Writing term papers is not a pretty affair--at least in my case. The dishes pile up. I don't bother with my hair. I grimace a lot. So, I'll have to be brief today.
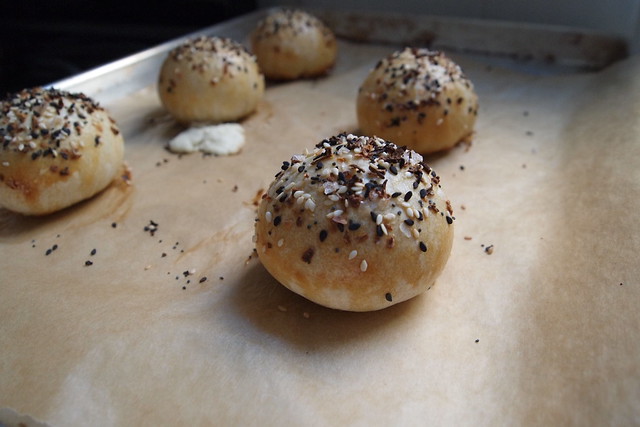
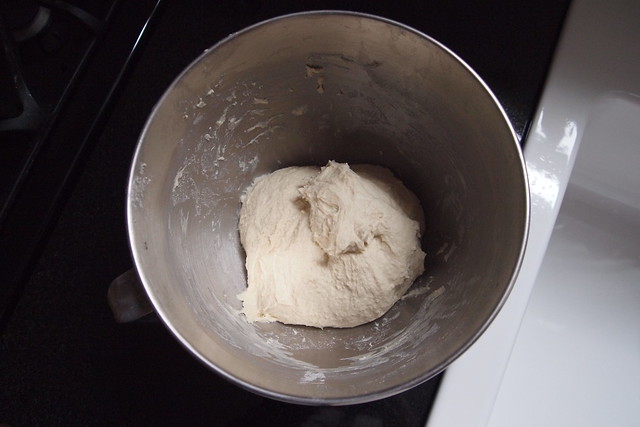
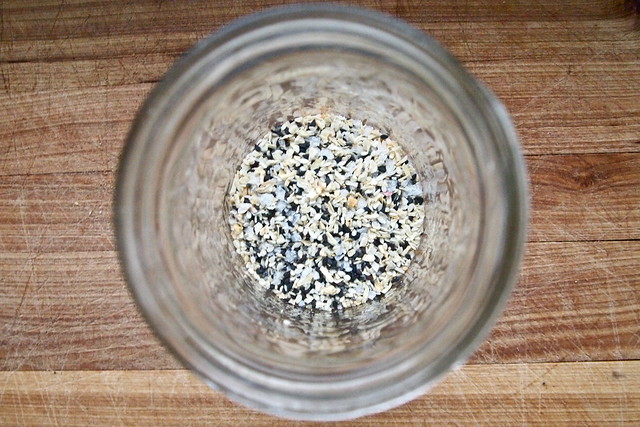
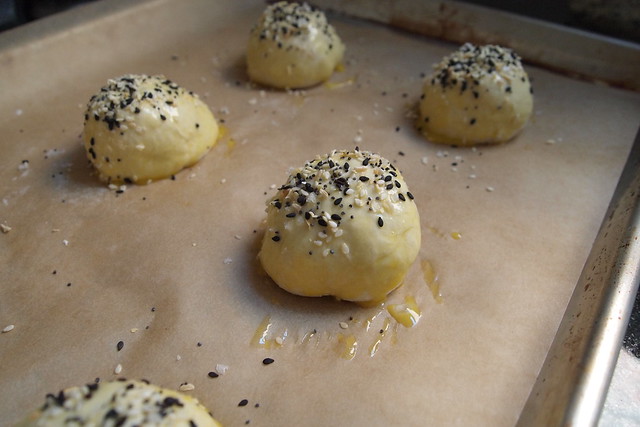
A few weeks ago, I finally kneaded together a batch of Milk Bar "mother" dough and baked up a few bagel bombs to share with the other sleepy-eyed folks in my early-morning political philosophy seminar. The bagel bomb is Christina Tosi's nod to the New York bagel, sesame seeds, dried onions, garlic powder, and all. Bite into one and you'll get the "bomb" bit--think bacon-scallion cream-cheese explosion. I think they went over pretty well with the class. I might have seen a person or two reaching for a second, maybe even a third bomb...but I won't mention any names.
Bacon-scallion cream cheese
Mother dough
Munching on bagel bombs definitely helped the morning along, but, really, I still think that I got the best of it while making them earlier that week. That bacon-scallion cream cheese? Totally amazing and dead easy to make too. I'll admit to having had a taste or two and maybe to licking the stand-mixer paddle clean. Hey--I get to when I'm doing the baking, right?
Assembly
Bagel topping
Egg washed, seed dusted
But in all seriousness, I have to say that after its spell in the oven, the cream cheese tucked into each bomb isn't nearly as good. The scallions lose their pluck. The cream cheese gets a little curdled. Next time around, I think I might just try my hand at some proper bagels and paddle together this cream cheese to mound on top. If you ate sour-cream-and-onion chips with abandon as a kid like I did, this is your cream cheese.

Bacon-scallion Cream Cheese
Adapted from the Momofuku Milk Bar Cookbook

50 g / 1 3/4 oz bacon, the smokier the better
200 g / 7 oz cream cheese
2 g scallion greens, thinly sliced (about 2-3 scallions' worth)
5 g / 1 teaspoon sugar
2 g / 1/2 teaspoon fine sea salt

Cook the bacon in a skillet over medium heat until it's auburn brown and crunchy. Remove it from the pan and chop it into small pieces; reserve it and, separately, the rendered bacon fat.
Put the cream cheese in the bowl of a stand mixer fitted with the paddle attachment and cream it on medium speed. Pour in the reserved bacon fat and paddle to combine. Scrape down the sides of the bowl. Add the chopped bacon, scallions, sugar, and salt and paddle briefly to incorporate.

One last thing: to help out those of you who already have the relevant cookbook and who might want to tackle a project I've posted about, I'm going to be adding a few technical notes to the end of my project posts from now on. I hope some of you out there will find them helpful!

Technical Notes for Milk Bar's Bagel Bombs

  • Oven temperature: the recipe directs you to bake these at 325 degrees F, but even when I baked the bombs at 350 degrees for 30 minutes, I wasn't getting any colour on them. I tweeted Tosi about it (it's a thing she does every Friday), and she suggested that I give them a minute or two on low under the broiler. It did the trick.
  • Yeast: the "Ingredients" section at the beginning of the Milk Bar cookbook says to use active-dry yeast, but I'm pretty confident that you should be using instant yeast for the mother dough. First of all, the active-dry stuff won't break down unless you dissolve it in liquid. Second, the quantity of yeast and the time allotted for proofing are more appropriate for instant.
  • Dough: the mother dough is probably a little wetter than the average bread dough--just keep your hands floured.

Saturday, March 3, 2012

Macaroni, matrimony, and cheese

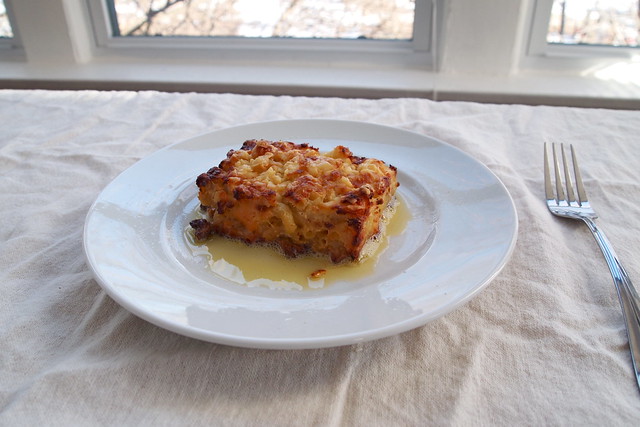
Edna Lewis' Mac and Cheese
It came out in conversation a few months ago that my friend Ben doesn't like macaroni and cheese. Doesn't like macaroni and cheese! I didn't think that that was humanly possible--at least for someone who'd grown up in this country. Worse yet, he admitted, his fiancée loves mac and cheese. How was this going to work out once they tied the knot this summer? Would Ben have to sneak his share of mac and cheese to the dog? Would the dog even welcome a pile of mac and cheese in his bowl? It didn't matter--there would be no room for a dog and two people in a Hyde Park apartment. Ben was a little apprehensive.
So, naturally, I invited him over for dinner. Ben's a good guy--the picture of a southern gentleman, really--well-dressed, soft-spoken, warm and, of course, appreciative of the good things in life, like fine bourbon and bluegrass. I wanted to do what little I could for his and his fiancée's matrimonial happiness. So, it was time to subject him to a good plateful of mac and cheese, hot, golden, and bubbly--something that would be irresistible, even to a hardened sceptic like him.
P2120856
Okay, so it turned out that Ben was not all that hardened a sceptic. His past experiences with mac and cheese had been of the orange-powdered, cardboard-boxed variety. And that's probably enough to leave most at least somewhat sceptical. All that Ben really needed was a little push, and I was happy to be the one to do it, to acquaint him with the good stuff.
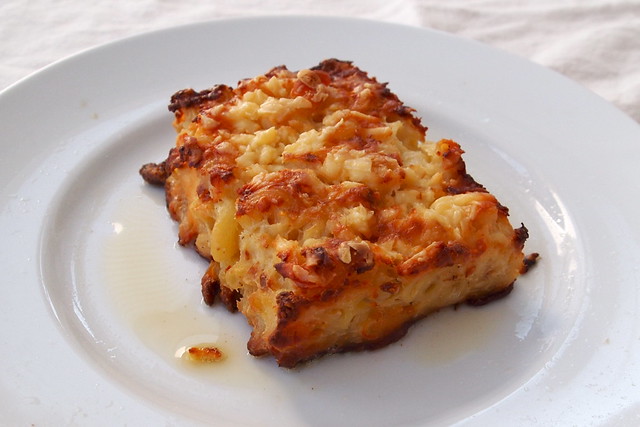
The mac and cheese we made that night was a southern variation on the standard bubbly, baked sort. Instead of starting with a roux and making a cheese sauce for the macaroni, you douse it in a rather immodest mixture of cream and eggs, scattering cubes of cheddar throughout, and then finish it off with another good heap of cheddar. It bakes up golden and creamy, almost custard-like beneath that cheesy lid.
That said, I can see how an absolute die-hard mac and cheese lover might not be entirely satisfied with this particular plate--it doesn't ooze cheese. But I still think it's fantastic, especially with a mess of braised collards on the side. And most importantly, it won Ben over. I look forward to the wedding!

Southern-Style Macaroni and Cheese
Adapted from Edna Lewis and Scott Peacock's The Gift of Southern Cooking via the May 2010 Saveur
Note: I used 2 cups of heavy cream and 1 cup of milk in place of heavy cream and half-and-half with no issues. I'm pretty confident that using less heavy cream wouldn't have been a problem either. And if indeed you're a die-hard mac and cheese lover, a few more ounces of cubed cheddar probably wouldn't hurt.

12 oz elbow macaroni
Butter, for greasing
13 oz extra-sharp cheddar, 7 oz (about 1 1/2 cups) cut into half-inch cubes + 6 oz (about 2 cups) grated
1 1/2 teaspoons salt
2 tablespoons + 1 teaspoon all-purpose flour
1 tablespoon Dijon mustard
1⁄4 teaspoon freshly ground black pepper
1⁄4 teaspoon freshly grated nutmeg
1⁄8 teaspoon cayenne pepper
2⁄3 cup sour cream
2 eggs, lightly beaten
1 1⁄2 cups half-and-half
1 1⁄2 cups heavy cream
1⁄3 cup grated onion
1 teaspoon Worcestershire

Heat oven to 350° F. Bring a 4-quart saucepan of salted water to a boil. Add the pasta and cook until cooked halfway through, about 3 minutes. Drain pasta and transfer to a buttered 9" x 13" baking dish. Stir in the cubed cheddar cheese and set aside.
Combine the salt, flour, mustard, black pepper, nutmeg, and cayenne in a large mixing bowl. Add the sour cream and the eggs and whisk until smooth. Whisk in the half-and-half, heavy cream, onions, and Worcestershire. Pour the egg mixture over the reserved pasta mixture and stir to combine. Sprinkle the grated cheese evenly over the surface. Bake until the pasta mixture is set around the edges but still a bit loose in the center, 60-70 minutes. Let cool for 10 minutes before serving.
Serves 8-10.

Friday, February 24, 2012

Truffles in the sandbox

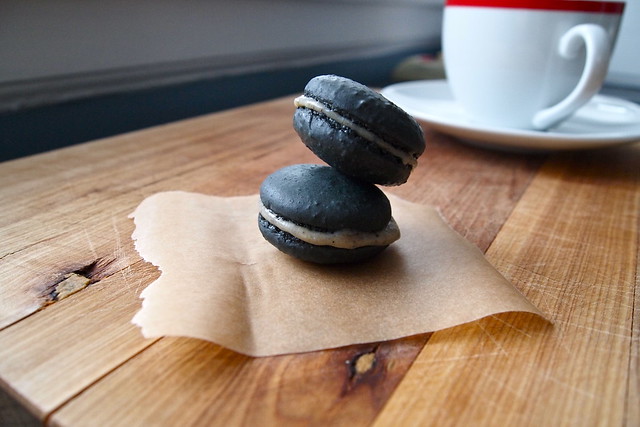
Summer truffle macarons
My boyfriend, Octavian (yes, he has a name!), has a knack for fixing things. Mostly, he tinkers with vintage audio parts, but he's pretty handy with a hammer or a hacksaw too. It's not too uncommon to find him over at a friend's putting something back into working order or assembling something new. Most recently, he's been helping some friends of ours re-arrange their kitchen's layout--basically, breaking down a cluster of wall cabinets and converting them into serviceable base cabinets (hooray for more counter space!). The job's almost done, and it's looking great. Though this sort of thing is just what Octavian likes to do in his spare time, our friends wanted to thank him for his help. So, late last week, they put together the most wonderful box of gourmet goodies for us. Quail eggs! Foie gras! A bottle of summer truffles! It was like Christmas.
I was more than a little giddy, but I wanted to play with something straightaway, jump right into that sandbox. It was hard to know where to start. Quail eggs first? Or truffles? Or both? I'd never worked with (or tasted, in fact) either before. So, I started a little research, thinking I'd carefully weigh my options. But then it hit me: Hermé has a recipe for black truffle macarons; I have a bottle of truffles. Conclusion: I have to make truffle macarons.
Truffles and ganache
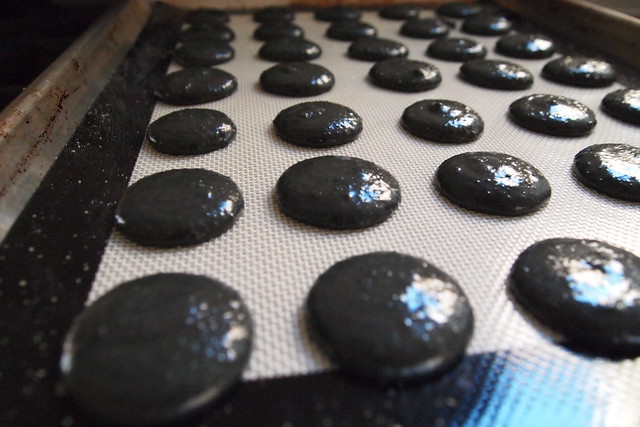
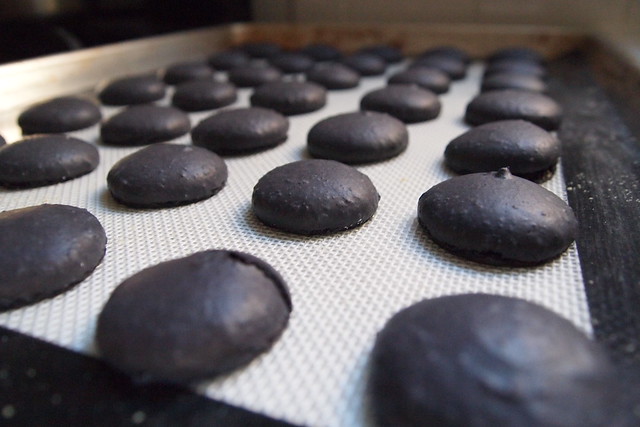
Grey piped macaron shells
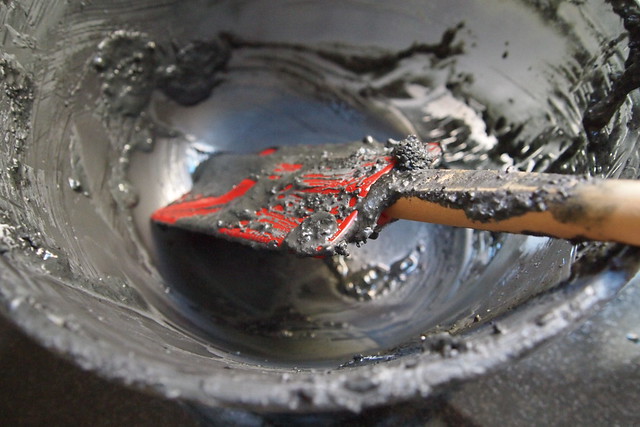
Macaron bowl
Now, I still don't know that much about truffles, but I can tell you this. The black truffles you've probably heard of--the ones that can go for $100 or more apiece fresh--are Périgord truffles (Tuber melanosporum) and come mostly from the south of France. These, I'm told, are the mother of all black truffles, the most fragrant and flavourful of the lot. They're available late in the fall through early winter and go for something like €1000 per kilo (that's just over two pounds) at farmers' markets. Unsurprisingly, it's some of these that Hermé expects you to be able to get your hands on for the macarons. All I have to say to that is: yeah right.
My truffles were summer truffles (Tuber aestivum), which, apparently, are a good second to the Périgord (like Robin to the Périgord's Batman?). And though these in particular were bottled (a lot of people, it seems, have been disappointed by bottled truffles, i.e. have found them to be completely flavourless), my friends and I thought that they were extraordinary--wildly deep, earthy, and aromatic, unlike any other mushroom we'd ever had. Bottled truffles might not compare to fresh specimens (again, I'm not in a position to say), but I was more than happy with these.
Baked macaron shells
Macaron crosscut
Oh, and if you're balking at the thought of mushrooms and white chocolate together...well, I did too. In fact, I was pretty convinced mid-way through the process that the macarons were going to be abhorrent, a terrible waste of truffles. But Hermé proved me wrong. Black truffles make for an incredible macaron. Somehow, all that milky sweetness just works with them. Their mushroomy earthiness blooms out of it and leaves you a little bewildered, a little awestruck. These macarons are unexpectedly marvellous. Hermé does it again.

Summer Truffle Ganache
Adapted from Pierre Hermé's Macaron
Note: About the truffles. Truffles are sold in a number of ways--fresh, frozen, bottled, and canned. I can't speak to the differences between them, but I'll say a little about the bottled variety. People tend to be disappointed with bottled truffles, and maybe it's warranted, but it might also have to do with the fact that the bottled ones lose their aroma especially quickly (or so I'm told). One place suggested that you add them immediately to whatever you're planning to cook them with and leave them in an air-tight container for a few hours to lock in their aroma. That's what I ended up doing--I chopped up my truffles, added them to the heavy cream, and let them sit together overnight. Of course, people also warn you not to overheat truffles and advise adding them at the end of cooking, which you can't do here if you've already added them to the cream. So, I don't have anything conclusive to say on the matter, only that I didn't note any serious loss of flavour after bringing the cream to a boil. One last thing--I left the ganache piping to Octavian, and he reported having some trouble keeping the ganache the right consistency. It warmed up very quickly in the pastry bag and made for some very sloppy-looking macarons. He even gave it a few minutes in the freezer when it got really runny. I don't know what to make of this. I added the little bit of truffle juice from the bottom of the bottle to the heavy cream before boiling. I don't know what effect that had. It might have just been an execution problem with the ganache. Macaron shells. For these macarons, I made some pretty standard Hermé Italian-meringue shells done up with 7 g or so of black gel food colouring. You can get a sense for them here. If their feet don't look particularly impressive, it's because I didn't check my new oven's temperature settings against any thermometer readings. From the looks of the shells, my oven's burning a little on the cool side.

175 g heavy cream
35 g summer truffles (see notes above)
219 g good quality white chocolate, finely chopped

Put the chopped chocolate in a heat-proof bowl over a pot of simmering water to melt. Stir occasionally.
Bring the cream to a boil. Chop the truffles finely. Add the truffles to the cream and mix with an immersion blender or in a blender until smooth, about 2 minutes. The truffle pieces will still be visible. Pour the cream in three rounds over the melted chocolate, stirring with each addition. Pour the ganache into a wide, shallow dish and cover with plastic wrap, touching it to the surface of the ganache. Chill in the refrigerator until thick and creamy, 3-4 hours.
Makes enough ganache for 36 macarons.

P.S. Has anyone ever tried the black truffles grown in Oregon? Though they're still expensive, they aren't prohibitively priced like the Périgords. And from what I've read, some people really like them. I'm tempted to order just enough for another batch of macarons while they're still in season. Can anyone recommend a vendor?
P.P.S. An English translation of Pierre Hermé's classic book, Macaron, was just released at the end of 2011 in North America, so now, you don't have to beg a friend going to Paris to scour the city for a copy and then struggle with your grade-school French translating recipes. I hear that the translation isn't great but still passable.

Wednesday, February 15, 2012

A heady affair

Smothered beans
I complain a lot during these dreary months. Nearly everything is drab, grey, and dead. It wears on me. A girl can only eat so many plates of root vegetables, can only drag herself through so many sunless days in a season. But even so, I'd hardly say that I dislike winter. There's something to be said for bright and biting winter mornings, taking in the cold, clean air, and, better yet, for being chased inside by the wind to blankets and tea and warm things bubbling in the oven. Yes, that's what this season is really about for me: keeping the oven glowing.
Though I've gone back to eating meat, there are still few things I welcome more than an earnest pot of beans on a dark, wintery day. I like the simplicity of beans. With the day still before you, you can stir together a few handfuls with some water and salt and keep them bubbling modestly in the oven hours. You can forget them for a while, let the day unfold, and then come back to find yourself with something truly sumptuous. It's surprising sometimes just how sumptuous and satisfying a pot of beans can be. Beans in the cupboard can look so spare.
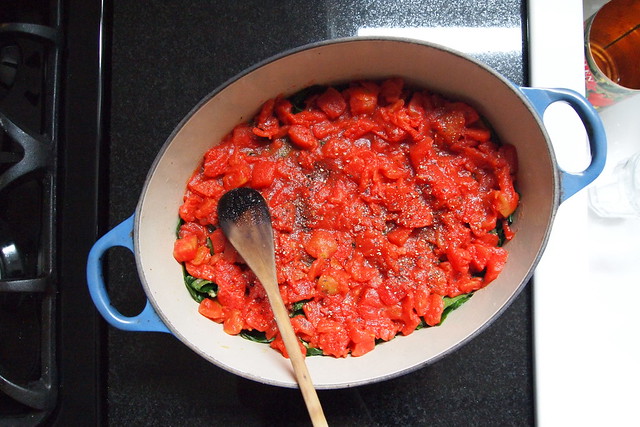
A layer of tomatoes
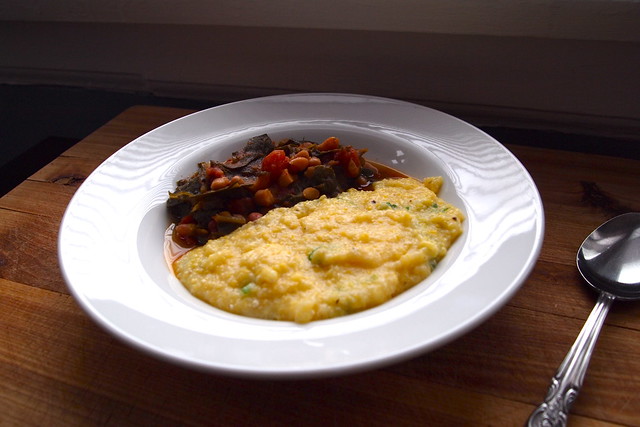
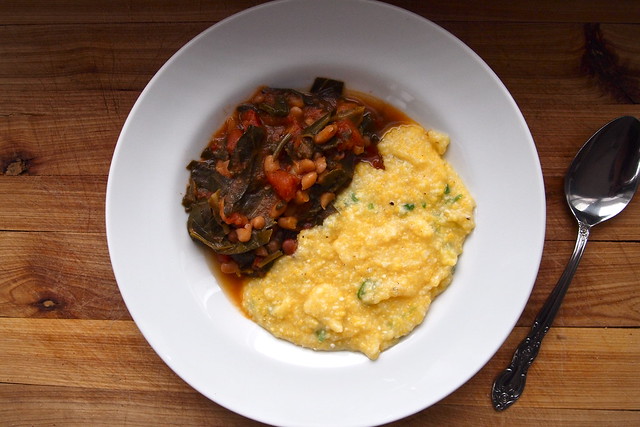
My favourite pot of beans this winter has been one with a tangle of greens, leeks, and chopped tomatoes. These beans aren't much to look at, admittedly, but they will surprise you. With a plate of them, you're in for spoonful after spoonful of some pretty serious umami. Prepare yourself for a heady affair.
For the first issue of Lucky Peach, Harold McGee wrote a great piece on umami and MSG. The short of it was: MSG, which occurs naturally in lots of foods, is umami and nothing that we should shy away from. In fact, it's the reason, for those of us who love tomatoes, why we love them. When I first read this last summer, I wasn't quite sure what to think. Tomatoes just didn't really scream umami to me. But with these beans, I think I finally get what McGee means. Give tomatoes, beans, and collard greens a few good hours together in the oven, and you'll see. You'll have something to savour.
Warm, wintery food

Smothered Beans
Adapted from Peter Berley's The Modern Vegetarian Kitchen
Note: Greens. Collards, I know, are not as popular as Swiss chard or kale, but trust me, collards are what you want with these beans. They have a certain savour to them. Anything else will be disappointing. Beans. If, like me, you sometimes like to splurge on dried heirloom beans, this is the dish for them. Much of its final flavour depends on the beans' pot liquor, and quality beans always make for a better one. Leeks. Leeks are often rather gritty. I think the easiest way to clean them is to slit them vertically and then run them under the tap, spreading out their layers with your thumb. Cooking time. I haven't been in the habit of pre-soaking my beans lately and baked these beans for closer to three hours than one-and-a-half. The collards held up splendidly, and the flavours, I'm sure, only got better. Next time, I might let the beans soak at least a couple of hours at room temperature to give them a head start. They could have baked for longer and gotten more tender, but I was getting hungry.


1 cup dried white beans (I like Rancho Gordo's alubia blanca), sorted, soaked, and rinsed
1/4 cup dried pinto beans, sorted soaked and rinsed
3 tablespoons extra-virgin olive oil
2 leeks, white and tender green parts, thinly sliced
3 garlic cloves, thinly sliced
1 teaspoon dried oregano
1 1/2 teaspoons coarse sea salt
1 bunch collard greens, trimmed of tough stems and sliced into 1/2-inch-wide strips
1 14-oz can of chopped tomatoes
Freshly ground black pepper

Preheat the oven to 275 degrees F.
In a saucepan over medium heat, combine the beans with 4 cups of water and bring to a boil. Skim the foam, reduce the heat, and simmer, covered, for 30 minutes.
While the beans cook, warm the oil in a Dutch oven over medium heat. Add the leeks, garlic, oregano, and 1 teaspoon of the salt. Sauté for 5 minutes, until the leeks begin to soften. Cover the Dutch oven, reduce the heat to low, and simmer gently for 10 minutes.
Place the collard greens in a large bowl, add the cooked leeks, and stir to combine.
Place a strainer or colander over a bowl and pour in the beans. Measure out the cooking liquid and, if needed, add enough fresh water to equal 2 cups.
Place half of the greens mixture in the bottom of the Dutch oven. Add the strained beans. Spread the remaining greens over the beans and top with the tomatoes. Sprinkle the remaining 1/2 teaspoon of salt over the tomatoes and add a few grinds of pepper. Without disturbing the layers, gently pour enough of the bean water down the side of the Dutch oven to barely cover the tomatoes.
Place the Dutch oven over high heat and bring to a boil. Remove from the stovetop, cover, and bake for 1 hour. Remove the cover and check the Dutch oven, adding a little more water if it is drying out. The casserole should be just slightly juicy when pressed gently with the back of a wooden spoon. Replace the cover and continue to braise for 20 to 30 more minutes, until the beans are tender and the greens and leeks have melted.
Serves 6.

Sunday, February 5, 2012

The first

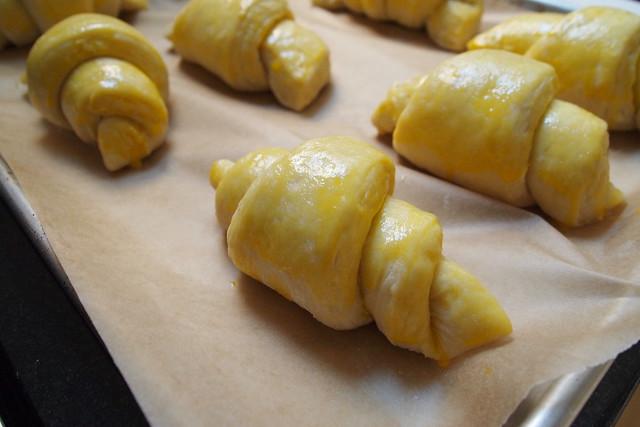
Shaped croissant
I have a problem when it comes to complicated, days-long baking projects. As you may have noticed, I can't seem to take on enough of them. I want to better understand ingredients. I want to master techniques. I want to be challenged in the kitchen. I want to be awestruck. So last week, when I found out that two of my classes wouldn't be in session that week, I decided, naturally, that I would use the free time to get ahead in my reading and make some croissants.
I'd wanted to tackle croissants for a while. You should know by now how I feel about buttery, flaky things, and croissants are pretty much the pinnacle of buttery and flaky. I'd just been putting it off because I knew that it would be an especially demanding project and that there was plenty that could go wrong. But with two days in a row clear of commitment, it was time. Hello, Tartine Bread croissants.
Croissant dough in the making
The butter
I ran into problems from the start, and these just compounded as the process went on. First, the sheer amounts of flour, milk, leaven (sourdough starter), and poolish (a similar mixture of flour, water, and commercial yeast) that went into the croissant dough made it really difficult to pull together. The biggest mixing bowl in my kitchen could barely contain it all (I should have foreseen this). And this led to a dough that wasn't evenly hydrated and rather lumpy (I should have mixed it more instead of rushing it). I tried fixing this by giving the dough a few more turns in the bowl during bulk fermentation, but that just overdeveloped the gluten in the dough. So when it came time to rolling it out and laminating in the butter, rolling was a huge struggle and led to tears in the dough.
First turn complete
So I was pretty sure that the croissants were doomed. Croissants, after all, are only as wonderful as they are because of their buttery, flaky layers. And to get those layers, what you do is pound cold butter into a pliable slab, encase that slab completely in the croissant dough, and then repeatedly fold the dough onto itself as you would a letter and roll it out again. When the butter hits the oven, it creates steam, and all of those lovely layers you made separate: buttery, flaky heaven. (How cool is that?) But, of course, if your dough tears repeatedly like mine did, the butter escapes, and you lose those layers. But I was already a day in at that point, so what could I do? I held my breath and hoped (and fretted and fretted some more).
Proofed, egg-washed croissants
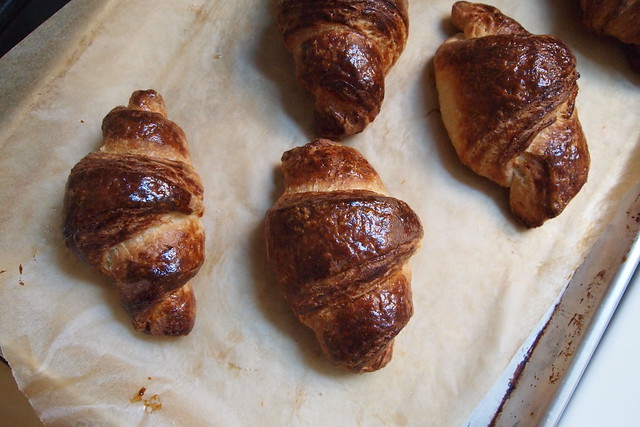
Out of the oven
It all turned out all right. My croissants had buttery, flaky layers aplenty. We ate the first few in a matter of seconds, leaning over the kitchen sink to catch all the buttery shards. They weren't perfect, mind you--not quite airy enough, a little too chewy--but they were satisfying, a good first attempt, anyway.
These croissants definitely won't be the last I make. I want croissants that will transport me to Paris. So, if you have a favourite formula or a tip or two for me, I'm listening. (Though I still love Tartine Bread for its country loaf, its croissant directions weren't always clear--some of them even conflicted with what was going on in the accompanying photographs.) Tell me what I should be doing or what else I might be doing wrong. Really, I want to know!
Croissant structure exposed
P.S. I really have to thank my friend, Freerk, for responding to my frantic messages about my poor torn croissant dough so promptly and with such kindness. Thank you for the reassurances!