Showing posts with label vegan. Show all posts

Wednesday, November 13, 2013

Retreat to the kitchen

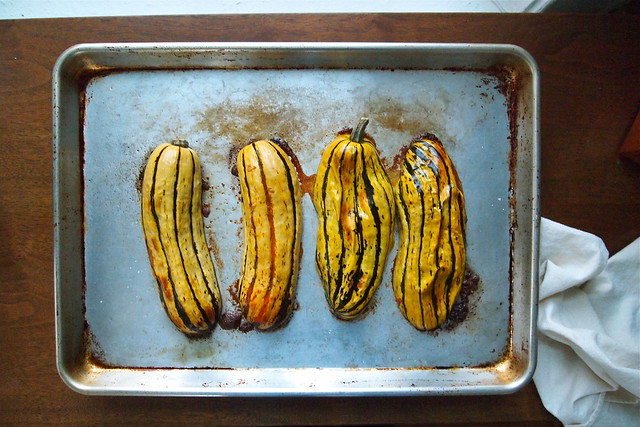
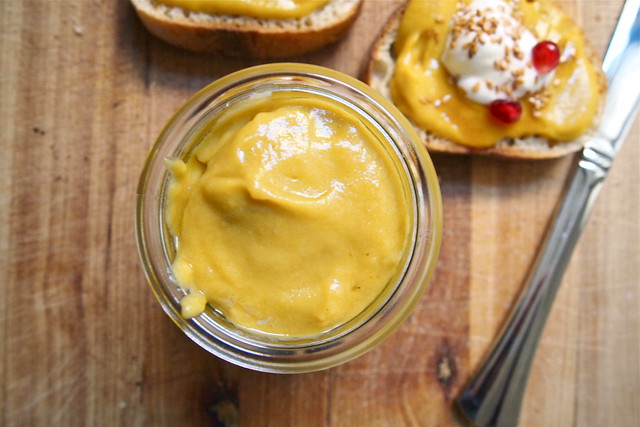
Delicata hummus
Starting to write a dissertation is no straightforward thing. You can be lost for weeks and not know it. And the advice you tend to get, while sometimes painfully obvious, is still hard to follow. I've been feeling shrunken, scared, and incapable lately. I've been wondering whether in fact I really belong here. And though I've been told that this phase of grad school is like this for lots of people, trying to push through it all, to actually believe in myself, has been hard. Sometimes, it's just been easier to retreat to the kitchen.
Still, I haven't allowed myself to take on anything too consuming. Spending time on something extravagant--a layer cake, another batch of preserves--would at this point, I think, just leave me guilt-stricken. So, I've stuck mostly to simple things, things to help keep me humming through the day, like this sunny delicata-squash hummus.
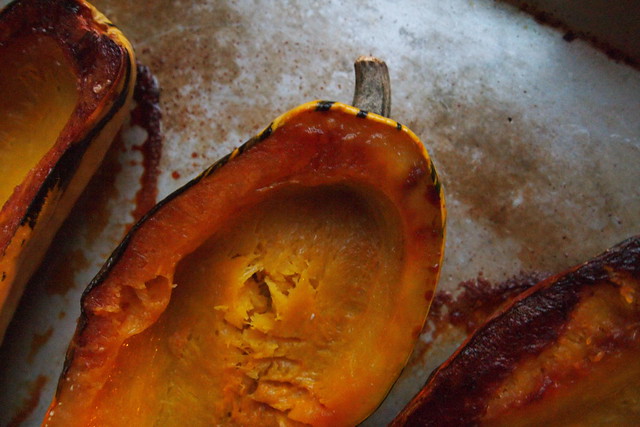
Ready for poaching Roasted squash Dark edges
Though I spend most mornings at my desk--typing, cursing, thumbing through books--I usually find myself desperately hungry a couple of hours after breakfast, no matter what I eat. So, almost inevitably, I drop what I'm doing, tear through the cupboards, and find a bag of something salty and satisfying to mindlessly crunch my way through. I am never at my best when hungry.
Having a jar of delicata hummus around has helped. Its mellow, nutty sweetness, which gives way to a lingering serrano-kissed heat, is worth slowing down for, worth savouring. So it at least makes for more mindful snacking. I often spread it just as it is on crackers or toasted baguette. But it takes well to being gussied up too. A dab of Greek yogurt tames its heat and adds welcome acidity. A drizzle of maple syrup brings out the delicata's sweetness. Pomegranate and sesame seeds add some nice pop. And though I haven't tried this yet, I get the feeling that something smoky would really make this hummus sing. Smoked sea salt? Crumbled bacon and chives? I don't know, but I can't wait to try.
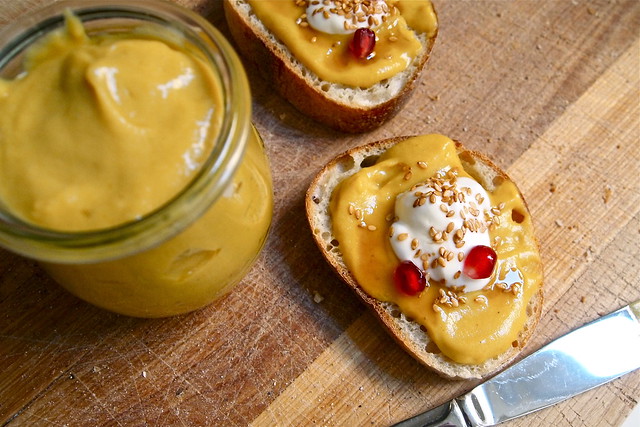
On baguette
This recipe, by the way comes from Modern Farmer, a new-ish quarterly magazine that I've enjoyed paging through recently. It isn't exactly a food magazine in the expected sense (the hummus recipe is the only recipe in this issue), but unsurprisingly, it touches on issues we should all take some interest in (food waste, breeding heat-resistant strains of lettuce).

Delicata Hummus
Adapted from Karen Lebovitz in Modern Farmer, Fall 2013

2 pounds delicata squash (or of another variety of your choosing)
1 cup plus 2 tablespoons extra-virgin olive oil
Salt and pepper
2 heads garlic, separated into cloves and peeled (about 1/2 cup of cloves)
2 or 3 serrano peppers, sliced in half, stems and seeds removed
1/4 cup tahini
3 tablespoons lemon juice

GARNISHES
Greek yogurt, maple syrup, pomegranate seeds, and toasted sesame seeds

Preheat the oven to 350 degrees F. Cut the squash in half and remove the seeds and string. Rub the flesh with 2 tablespoons of olive oil and 2 generous pinches of salt. Place the squash cut side down on a half-sheet and bake until very soft, about 1 hour.
While the squash is baking, place the garlic, serranos, and remaining olive oil in a small saucepan over low heat. Poach the garlic and peppers in the oil until completely soft, 30-40 minutes. The garlic should be very lightly browned.
Scoop out the flesh from the roasted squash and place in a food processor. Add the poaching oil, garlic, serranos, tahini, and lemon juice. Puree until smooth, about 1 minute. Season to taste with salt and pepper.
The texture of the hummus will vary with the squash. Add up to 1/2 cup of water and blend until the desired consistency is reached. Refrigerate at least 3 hours or up to a week. The hummus also keeps well frozen in an airtight container.
Makes 5-6 cups.

Tuesday, August 27, 2013

Setting aside spades and worries

Pepper and Eggplant Coca
It's been a quiet summer for the two of us. We stuck pretty close to home, busy tending to ideas and vegetable beds, hoping that in time they'd flourish. But summer is fast fading, which means that many of our good friends, who've spent the summer away, will be back in town. I'm thinking that it's time that we set aside our spades and worries for a little and think about breaking the quiet, about maybe having a party.
When we do, this flatbread is sure to be a part of it. (If you want to get fancy, this flatbread is technically a Catalan coca of sorts.) It is perfect late-summer party fare--just red pepper, onion, and eggplant cooked down into a luxurious mess, spread out on thin stretches of dough, and then slipped into a hot oven for a scant few minutes. There, the onion especially melts and chars, while the dough blisters and bakes up shatteringly crisp. Cut into squares, it is ready to be passed around.
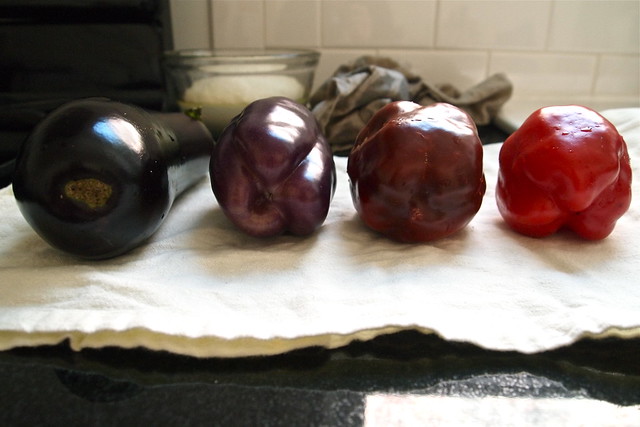
In a row
This flatbread is decidedly unfussy. The dough, though yeasted, is forgiving. I have let it sit out an hour or two longer than it really should have and then stuck extra in the fridge for later use. It held up just fine. You could definitely cook down the vegetables a few hours, maybe a day even, in advance. And with everything prepped, you could easily keep turning out flatbreads with a party in full swing.

Onion, Red Pepper, and Eggplant Coca
Adapted from Sam and Sam Clark's Moro East

DOUGH
112 g / 1 cup bread flour, plus extra for dusting
1/3 teaspoon fine sea salt
1/4 teaspoon instant yeast
75 ml / scant 1/3 cup water
1/2 tablespoon olive oil

VEGETABLES
1 medium eggplant, cut into half-inch cubes
1 teaspoon fine sea salt
6 tablespoons olive oil, plus more as needed
2 medium Spanish onions, roughly chopped
2 red peppers, cut in half lengthwise, seeded, and thinly sliced
1 heaped tablespoon finely chopped rosemary

To make the flatbread dough, place the flour, salt, and yeast in a medium bowl and mix thoroughly. Stir together the oil and water in a cup. Make a well in the flour and then pour in the water mixture a little at a time, mixing constantly with your hands. When all the yeast mixture has been incorporated, transfer the dough to a floured surface and knead well for at least 5 minutes. If the dough is still stick, add a little more flour; if it is too stiff, a little more water. It is ready when no longer tacky but soft, elastic, and smooth. Put the dough in a clean, oiled  bowl and leave to rise until doubled in bulk, 1-2 hours. After proofing, it can be chilled until needed. Give it some time to come back to room temperature, about an hour.
For the topping, first toss the eggplant with the salt in a colander and set aside. Heat the olive oil in a heavy, 10-inch sauté pan and, when hot but not smoking, add the onions with a pinch of salt. Give them a good stir and cook for 5 minutes. Add the peppers and cook for 15-20 minutes more, until the onions are golden and sweet and the peppers soft. Be sure to stir them often so they cook evenly and do not stick to the bottom of the pan. Blot the eggplant dry with a towel, add to the pan along with the rosemary, and cook for a final 15 minutes, stirring often, until the eggplant is soft all the way through. Remove from heat and rain off any excess oil. Check the seasoning and set aside to cool.
When ready to bake the flatbread, preheat the oven to 525 degrees F (with a baking stone, if you have one). Divide the dough into two and roll out half very thinly to make a 12-inch by 8-inch oblong. If it's being stubborn, cover and let rest for a few minutes for the gluten to relax and then try again. Place it on a peel, if using a baking stone, or on a baking sheet, if not. Spread half the vegetables over the surface, right up to the edges of the dough. Bake for 8-15 minutes (flatbread baked on a stone will take significantly less time), until browned and crispy underneath. While the first flatbread is in the oven, start rolling and topping the next one. They are great served piping hot from the oven or at room temperature.
Serves 6-8 as an appetizer.

Wednesday, February 15, 2012

A heady affair

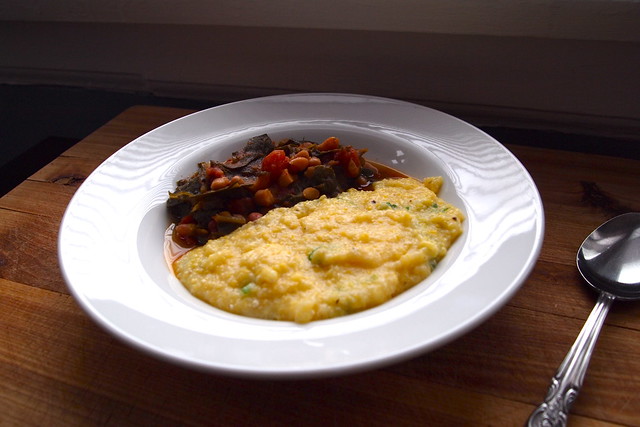
Smothered beans
I complain a lot during these dreary months. Nearly everything is drab, grey, and dead. It wears on me. A girl can only eat so many plates of root vegetables, can only drag herself through so many sunless days in a season. But even so, I'd hardly say that I dislike winter. There's something to be said for bright and biting winter mornings, taking in the cold, clean air, and, better yet, for being chased inside by the wind to blankets and tea and warm things bubbling in the oven. Yes, that's what this season is really about for me: keeping the oven glowing.
Though I've gone back to eating meat, there are still few things I welcome more than an earnest pot of beans on a dark, wintery day. I like the simplicity of beans. With the day still before you, you can stir together a few handfuls with some water and salt and keep them bubbling modestly in the oven hours. You can forget them for a while, let the day unfold, and then come back to find yourself with something truly sumptuous. It's surprising sometimes just how sumptuous and satisfying a pot of beans can be. Beans in the cupboard can look so spare.
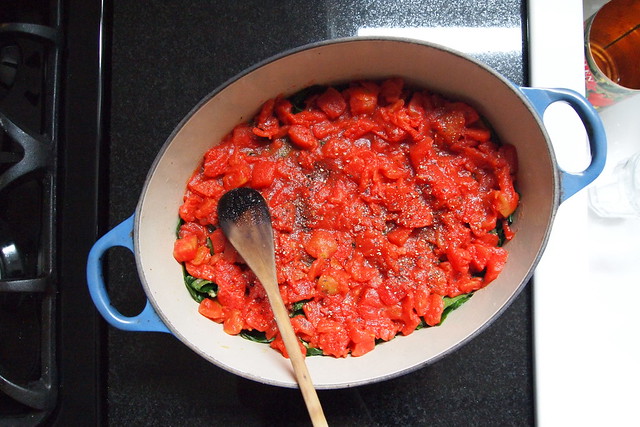
A layer of tomatoes
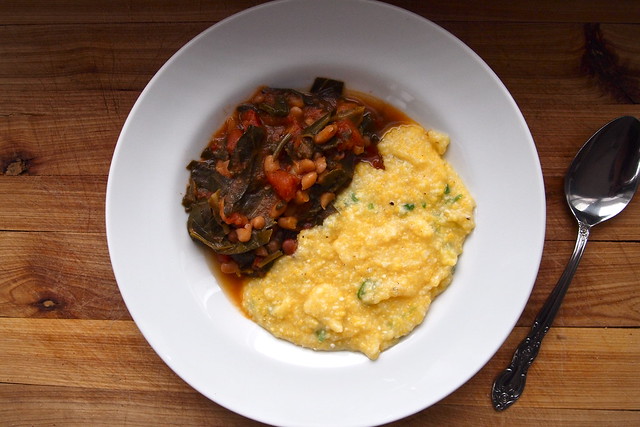
My favourite pot of beans this winter has been one with a tangle of greens, leeks, and chopped tomatoes. These beans aren't much to look at, admittedly, but they will surprise you. With a plate of them, you're in for spoonful after spoonful of some pretty serious umami. Prepare yourself for a heady affair.
For the first issue of Lucky Peach, Harold McGee wrote a great piece on umami and MSG. The short of it was: MSG, which occurs naturally in lots of foods, is umami and nothing that we should shy away from. In fact, it's the reason, for those of us who love tomatoes, why we love them. When I first read this last summer, I wasn't quite sure what to think. Tomatoes just didn't really scream umami to me. But with these beans, I think I finally get what McGee means. Give tomatoes, beans, and collard greens a few good hours together in the oven, and you'll see. You'll have something to savour.
Warm, wintery food

Smothered Beans
Adapted from Peter Berley's The Modern Vegetarian Kitchen
Note: Greens. Collards, I know, are not as popular as Swiss chard or kale, but trust me, collards are what you want with these beans. They have a certain savour to them. Anything else will be disappointing. Beans. If, like me, you sometimes like to splurge on dried heirloom beans, this is the dish for them. Much of its final flavour depends on the beans' pot liquor, and quality beans always make for a better one. Leeks. Leeks are often rather gritty. I think the easiest way to clean them is to slit them vertically and then run them under the tap, spreading out their layers with your thumb. Cooking time. I haven't been in the habit of pre-soaking my beans lately and baked these beans for closer to three hours than one-and-a-half. The collards held up splendidly, and the flavours, I'm sure, only got better. Next time, I might let the beans soak at least a couple of hours at room temperature to give them a head start. They could have baked for longer and gotten more tender, but I was getting hungry.


1 cup dried white beans (I like Rancho Gordo's alubia blanca), sorted, soaked, and rinsed
1/4 cup dried pinto beans, sorted soaked and rinsed
3 tablespoons extra-virgin olive oil
2 leeks, white and tender green parts, thinly sliced
3 garlic cloves, thinly sliced
1 teaspoon dried oregano
1 1/2 teaspoons coarse sea salt
1 bunch collard greens, trimmed of tough stems and sliced into 1/2-inch-wide strips
1 14-oz can of chopped tomatoes
Freshly ground black pepper

Preheat the oven to 275 degrees F.
In a saucepan over medium heat, combine the beans with 4 cups of water and bring to a boil. Skim the foam, reduce the heat, and simmer, covered, for 30 minutes.
While the beans cook, warm the oil in a Dutch oven over medium heat. Add the leeks, garlic, oregano, and 1 teaspoon of the salt. Sauté for 5 minutes, until the leeks begin to soften. Cover the Dutch oven, reduce the heat to low, and simmer gently for 10 minutes.
Place the collard greens in a large bowl, add the cooked leeks, and stir to combine.
Place a strainer or colander over a bowl and pour in the beans. Measure out the cooking liquid and, if needed, add enough fresh water to equal 2 cups.
Place half of the greens mixture in the bottom of the Dutch oven. Add the strained beans. Spread the remaining greens over the beans and top with the tomatoes. Sprinkle the remaining 1/2 teaspoon of salt over the tomatoes and add a few grinds of pepper. Without disturbing the layers, gently pour enough of the bean water down the side of the Dutch oven to barely cover the tomatoes.
Place the Dutch oven over high heat and bring to a boil. Remove from the stovetop, cover, and bake for 1 hour. Remove the cover and check the Dutch oven, adding a little more water if it is drying out. The casserole should be just slightly juicy when pressed gently with the back of a wooden spoon. Replace the cover and continue to braise for 20 to 30 more minutes, until the beans are tender and the greens and leeks have melted.
Serves 6.

Friday, September 2, 2011

Something to enliven

Okra curry
I've been busy with painting, oh so much painting--like eight to ten hours every day the past two weeks clearing baseboards and crown moulding (of general grime, sawdust, plaster, and cat hair), stripping and re-finishing hardware, taping, patching, priming, and, of course, actual painting. Getting this new apartment ready has been a lot of work--way more than I'd imagined it would be--and there's still a few more days' worth to be done. Luckily, I've had the help of my boyfriend and a couple of very kind and dedicated friends. We've been working steadily through the days, keeping one another sane and motivated. Without them, I'm sure that by now I'd be lying somewhere in a pool of paint, exhausted, paint-spattered, and delirious.
Painted hardware
Though we've been really busy, we've still had to eat. There has been no time for trips to the farmers' market or elaborate meals. Early every morning, I've been preparing a little lunch for the four of us--something simple and hearty, something to nourish and enliven us after a few hours of work. Over the past week, I've made this mujadara a couple of times, this lentil salad, this split-pea dal, a few loaves of Tartine sourdough, a black-bean chili, and best of all, maybe, Tahera Rawji's okra curry.
I'm not sure what it is about okra, but I'm always excited to try more however it's served. Maybe it has something to do with how weird a vegetable okra is (at least to me, not being from the American South)--so ridged and pointy, so slimy on the inside, so distinctively vegetal tasting---I guess I'm just curious about what people do with it, about how they make it welcome at their tables.
Hardware re-finished
My favourite preparation for a while now has been this okra curry. It's warmly spiced, rich, and comforting. You start by browning the okra--this seals it up so that it doesn't make the curry slimy. Then, you make the lush base in which the okra stews--onions sautéed to a golden hue, chopped tomatoes, garlic, ginger, and a punchy dose of spices. It all comes together pretty quickly. Add the okra back in, and within a few minutes, you've got yourself a tangy and wonderfully aromatic curry. That's how I've been making okra welcome at my table lately.

Okra Curry
Adapted from Tahera Rawji's Simply Indian
Note: I like to make my own curry powder. That way, I know that my curries will be punchy and flavourful. It's simple--toast whole spices like cumin, coriander seed, fenugreek, clove, and mustard seed along with a few dried chilis in a dry skillet, grind them to a fine powder, and then blend with a bit of cinnamon and turmeric. Garam masala is another spice blend that you can make at home. Typically, it includes the sorts of spice that complement sweet things--like nutmeg, cardamom, and star anise--along with a bit of black pepper (I've included one of Rawji's blends below). About the yogurt--it makes the curry a little creamier and adds a bit of tanginess, but if I don't happen to have any yogurt lying around, I don't worry about it.
1 lb okra
1/4 cup vegetable oil
2 medium onions, sliced
1 large tomato, chopped
2 cloves garlic, minced
1/2 teaspoon grated ginger
1 teaspoon cayenne pepper
1 teaspoon curry powder
1 teaspoon turmeric
1/2 teaspoon garam masala
2 tablespoons yogurt (optional)
Wash the okra and thoroughly pat dry. Trim at both ends and cut into half-inch lengths.
In a wide skillet, warm the vegetable oil over medium-high heat. Add the okra and, stirring occasionally, fry until golden brown. The frying seals the okra. Remove from the oil and set aside.
In the same skillet, sauté the onions over medium-high heat until golden. Then, add the tomatoes, garlic, ginger, cayenne, curry powder, and turmeric. Continue cooking over medium heat for about five minutes, allowing the tomatoes to break down and the flavours to come together. Add the okra and stew for another five minutes. If the pan starts to get too dry at any point, add a splash of water. Then, add the yogurt, if using. Just before serving, stir in the garam masala.

Garam Masala
Adapted from Tahera Rawji's Simply Indian
1/2 cup cardamom pods
3 whole nutmeg
1 tablespoon black peppercorns
6 whole star anise
4 cinnamon sticks
Toast the spices in a dry skillet until fragrant. Grind to a fine powder and seal in an air-tight container. It should keep for about a year.

About the door hardware: one of the great things about the new apartment is that it came with all its original solid brass door knobs, plates, and rosettes--gorgeous old Victorian(ish) things. What was not so great was that they were carelessly painted over and painted over in hideous colours (peach, blue, something that was once white). I was determined to save the hardware. There are a number of methods out there, but since there might have been a layer of lead paint on everything of mine, I decided on the method described here on An Urban Cottage. Basically, you get your hands on some sodium carbonate (Arm & Hammer sells it as "Super Washing Soda," found in the laundry aisle) and a bucket you don't mind discarding later. Then, you boil enough water to cover your ailing hardware and dump it in the bucket, and for every quart of water you boil, you add about a quarter cup of sodium carbonate to the mix. Soak the hardware in it for at least 24 hours, and the paint will peel right off, usually in one neat piece. Magic! Or maybe just chemistry. Then, just scrub off any remaining paint with an old toothbrush and give your hardware a new coat of paint, preferably something rust resistant. I used Rustoleum spray paint--the satin nickel in their metallic line. This was really, really easy--no simmering in a crock pot, no chemical paint stripper--just good old sodium carbonate, which, by the way, is the same alkali key to making excellent ramen noodles, (but please don't use Super Washing Soda in your ramen dough--it's probably not food grade). Hopefully, I'll be able to say more on that later...in the new kitchen.

Tuesday, May 31, 2011

Brick Roux Magic

Vegetarian Gumbo
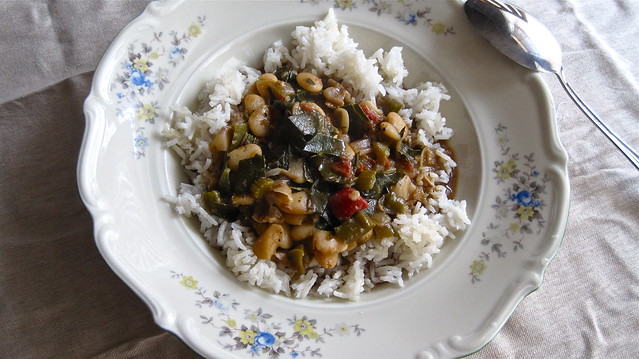
Save this one for a cold, drizzly day. I think that we've seen the last of those for a while here in Chicago. And even so, that won't be enough keep me from what remains of this gumbo. Have you ever had something made with a brick roux? It's what makes this gumbo. Like any roux, it's just fat and flour--the magic of it is in the extended spell it spends in the oven, getting dark and smoky, with a savour unlike anything else I've ever tasted. It permeates the gumbo and lingers on tongue, leaving you a little wide-eyed, a little desperate for more. Brick roux is a serious and heady affair.
But that doesn't make it difficult. Just lug out your trusty cast-iron dutch oven (or another heavy-bottomed, oven-proof vessel of your choosing), whisk together equal amounts of flour and oil, and let things work their magic in the oven. In about an hour and a half, you'll have a rich, dark red paste--the real soul of your gumbo. The rest is a matter of sautéing and simmering, as you might expect--a mirepoix of onion, celery, and green pepper (the Cajun trinity), creamy beans, some collards, if you like. Irresistible on a cold, dark day, (though I might not wait even that long to make this again--I have a friend who strongly hinted that he'd welcome some more soon, despite the heat).
A final note about brick roux and gumbo. Unlike the sort of roux you're likely familiar with--pale and prized for its thickening power in béchamel and the like--brick roux is all flavour and won't do any work when it comes to thickening your gumbo. For this, turn to filé powder, the ground leaves of the sassafras plant, which, I'm told, is the traditional ingredient for thickening gumbo. The powder also adds a slight lemony note to the gumbo and complements the savour of the roux. If you can't find filé, a handful of chopped okra is a good second. I actually prefer okra, even if it flouts tradition. Decide for yourself the next time you're in need of something to warm you.

Vegetarian Gumbo
Adapted from  Alton Brown and Deborah Madison's Vegetarian Cooking for Everyone
Note: a few things--first, the beans. If you can find yourself a bag of Camellia Brand red kidney beans from Louisiana, good on you. According to Cook's Illustrated, anyway, they're the preferred bean of New Orleans cooks--thin-skinned and very creamy. Otherwise, you might try the more widely available Mexican Red bean. Personally, I like the Brown Tepary bean, which you can find at Rancho Gordo. It has a nice grassy sweetness that complements the smokiness of the gumbo (the beans pictured above are butter beans--also good but not particularly noteworthy). Second, I like to give my roux an extra 10 minutes in the oven. The one time I didn't, it didn't quite have its usual smoky intensity. Don't get too daring with it, though--you want brick roux not blackened roux. Also, please use care when handling your roux--it is, after all, very hot fat and flour. Finally, filé powder, the ground leaves of the sassafras plant, is the traditional thickener in gumbo, and you can find with the other spices at a well-stocked grocery store or at a place that specialises in Cajun food. Otherwise, okra is a fine substitute and will thicken your gumbo just the same.

8 oz dried beans, sorted and soaked (see note above)
1/2 teaspoon sea salt

4 oz vegetable oil
4 oz all-purpose flour

4 cups good-quality vegetable broth
1 medium onion, diced
1 small green bell pepper, diced (about a 1/2 cup)
2 stalks of celery, diced
4 cloves garlic, minced
1/2 cup peeled, seeded, and chopped tomato
1/2 teaspoon freshly ground black pepper
1 teaspoon fresh thyme, chopped
1/4 teaspoon cayenne pepper
2 bay leaves
2-3 cups collard greens, chopped
1 tablespoon filé powder or 2 oz okra, trimmed and chopped into 1/2-inch pieces
Salt to taste

Preheat the oven to 350 degrees F.
Place the oil and flour in a 5- to 6-quart cast-iron dutch oven and whisk into a smooth paste. Place the dutch oven on the middle shelf of the oven and bake, uncovered, for 1 1/2 hours--give or take 15 minutes--whisking two to three times throughout the cooking process.
Meanwhile, place the beans in a 2-quart saucepan with enough water to cover them by an inch. Add the salt. Bring to a boil over medium heat. Leave them cooking at a hard boil for 5 minutes, skimming off any foam that rises to the surface. Reduce heat to low and gently simmer, covered, until beans are tender. Cooking times vary widely between bean varietals.
When the roux is done, carefully remove it from the oven and set it over medium-high heat. Gently add onions, green pepper, celery, and garlic and cook, stirring constantly for 7 to 8 minutes or until the onions are translucent.
Add the tomatoes, black pepper, cayenne, thyme, and bay leaves and stir to combine. Gradually add the vegetable broth while stirring continuously. Reduce the heat to low and cook, covered, for 20 minutes. Then add the collards and beans and cook for 20 minutes more--if using okra, add 10 minutes in. Salt to taste (with the vegetable broth I use, I find that salt isn't necessary).
Turn off the heat. Add filé while stirring constantly. Cover and let sit for 10 minutes. Serve over rice.
Serves 6-8

Sunday, January 23, 2011

Putting things in the past

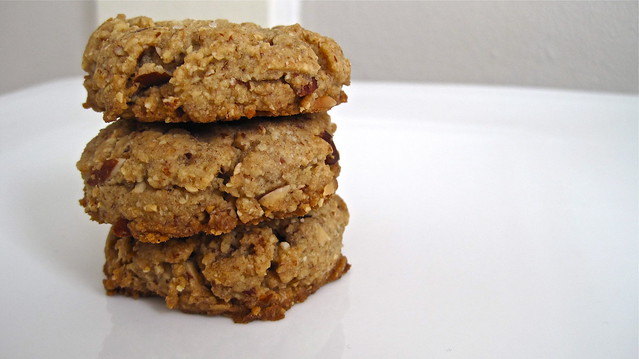
Almond cookies!
Every academic department has its social traditions. At my alma mater, for instance, on Thursday evenings after the weekly departmental colloquium (i.e. lecture and discussion), we all flocked to the faculty club to have a drink (on the department's tab, of course), gossip talk philosophy, and fight over the one sad bowl of peanuts or pretzels that the bartender put out.
Things are a little different at my new department. On Friday afternoons after the last talk has let out, everyone similarly gathers in the departmental lounge for a few hours to unwind over food and drink--only here, it's traditionally the responsibility of members of the incoming class to put the (modest) budget to good use every week and provide whatever sort of food and drink they want within the budget's constraints. This, of course, has made for both really good and really bad outcomes. I've been told that sometime ago the weekly spread was always Cheetos and PBR, as though teenagers had taken over the budget. But this year, I must say, my fellow first-years and I have been doing a pretty stand-up job. There's been plenty of fruit, cheese, hummus, and, ahem, the occasional bottle of twelve-year-old whisky.
IMG_1985
I was responsible for last Friday's fare, and as you might imagine, things could easily have gotten out of hand with me, food, and a budget with which to do whatever I willed. I dreamed up something like this: at least two kinds of home-made hummus, maybe a red lentil dip, home-made pita bread, poached pears, dark rye bread, apple slices and caramel dip, mulled cider...but I restrained myself (there is that business of reading and research that I'm also supposed to be doing, if you remember) and drew the line at making cookies.
Okay, so I know that the last recipe I shared with you was from Berley's Modern Vegetarian Kitchen, but I love this book--it was the first real cookbook I worked with back in my early undergraduate days when I was just starting to get a feel for the kitchen, and I've never really put it down for very long since. It's clear, well-written, and full of reassurance for the novice cook--there are some very elegant illustrations, for instance, that demonstrate how to deal with odd-ball vegetables like artichokes and leeks, and there's lots of helpful information for vegetarians, new and old, about what to do with things like tempeh or seitan.
However, the reason that I've been turning to this book rather frequently as of late is its vegan desserts. As much as I love butter and eggs, I can't of course exclude my vegan friends from the table. I really like Berley's desserts--not only because they don't rely on things like butter substitutes or egg replacers but especially because they're amazing as they are. They don't taste as though they're missing something.
IMG_1994
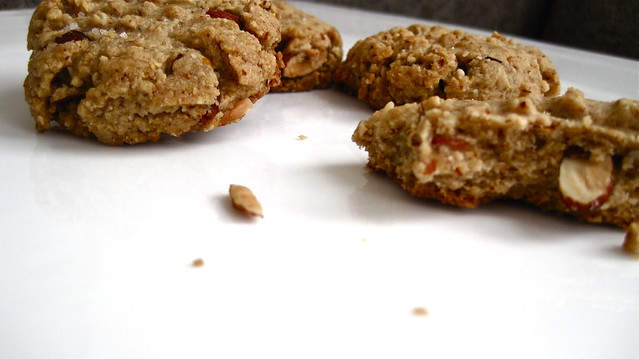
These toasted almond cookies are particularly outstanding. You start with raw almonds, which are toasted in the oven until their sweet nuttiness really comes through. You then grind these along with flour, salt, and baking soda into a beautifully aromatic meal. Finally, the real magic happens: maple syrup and a generous heap of orange zest go into the batter. Just shape the cookies as you would their peanut-butter counterparts, finish them with a sprinkle of sea salt, and into the oven they go. (And because they're vegan, you can definitely lick the spoon when you're done.)
The Friday crowd really enjoyed these cookies. They'd munch contemplatively on their first bites, not quite having figured out what was in them, and then smile knowingly when I told them. You'd almost think that they were peanut-butter cookies--the maple syrup mutes that distinctive almond flavour a little bit--but then the orange blooms in your mouth, and you know that this is no ordinary cookie.
Hopefully, these helped everyone put the old days of Cheetos and PBR behind them.

Toasted Almond Cookies with Orange Zest
Adapted (barely) from Peter Berley's Modern Vegetarian Kitchen

1 cup whole almonds (6 oz)
2 cups unbleached all-purpose flour or 1 cup whole-wheat pastry flour and 1 cup all-purpose (8.4 oz of AP or 4.2 oz each of AP and WWP)
1/4 teaspoon fine sea salt
1/8 teaspoon baking soda
1/2 cup pure maple syrup (5.5 oz)
1/2 cup pure olive oil (or melted coconut butter or melted unsalted butter) (4 oz)
1 teaspoon vanilla extract
1/2 teaspoon almond extract
1 teaspoon finely grated orange zest
1/2 cup sliced almonds (2 oz)
  1. Preheat oven to 350 degrees. Spread the almonds, both whole and sliced (while careful not to mix), on an ungreased baking sheet and toast in the oven for eight minutes.
  2. Set the sliced almonds aside. In a food processor fitted with a metal blade, combine the whole  almonds, flour, salt, and baking soda and grind to a fine meal.
  3. Lightly grease two baking sheets or line them with parchment paper (or, if you're short on half-sheets like me, just grease the one on which you toasted the almonds--no need to wash it, either).
  4. In a bowl, whisk together the maple syrup, olive oil, vanilla, almond extract, and orange zest. Add the almond mixture and sliced almonds and mix together with a wooden spoon (or your favourite silicone spatula).
  5. Moisten your hands and form the dough into walnut-sized balls (or, get out your trusty scoop--I used a #30, which I think means that it's a one-ounce scoop). Place the balls three inches apart on the baking sheet(s) and gently flatten into 2-inch rounds with a fork. Dust each cookie with a few grains of your favourite salt (I have Himalayan Pink that I like quite a bit).
  6. Bake for 15 to 18 minutes, rotating the baking sheets halfway through for evening baking, until cookies are golden brown.
  7. Transfer the cookies to a wire rack to cool.
Yield: the original recipe says about 24 but I only got 19. It's possible that I overfilled a few of my scoops. The smaller cookies were the prettiest.

Wednesday, January 12, 2011

A Belated Birthday

Birthday Cake!
Last week, one of my friends neglected to tell anyone that it was his birthday until it had all but passed and so spent it at home alone. We remedied this later in the week by taking him out to Karyn's on Green, where he could eat his vegan heart out. And though I will never be so virtuous a person as to be able to give up such things as sauteing my mushrooms in butter or topping my greens with a poached egg, I ate with relish that night. The "chicken legs," especially, were a work of genius. Most vegetarian meat substitutes lack something texturally--they're...spongy at best. But these legs were something to really sink one's teeth into and, even two days later as leftovers, were great--they even had the sort of satisfying fattiness to them that you'd expect from a good chicken leg. All of us left the restaurant overstuffed and content.
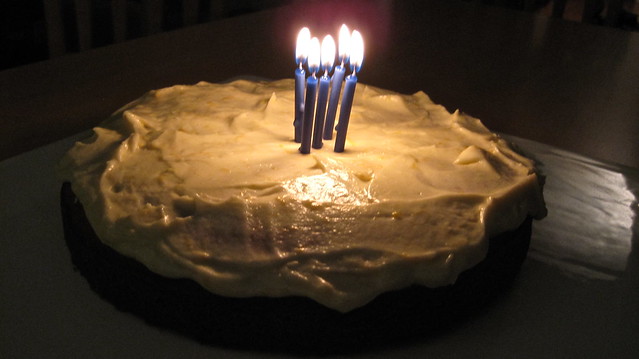
And if that were not enough, having just fantasized about baking towering birthday cakes draped in snowy frosting earlier that week--and because, of course, I hold my friends dear--I baked a (belated) birthday cake the next day to coincide with our weekly listening party. And so we spent Saturday evening digging into (not quite vegan) maple birthday cake with the strange and lovely croonings of Joanna Newsom's Ys flooding the room.
Meyer-lemon-frosted
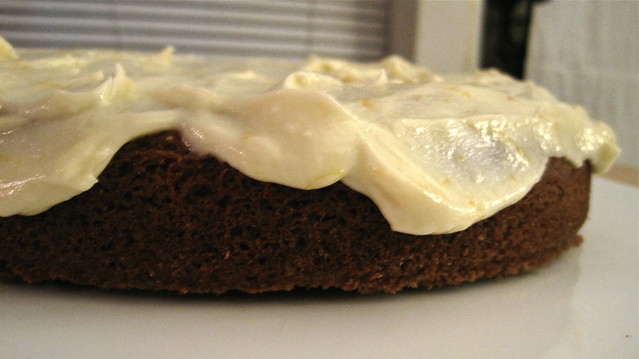
This cake, kind of like Joanna Newsom, is not for the faint of heart. It's not the buttercream-frosted vanilla cake from your childhood birthday parties, anyway. It has such grown-up things in it as maple syrup (a cup's worth!) and whole-wheat pastry flour, which make the cake's sweetness warm, dark, and deep. And to offset the maple intensity is a crown of meyer-lemon frosting, adding just enough brightness to make it all come together. This is exactly the sort of cake you want on a cold, dark January night, whether or not it's your birthday. (Apologies for the absence of shots of the cake's insides--we polished it off too quickly.)

(Vegan) Maple Birthday Cake with Meyer-Lemon Frosting
Cake base adapted (barely) from Peter Berley's Modern Vegetarian Kitchen

Note: This cake can be made vegan, just follow the substitutions below. For some reason or another, this cake tends to fall a little in the centre--I will have to do so more testing in the kitchen to get this worked out. However, this is an easy fix: just level off the top of the cake with a serrated knife (it doesn't have to be perfect) and cover it all up with the frosting. One last thing--the recipe for frosting below doesn't quite make enough to fully cover the cake (as you can see), so you'll have to scale up, probably by 1.5, if you don't want a bit of cake peeking out from underneath. Personally, I think it looks just fine this way.

For the cake:
1 1/3 cups unbleached all-purpose flour
2/3 cup whole-wheat pastry flour
1 teaspoon baking powder
1 teaspoon baking soda
1/2 teaspoon fine sea salt
1 cup pure maple syrup
2/3 cup water or 2 eggs + 3 tablespoons water
1/3 cup pure olive oil or melted butter
2 teaspoons apple cider vinegar
1 tablespoon vanilla extract

Preheat the oven to 350 degrees. Lightly oil a nine-inch springform pan and dust with all-purpose flour.
In a mixing bowl, sift together the flours, baking powder, baking soda, and salt.
In a separate bowl, whisk together the maple syrup, eggs (if using), water, olive oil/butter, vinegar, and vanilla. Add the wet mixture to the dry and stir until just combined, taking care not to overmix.
Pour the batter into the cake pan and bake for 25 minutes or until a toothpick inserted in the centre comes out clean. Set the cake pan on a rack to cool.

For the frosting:
1 stick of butter or 8 tablespoons of a vegan substitute like Earth Balance (4 oz), cut into one-inch pieces if using butter
1 1/2 cups of confectioners' sugar (4.5 oz)
1/2 teaspoon Meyer lemon juice
zest of one Meyer lemon

Cream butter and sugar together until smooth. Add zest and juice to combine.

Assembly:
Heap frosting on top of the cooled cake and spread into an even layer with an off-set spatula. Add candles, light them, and get ready to bellow out 'Happy Birthday'.

Thursday, October 28, 2010

Quick and Adaptable

Phyllo cups
Having recently moved to a new city and met a whole crowd lovely people to call my friends has been exciting in a number of ways, one of them being the chance to get to know all of them better over a good meal and a few pints. I've had more dinner guests and get-togethers at my place in the past two months than than I've had all year. I can only hope that it keeps up. There's really something to feeding the people you care about.
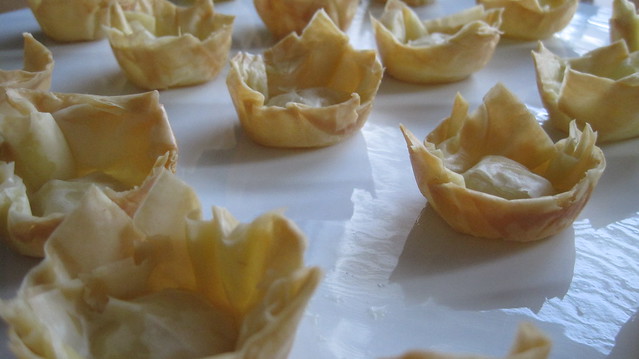
One of the challenges of feeding this crowd in particular has been keeping things vegan (and by extension, inclusive). Though this has ruled out a lot of approaches and flavours that I really enjoy, I've relished it and taken it as an opportunity to be more creative and adventurous in the kitchen. Last week, for instance, I freely adapted one of my favourite quiche recipes into mini phyllo cups filled with tender slivers of braised leek and port-laden slices of mushroom. Though the resulting hors d'oeuvres were a little lacking (namely in butter and silky custard), I won't be discouraged. Some recipes are just eminently more adaptable than others.
Skillet Cornbread
Take this cornbread, for instance. Pictured here, this particular incarnation involves butter, eggs, milk, a generous helping of scallion and jalepeno, coarsely ground yellow cornmeal, and finely ground blue cornmeal. However, it also does wonderfully as originally intended, i.e. vegan--just swap out the butter for corn oil, and the eggs and milk for water. Either way, you'll end up with some very satisfying cornbread--crisp, golden edges, a tender, jalepeno-flecked crumb, and subtle, corny sweetness. And, maybe best of all, it comes together quickly--unlike, say, my other favourite cornbread, which needs a bit of head start. I can't always be expected to plan for cornbread a whole day in advance, now can I?

Skillet Cornbread
Adapted from Peter Berley's The Modern Vegetarian Kitchen

Note: for a vegan version of this cornbread, replace the two eggs and milk with 1 cup + 1 tablespoon of water and the butter with an additional 2 tablespoons of corn oil in the wet mixture; do not use whole grain coarsely ground cornmeal--for one reason or another, this stuff never quite softens up, and you will end up with very chewy nubs of cornmeal in your bread.

1 cup unbleached white bread flour
1/2 cup coarsely ground yellow cornmeal (not whole grain, see notes above)
1/2 cup finely ground blue or yellow cornmeal or masa harina
2 teaspoons baking powder
2 eggs
1/2 cup + 1 tbsp milk or buttermilk
2 tablespoons corn oil
2 tablespoons cold butter
3 tablespoons maple syrup
2 scallions, finely chopped
1 jalepeno pepper, seeded and minced
3/4 teaspoon fine sea salt

Preheat oven to 350 degrees F. Grease a 9-inch cast-iron skillet, 8-inch square baking dish, or 9-inch pie pan.
In a bowl, whisk together the flour, cornmeals, and baking powder. Add butter to dry mixture and rub into pea-sized flecks with fingertips.
In a separate bowl, whisk together the eggs, milk, corn oil, maple syrup, scallion, jalepeno pepper, and salt.
Using a rubber spatula, fold the wet mixture into the dry mixture. Be careful not to overmix, a few lumps won't matter.
Pour the batter into the prepared pan and bake for 25 to 30 minutes, until a toothpick inserted into the middle of the corn bread comes out clean.
Cool in the pan for 15 minutes before serving.
Serves 4 to 6.