I wasn't planning on making macarons this past weekend. But then a good friend of mine called on Friday morning and asked apologetically if I could make a little dessert for his wedding reception. The wedding, I knew, was taking place on Sunday, just two days from then. Over the phone, I could here the chaotic clanging of pots and sheet pans. Clearly, the happy couple already had their hands full. I assured him that I'd have something put together for then and wished him luck.
Macarons seemed fitting for the occasion. When the couple had first gotten together, Octavian and I had had them over for dinner, and we finished the meal with a few Hermé macarons in the sweltering summer heat. And marriage--well, that seemed another beginning of sorts, so I set about separating some eggs and blanching some almonds.


Macarons Frivolité
Adapted from Pierre Hermé's Macaron
NOTE: For more general macaron advice, see this post. Equipment. You'll need at least two heavy-duty half-sheets to bake the shells. You can bake them in two batches, about 36 shells per sheet--Italian meringue is stable enough to stand for an hour or longer. You do, however, need to double up on half-sheets when you bake the shells--otherwise, the shells will crack during or after baking. The second half-sheet insulates the macarons from the oven's heat. (If you double the recipe as I did, the going is easier with three half-sheets on hand.) You'll also need a pastry bag and a no. 11 tip for piping the shells and filling, a candy thermometer for the meringue and caramel, and a mixer for the meringue and the buttercream. Aged egg whites. Egg whites that have been left in the fridge for 5-7 days, covered with plastic wrap with a few holes poked, will be easier to whip up for the Italian meringue. This allows some of their moisture to evaporate and their proteins to relax. Baking times. Hermé has you bake the shells for 12 minutes, but the time will vary depending on your oven. I've found that at 14 minutes, the feet on my macarons are better formed, and the shells no longer stick to the parchment on removal. Apples. You need at least 144 apple cubes, give or take, if you're making 36 macarons and putting 4 apple cubes in each. From Hermé's directions, I wasn't really clear on what to look for to determine whether the apples were ready. I baked mine for about an hour and 25 minutes, basically until the heat had taken away their raw edge. At this point, they're sort of pale and a little spongy. Not very pretty, but not to worry, no one will really see them. Colour. Before baking, my macaron shells were more or less the colour of mustard. Baking improved their colour. Even so, I might just skip out on the yellow food colouring all together next time. Trablit. Trablit is a French coffee extract. I don't know how it compares to more common coffee extracts from personal experience, but I'm sure that Hermé and other bakers favour Trablit because it's really just super-concentrated espresso with a little added sugar. (As a result, you don't need to worry about very much extra liquid interfering with the other ingredients.) In the macarons, the coffee flavour isn't very pronounced--though it's certainly there if you try the shells on their own. I can't really say quite what it added to the macarons overall. But I found a reasonably priced bottle of Trablit here at L'Epicerie. Buttercream. I wouldn't recommend making the buttercream on a very hot day. The butter might melt out of it. If you're worried about it, pop it in the freezer for 5 or 10 minutes before proceeding. But don't let it harden--otherwise, your piping won't be very pretty. The consistency of the buttercream should be airy and mousse-like. You may find yourself with leftover filling. Let your imagination run wild.
(These aren't the prettiest macarons I've ever made. I think my problem is a combination of letting the Italian meringue get too stiff and not mixing the meringue with the almond mixture thoroughly enough. The macaron batter holds its shape too well, which leaves the shells with little tails from piping. I'm a little out of practice.)
OVEN-DRIED APPLES
2-3 granny smith apples (or any other tart, baking apple)
15 g lemon juice
10 g granulated sugar
MACARON SHELLS
150 g powdered almonds
150 grams powdered sugar
55 g aged egg whites
7.5 g yolk-yellow food colouring
7.5 g Trablit coffee extract
+
150 g granulated sugar
37 g water
55 g aged egg whites
TO FINISH
Coarse-grain sugar
CARAMEL BUTTERCREAM
150 g granulated sugar
167 g heavy cream
33 g butter
2 big pinches of good-quality sea salt
145 g unsalted butter, softened
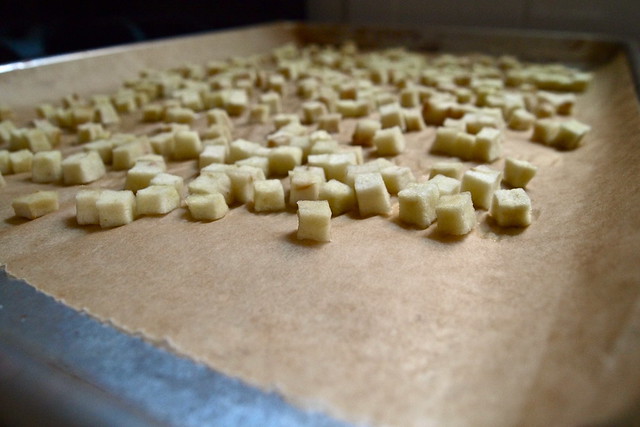
The night before, prepare the oven-dried apples. Peel and core the apples. Cut into 8 mm cubes and toss in the lemon juice as you go. Coat with the sugar.
Preheat the oven to 90 degrees C / 194 degrees F. Spread the apple pieces over a parchment-lined half-sheet in an even layer. Slide them into the oven and let them dehydrate for about an hour, depending on the variety of apple. The cubes should look somewhat dry when they're ready. Leave them at room temperature until the next day.
The next day, prepare the macaron shells. Sift the powdered sugar with the almonds. Mix the food colouring with one of the 55 g portions of egg whites. Add the egg mixture to the sugar and almonds without mixing.
Bring the sugar and water to a boil. When the syrup reaches 99 degrees C / 210 degrees F, begin whipping the second 55 g portion of egg whites. When the syrup reaches 118 degrees C / 244 degrees F, slowly pour the syrup into the whites, letting the syrup run down the sides of the bowl so that it doesn't splatter. The whites should have barely formed soft peaks at this point. Continue whipping the whites on high speed for one more minute. Reduce the speed of the mixer to medium and continue whipping the whites for about 2 minutes. The whites are ready when they've cooled to 50 degrees C / 122 degrees F. Add the whites to the powdered almond mixture and fold together quickly, in as few strokes as possible. The batter is of the right consistency when it falls off the end of the spatula in a thick ribbon. Put the macaron batter in a pastry bag fitted with a no. 11 tip.
Pipe shells around 3.5 cm in diameter, spaced at least 2 cm apart on a parchment-lined half-sheet (doubled with another half-sheet for insulation). Let the shells stand for 30 minutes. Partway through, sprinkle each shell with a pinch of coarse-grain sugar.
Preheat the oven to 180 degrees C / 356 degrees F. Slide the macaron shells into the oven. Bake for 12-14 minutes, opening the oven door quickly twice towards the end of this time. Let the shells cool for at least 30 minutes before lifting them from the parchment.
Prepare the caramel buttercream. Bring the heavy cream to a boil. Pour about 50 g of sugar into the bottom of a medium saucepan. Let it melt over medium heat. Then add 50 g more sugar and do the same. Repeat with the final 50 g of sugar. Let the sugar caramelize until it is dark amber.
Remove from heat. Minding the hot caramel, add the 33 g of butter. It will spatter and foam. Stir with a spatula and then pour in the cream in a few rounds, stirring until incorporated. Return the caramel to the flame and heat it until it reaches 108 degrees C / 226 degrees F. Pour it into a wide dish. Cover the caramel with plastic wrap, touching the wrap to the surface of the caramel. Leave in the refrigerator until cold.
Place the softened butter in the bowl of a stand mixer fitted with the whisk attachment and whip the butter for 8 minutes until airy. Add the cooled caramel in a few rounds and whip with the butter until uniform. Work quickly at this point. Put the buttercream into a pastry bag fitted with a no. 11 tip. Pipe a generous amount of buttercream onto half of the macaron shells. Gently press 4 or 5 apple cubes into the buttercream. Top with the remaining shells. Leave the macarons in the refrigerator 24 hours. Let stand at least 20 minutes at room temperature before serving.
Makes about 36 macarons.
Given that I only had a day or so, there was no time to suss out offerings at the farmers' market. I had to make do with what I already had at hand. Being April, that meant winter apples, butter, sugar, and cream--all that you really need to make Pierre Hermé's macarons frivolité.
And these macarons might just be my favourite yet. There are two parts to their filling: apples diced into tiny gems and then cooked gently in the oven and a deep, dark salted-butter caramel chilled and then whipped up cloud-like with butter. Together in the macarons, the effect is something like apple tarte tatin made fleeting, ethereal--there and then gone before you know it.
And these macarons might just be my favourite yet. There are two parts to their filling: apples diced into tiny gems and then cooked gently in the oven and a deep, dark salted-butter caramel chilled and then whipped up cloud-like with butter. Together in the macarons, the effect is something like apple tarte tatin made fleeting, ethereal--there and then gone before you know it.
The wedding, if you're curious, went beautifully. I got a little teary-eyed seeing the two of them at the altar. They were perfect. And afterwards, there were grapefruit mimosas, small savoury bites, marzipan, zserbó szelet, macarons, and tons of cake. The macarons were a hit with the guests. They were being snapped up in kitchen even before the desserts had been laid out. The bride admitted later that she'd secretly hoped that I would bring macarons. I was glad to have done my little part for the big day.
Macarons Frivolité
Adapted from Pierre Hermé's Macaron
NOTE: For more general macaron advice, see this post. Equipment. You'll need at least two heavy-duty half-sheets to bake the shells. You can bake them in two batches, about 36 shells per sheet--Italian meringue is stable enough to stand for an hour or longer. You do, however, need to double up on half-sheets when you bake the shells--otherwise, the shells will crack during or after baking. The second half-sheet insulates the macarons from the oven's heat. (If you double the recipe as I did, the going is easier with three half-sheets on hand.) You'll also need a pastry bag and a no. 11 tip for piping the shells and filling, a candy thermometer for the meringue and caramel, and a mixer for the meringue and the buttercream. Aged egg whites. Egg whites that have been left in the fridge for 5-7 days, covered with plastic wrap with a few holes poked, will be easier to whip up for the Italian meringue. This allows some of their moisture to evaporate and their proteins to relax. Baking times. Hermé has you bake the shells for 12 minutes, but the time will vary depending on your oven. I've found that at 14 minutes, the feet on my macarons are better formed, and the shells no longer stick to the parchment on removal. Apples. You need at least 144 apple cubes, give or take, if you're making 36 macarons and putting 4 apple cubes in each. From Hermé's directions, I wasn't really clear on what to look for to determine whether the apples were ready. I baked mine for about an hour and 25 minutes, basically until the heat had taken away their raw edge. At this point, they're sort of pale and a little spongy. Not very pretty, but not to worry, no one will really see them. Colour. Before baking, my macaron shells were more or less the colour of mustard. Baking improved their colour. Even so, I might just skip out on the yellow food colouring all together next time. Trablit. Trablit is a French coffee extract. I don't know how it compares to more common coffee extracts from personal experience, but I'm sure that Hermé and other bakers favour Trablit because it's really just super-concentrated espresso with a little added sugar. (As a result, you don't need to worry about very much extra liquid interfering with the other ingredients.) In the macarons, the coffee flavour isn't very pronounced--though it's certainly there if you try the shells on their own. I can't really say quite what it added to the macarons overall. But I found a reasonably priced bottle of Trablit here at L'Epicerie. Buttercream. I wouldn't recommend making the buttercream on a very hot day. The butter might melt out of it. If you're worried about it, pop it in the freezer for 5 or 10 minutes before proceeding. But don't let it harden--otherwise, your piping won't be very pretty. The consistency of the buttercream should be airy and mousse-like. You may find yourself with leftover filling. Let your imagination run wild.
(These aren't the prettiest macarons I've ever made. I think my problem is a combination of letting the Italian meringue get too stiff and not mixing the meringue with the almond mixture thoroughly enough. The macaron batter holds its shape too well, which leaves the shells with little tails from piping. I'm a little out of practice.)
OVEN-DRIED APPLES
2-3 granny smith apples (or any other tart, baking apple)
15 g lemon juice
10 g granulated sugar
MACARON SHELLS
150 g powdered almonds
150 grams powdered sugar
55 g aged egg whites
7.5 g yolk-yellow food colouring
7.5 g Trablit coffee extract
+
150 g granulated sugar
37 g water
55 g aged egg whites
TO FINISH
Coarse-grain sugar
CARAMEL BUTTERCREAM
150 g granulated sugar
167 g heavy cream
33 g butter
2 big pinches of good-quality sea salt
145 g unsalted butter, softened
The night before, prepare the oven-dried apples. Peel and core the apples. Cut into 8 mm cubes and toss in the lemon juice as you go. Coat with the sugar.
Preheat the oven to 90 degrees C / 194 degrees F. Spread the apple pieces over a parchment-lined half-sheet in an even layer. Slide them into the oven and let them dehydrate for about an hour, depending on the variety of apple. The cubes should look somewhat dry when they're ready. Leave them at room temperature until the next day.
The next day, prepare the macaron shells. Sift the powdered sugar with the almonds. Mix the food colouring with one of the 55 g portions of egg whites. Add the egg mixture to the sugar and almonds without mixing.
Bring the sugar and water to a boil. When the syrup reaches 99 degrees C / 210 degrees F, begin whipping the second 55 g portion of egg whites. When the syrup reaches 118 degrees C / 244 degrees F, slowly pour the syrup into the whites, letting the syrup run down the sides of the bowl so that it doesn't splatter. The whites should have barely formed soft peaks at this point. Continue whipping the whites on high speed for one more minute. Reduce the speed of the mixer to medium and continue whipping the whites for about 2 minutes. The whites are ready when they've cooled to 50 degrees C / 122 degrees F. Add the whites to the powdered almond mixture and fold together quickly, in as few strokes as possible. The batter is of the right consistency when it falls off the end of the spatula in a thick ribbon. Put the macaron batter in a pastry bag fitted with a no. 11 tip.
Pipe shells around 3.5 cm in diameter, spaced at least 2 cm apart on a parchment-lined half-sheet (doubled with another half-sheet for insulation). Let the shells stand for 30 minutes. Partway through, sprinkle each shell with a pinch of coarse-grain sugar.
Preheat the oven to 180 degrees C / 356 degrees F. Slide the macaron shells into the oven. Bake for 12-14 minutes, opening the oven door quickly twice towards the end of this time. Let the shells cool for at least 30 minutes before lifting them from the parchment.
Prepare the caramel buttercream. Bring the heavy cream to a boil. Pour about 50 g of sugar into the bottom of a medium saucepan. Let it melt over medium heat. Then add 50 g more sugar and do the same. Repeat with the final 50 g of sugar. Let the sugar caramelize until it is dark amber.
Remove from heat. Minding the hot caramel, add the 33 g of butter. It will spatter and foam. Stir with a spatula and then pour in the cream in a few rounds, stirring until incorporated. Return the caramel to the flame and heat it until it reaches 108 degrees C / 226 degrees F. Pour it into a wide dish. Cover the caramel with plastic wrap, touching the wrap to the surface of the caramel. Leave in the refrigerator until cold.
Place the softened butter in the bowl of a stand mixer fitted with the whisk attachment and whip the butter for 8 minutes until airy. Add the cooled caramel in a few rounds and whip with the butter until uniform. Work quickly at this point. Put the buttercream into a pastry bag fitted with a no. 11 tip. Pipe a generous amount of buttercream onto half of the macaron shells. Gently press 4 or 5 apple cubes into the buttercream. Top with the remaining shells. Leave the macarons in the refrigerator 24 hours. Let stand at least 20 minutes at room temperature before serving.
Makes about 36 macarons.