

This cake, Christina Tosi's apple-pie layer cake, was going to be the dessert at our Thanksgiving table on Thursday. I had it all planned out. There was a schedule, and I stuck to it. I made one of its five components every day starting last Wednesday. I assembled everything on Sunday afternoon. It was beautiful. It couldn't have gone better. I put it in the freezer to set. It could sit there tucked away until Thursday. I would just have to thaw it out early in the day. But on Monday afternoon, we couldn't resist. My boyfriend's parents were going to arrive from New York just in time for dinner. Wasn't that occasion enough to enjoy some cake? We could just whip up a quick apple tarte tatin for Thursday, we reasoned. So we held our breaths, popped the cake out of its metal ring, and peeled off the clear acetate that had been holding it all together.
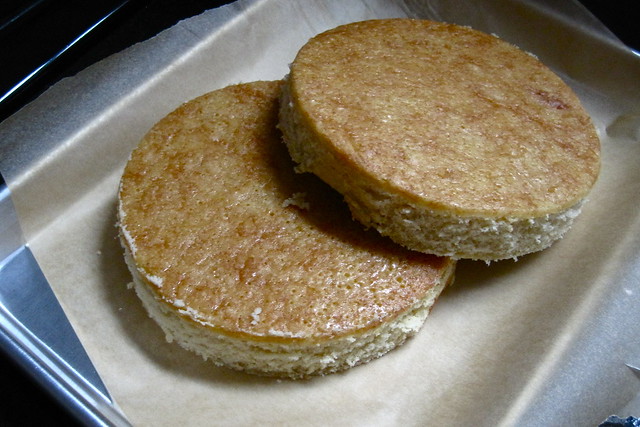
It really was a thing of beauty. Three six-inch discs of barely brown butter cake stacked high with liquid cheesecake, buttery pie crumb, and apple-pie filling, all of it crowned with pie-crumb frosting and more pie crumb. Glorious. Certainly the most impressive-looking cake ever put together in my kitchen. See why we couldn't wait any longer?
Right after dinner, we dug in, and it was amazing. It was familiar tasting but not. It was like apple pie but not. It was everything you'd ever want in a cake--rich, moist, wildly flavourful, and delightfully unexpected. It was just about perfect. Every bit of it, down to the tiniest nub of pie crumb, was so good. If only it would last us until Thanksgiving dinner.

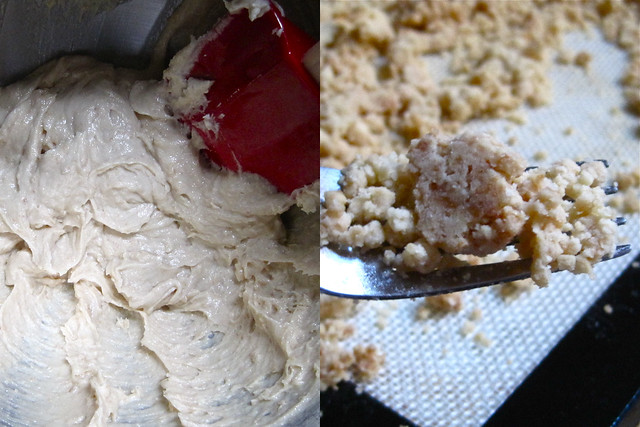
And it was just as fun to make as it was to eat. Though none of it was particularly challenging, it was eye-opening. Who knew, for example, that a little cream cheese, cornstarch, milk sugar, and egg barely baked would turn into something unmistakably cheesecake-like but totally spreadable? I know that I gushed about Christina Tosi and the Momofuku Milk Bar Cookbook just a few short weeks ago, but I'll do it again. This woman is a genius. Her desserts conjure up childhood in strange and wonderful ways. And all of it is put together with such care--every last little crumb. While making the components for the layer cake last week, I was in constant danger of eating up whatever I'd just made.

I don't think I can share the whole cake with you. I have to leave some of the Milk Bar cookbook for you to read and play with on your own. But I will give you the liquid cheesecake. I could definitely have just eaten the whole batch of it on my own the day I made it, spoonful after guilty spoonful.
Make the liquid cheesecake. Have it with carrot cake. Spread it on slices of vanilla pound cake. Share it with your friends (or not). Taste Tosi's genius and go out into the world for more.
Liquid Cheesecake
Adapted, barely, from the Momofuku Milk Bar Cookbook
225 g / 8 oz cream cheese
150 g / 3/4 cup sugar
6 g / 1 tablespoon cornstarch
2 g / 1/2 teaspoon sea salt
25 g / 2 tablespoons milk
1 egg
Heat oven to 300 F.
Put the cream cheese in the bowl of a stand mixer fitted with the paddle attachment and mix on low speed for 2 minutes. Scrape down the sides of the bowl with a spatula. Add the sugar and mix for 1-2 minutes, until the sugar has been completely incorporated. Scrape down the sides of the bowl.
Whisk together the cornstarch and salt in a medium bowl. Whisk in the milk in a slow, steady stream, then whisk in the egg until the slurry is homogenous.
With the mixer on medium-low, stream in the egg slurry. Paddle for 3-4 minutes until the mixture is smooth and loose. Scrape down the sides of the bowl.
Line the bottom and sides of a 6x6 inch baking pan with aluminium foil and/or parchment paper. Pour the cheesecake batter into the pan, put the pan in the oven, and bake for 15 minutes. Gently shake the pan. The cheesecake should be firmer and more set toward the outer boundaries of the baking pan but still be jiggly and loose in the dead center. If the cheesecake is jiggly all over, give it five minutes more. And 5 minutes more if it needs it. If the cheesecake rises more than a 1/4 inch or begins to brown, take it out of the oven immediately.
Cool the cheesecake completely, to finish the baking process and allow the cheesecake to set. The final product will resemble a cheesecake, but it will be pipeable and pliable enough to easily spread or smear, while still having body and volume. Once cool, the cheesecake can be stored in an airtight container in the fridge for up to 1 week.
The cake looks delicious and so impressive, but not like something I would be able to make. I'm really impatient when it comes to cooking and baking, I think I need instant gratification.
ReplyDeleteAll the different layers of this cake sound great though, and I'm dreaming of making this liquid cheesecake and spreading it on a slice of bread, for breakfast. (This sounds a bit wrong, I don't think I should be eating cheesecake for breakfast)
So beautiful!!!! Well done. It looks just like in the momofuku cookbook! I like how each day you made a different component. I feel like in the end when you add and layer them up all together it certainly must feel impressive.
ReplyDeleteThis makes me want to go out and buy six-inch pie pans just to be able to create the height of this cake. One question though: is there a recipe for a layered carrot cake with the liquid cheesecake as a part? That sounds absolutely delicious and I think I might try it out.
Happy Thanksgiving, Katie!
Lena, thanks! I understand the pull of instant gratification. I thought of the process here as kind of like an advent calendar counting down the days to Thanksgiving and cake time. Each day, I got to make something fun and new, and of course, I always let myself have a little nibble, just to make sure that everything had turned out all right. As for cheesecake for breakfast...I'm sure I've eaten worse. I know that I've had my mom's apple pie for breakfast before, so maybe if you top your toast + liquid cheesecake with some berries or peaches or some other fruit, you could let yourself think you were having a sensible breakfast. :)
ReplyDeleteAmy, thank you so much. It was very exciting putting the cake together. There's definitely something special about cakes with lots of layers.
To make Christina Tosi's cakes, you actually need a six-inch cake ring. They're pretty easy to find on Amazon. And you'll need a quarter sheet pan too. You bake the cake in the quarter sheet pan, and when you're ready to assemble it all, you stamp out 2 6-inch discs of cake. That should leave you with just a little more than you need to make the base layer out of cake scraps. You can kind of cut two half discs from the scraps and fill in what's missing with more scraps. You press this scrap layer into your six-inch ring and start building from there.
And there definitely is a carrot layer cake in the book that uses the liquid cream cheese. Instead of pie crumb, it calls for a graham cracker crumb. It looks awesome. You should make it!
Happy Thanksgiving to you too!
dear santa,
ReplyDeleteI would like....
1) momofuku milk bar cookbook, PUH-lease
2) a sheet plan
3) 6" cake cutter disc thingy
4) a flight to NYC so I can go to Milk Bar
...
5) and bring Katie some Staub bakeware while you're at it.
danke!
haus frau
Um okay so really, this is the most amazing sounding cake ever. pie. crumb. cheesecake. apple. wow. And it looks absolutely beautiful, but obviously not too pretty to eat. Impressed you could even hold out as long as you did. What did you have for Thanksgiving dessert instead?
Talley, thanks for putting in a good word with Santa for me :) If you're going to make Milk Bar cakes, you'll need strips of clear acetate too. You can find it in art supply stores. That's how the cake stays together while you build it. The Milk Bar cookbook is one of those books in which it's super important to read all of the introductory material discussing equipment, ingredients, and techniques. These desserts are for days when you're in the mood for studious preparation, checklists, and amazing results.
ReplyDeleteWe held out for about the minimum time--you have to freeze the cake for at least 12 hours so that you won't make a huge mess when you remove the acetate and cake ring. That doesn't mean I didn't open the freezer door every time I was in the kitchen just to look at it.
Our Thanksgiving menu was a little eclectic. My boyfriend's parents drove up and brought with them a shiny new ice cream maker for us, so we decided that it would be fun to make a quick custard on Thanksgiving morning and spin it into ice cream for dessert. We went with David Lebovitz's blue cheese and honey ice cream, a little intense but still very nice. Between all the fish sauce in the brussels sprouts and the blue cheese, it was a very pungent Thanksgiving.