Wednesday, May 16, 2012

Of course, there was cake

Chocolate-chip Layer Cake
This past weekend, we celebrated Octavian's birthday. We put down our books. We strolled out in the sunshine. We sipped on dulce de leche milkshakes. We cleaned decades' worth of dust off the LPs that belonged to Octavian's late grandfather. We let the needle drop and sat back as Ella's voice filled the room. It was a wonderful moment. These records had sat untouched for years in Octavian's grandparents' home in Romania. Many of them were British pressings of 1960s pop and jazz smuggled into the country during the Ceaușescu regime. It felt good to be able to give them a new life in our home.
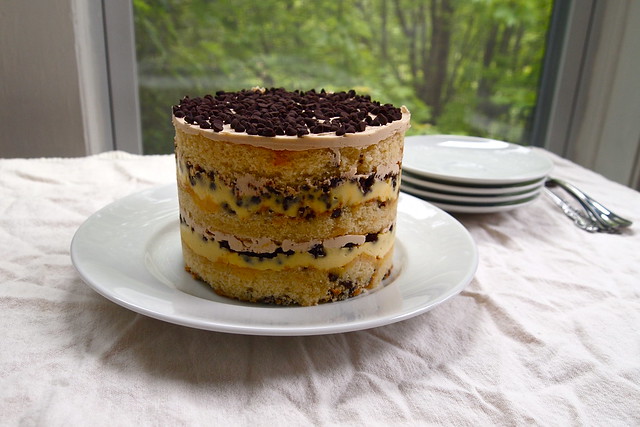
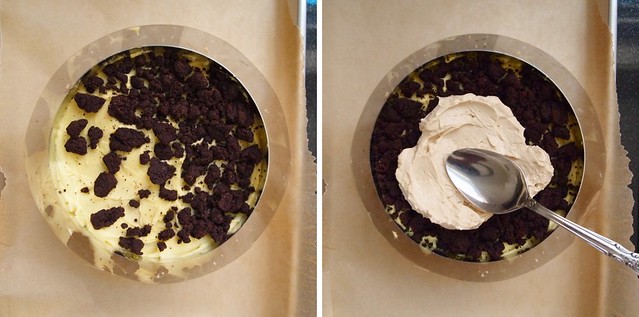
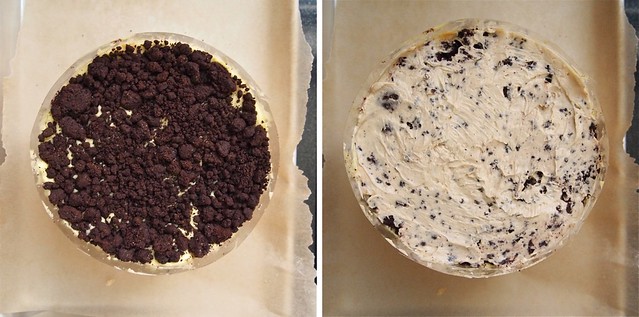
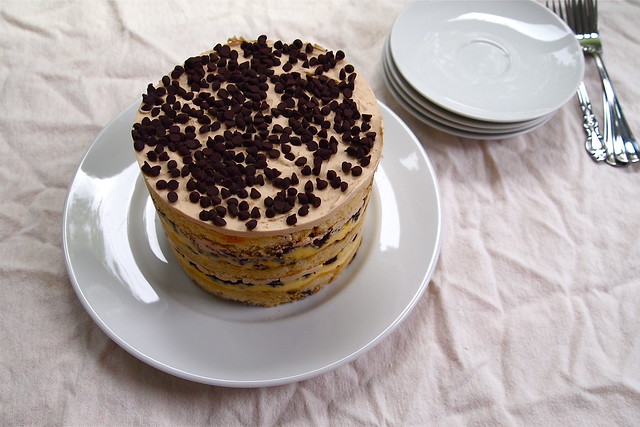
And, of course, there was cake. The folks at Momofuku Milk Bar call this one a chocolate-chip layer cake, but that, I think, hardly captures it. What makes this cake worthy of a chorus of oohs and aahs are the bright ribbons of passion-fruit curd running through it, bold, tart, and unmistakably tropical. The curd plays brilliantly with the other elements--coffee frosting, chocolate crumb, chocolate-chip cake--and lingers just a little in the mouth, exotic and floral. It is wonderfully good stuff.
First layer Chocolate crumb layer
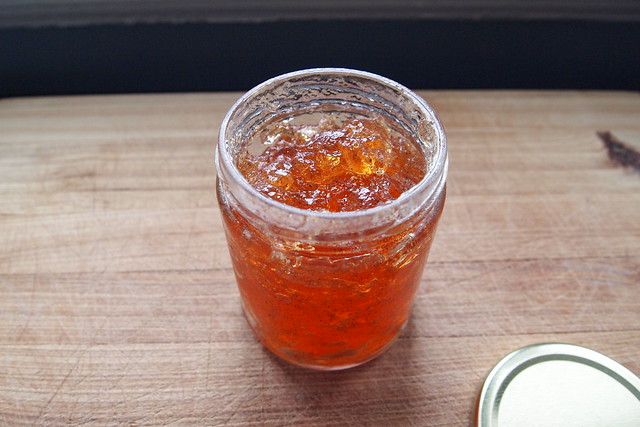
Without a doubt, in fact, it's the best stuff I've made out of the Milk Bar cookbook. I am crazy about this curd. I wish I'd made more last week--enough to smear on toast, to swirl into yogurt, to sandwich between bittersweet-chocolate-wafer cookies, to eat by the spoonful. It is that good.
Admittedly, this curd does demand a little more of you than the typical curd. You'll need a blender and some gelatin. But it's worth it. The addition of gelatin gives this curd serious body. Most curds rely only on eggs for thickening, and while that's fine for toast, curd made that way won't hold up in a cake or sandwiched between cookies. This curd, by comparison, is versatile. Let your imagination run wild. Whatever you come up with, this curd will not be out of place.
Chocolate chips! More fillings
And if you're wondering, Octavian and I really liked the cake as a whole. Passion fruit, coffee, and chocolate are amazing together (and make for a far more balanced cake than the chocolate-malt, if you ask me). But in our heart of hearts, we're still apple-pie layer cake people.
Crowned with chocolate chips The remaining slice

Passion-fruit Curd
Adapted from the Momofuku Milk Bar Cookbook
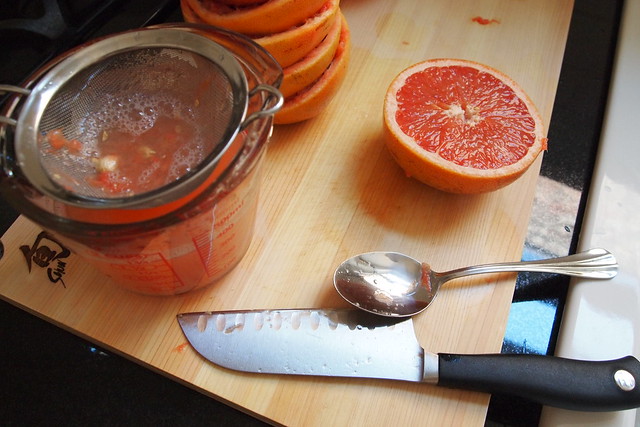
Note: About the passion fruit puree. There are a number of online vendors that sell very high-quality frozen fruit purees, but with overnight shipping and the quantity of puree recommended to ensure that it all stays cold, it can add up. I recommend that you check the freezer aisle of Latin markets in your area first. Chicagoans, I found more than enough El Sembrador passion fruit puree for this recipe for about $3 at Tony's Finer Foods in Logan Square. I was pleased with the quality.

100 g / 1/2 cup passion fruit puree
65 g / 1/3 cup sugar
2 eggs
1 gelatin sheet or 1/2 teaspoon powdered gelatin
170 g / 12 tablespoons (1 1/2 sticks) butter, very cold
2 g / 1/2 teaspoon fine sea salt

Put the passion fruit puree and sugar in a blender and blend until the sugar granules have dissolved. Make sure to scrape under the blender's blades--granules tend to deposit there. Add the eggs and blend on low until you have a bright-orange-yellow mixture. Transfer the contents of the blender to a medium saucepan. Clean the blender canister.
Bloom the gelatin. Soak the sheet in a small bowl of cold water. The gelatin is bloomed when it has become soft, after about 2 minutes. If the gelatin still has hard bits to it, it needs to bloom for longer. If it is so soft it is falling apart, it is overbloomed; discard the gelatin and start over. Gently squeeze the bloomed gelatin to remove any excess water before using.
Heat the passion fruit mixture over low heat, whisking regularly. As it heats up, it will begin to thicken; keep a close eye on it (this can take awhile--at least 15 minutes, in my experience). Once it boils, remove it from the stove and transfer it to the blender. Add the bloomed gelatin, butter, and salt and blend until the mixture is thick, shiny, and super-smooth.
Transfer the mixture to a heatproof container and put it in the fridge until the curd has cooled completely, at least 30 minutes. The curd can be refrigerated for up to 1 week. Do not freeze.
Makes about 1 cup.

Technical Notes for Milk Bar's Chocolate-chip Layer Cake

The directions for this cake were, for the most part, straightforward. Below are a few points of obsessive detail that you might find helpful when making the cake.
  • Passion-fruit curd: when you're dissolving the sugar into the puree in the blender, give the underside of the blades a scrape with a spatula before proceeding on. Sugar tends to deposit there, and you want that sugar in your curd.
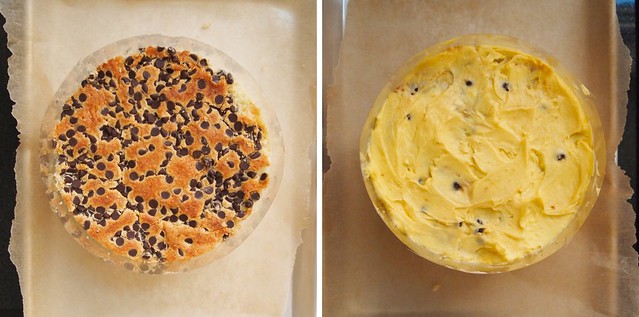
  • Cake mixing: be warned--the chocolate-chip cake has far more liquid than the other Milk Bar cakes, so you really need to mind Tosi's mixing instructions with this one. I mixed my cake batter for the six minutes required, and still my cake almost baked out of its quarter-sheet. It was also less dense than it should have been and was more difficult to work with as a result. The lesson: mix, mix, mix!
  • Chocolate chips: I'm not really sure why Tosi wants you to scatter the chips over the batter just before baking. Why not just fold them in by hand before spreading the batter over the quarter-sheet? Nearly all my chips stayed at the surface of the cake. I think the final cake would have had more visual appeal if you could see the chips in the profile of each of the cake rounds.
  • Serving: This cake was by far the easiest to cut slices out of. With previous Milk Bar cakes, I've had the slices collapse on me while trying to transfer them to a plate. Keep this cake cold enough, and it will slice beautifully. That said, I recommend, if you can manage, waiting for the cake slices to come up to temperature a little before digging in, at least 10 minutes. Cold, hard mini chocolate chips just don't have that much appeal.
  • Height: This layer cake was noticeably more stout than other Milk Bar layer cakes I've made. I chalk that up to the cake's components--they don't give the cake as much height as some others.

P.S. If you're looking to make the whole cake, you can find the recipe posted here.

Sunday, May 6, 2012

Those first few minutes were glorious

Grapefruit jelly filling!
Common sense recommends that you not fry doughnuts in your kitchen when it's 82 degrees F out or when you're planning to attend a rather technical philosophy talk in a few hours or when the only ventilation in your kitchen is an open window. It also recommends that you not down four or five such doughnuts (as modestly sized as they might be) within seconds of one another. But some considerations tend to drown out that sober, well-meaning voice in your head--for example: grapefruit-jelly doughnuts! Just the idea of them--it's like bells ringing in your head. It chimes and crashes 'til you wake up one day thinking, "Common sense--what's that?" and then find yourself juicing grapefruits in the kitchen.
So it was under the spell of these doughnuts that a few friends and I gathered in my sweltering, cramped kitchen this past week, dropping bits of brioche dough into hot, shimmering oil to have them sizzle, puff, and blister golden. It got pretty sticky and greasy in there, but that didn't matter to us. Warm doughnuts filled with grapefruit jelly--the idea kept us going.
Squeezing grapefruits Grapefruit jelly
And when we were through, those first few minutes were glorious. We stood there together in the thick air of the kitchen, just eating. We reached for one doughnut, then another, then another. Whatever sense we had had left us. We blissfully gorged ourselves. It was not, perhaps, our finest moment. Five or six doughnuts in, we started to feel the grease on our fingertips, the sugar going to our heads, and had to stop ourselves. But I maintain that those first few minutes were glorious. The aftermath--not so much. Octavian and I, anyway, were headache-stricken and drowsy for the remainder of the day. Doughnut coma is a phrase that comes to mind.
But I don't mean to discourage you from making your own doughnuts at home. It's a good way to spend an afternoon with friends (you should just round up more than I managed to to help you with the eating), and these doughnuts are really good. Make a party of it. Your friends will thank you.
That said, making these doughnuts in particular does require a bit of planning ahead and a few extra hands (remember those friends?). It's easiest, I think, to spread the work over two days. On the first day, you should put together the brioche dough. This is my favourite part. You start by mixing together a basic yeasted dough. Then you add butter, a lot of butter, to the dough, bit by bit, until it's satiny and yielding. This process takes a while, and you may find it tedious, but I am all for the waltz of dough and butter whirling around the bowl of my stand mixer. I find it mesmerizing.
Leaven and poolish Butter and zest Proofed dough
Brioche dough is not typically what you'd use for jelly doughnuts. By weight, the butter-to-flour ratio in brioche ranges from 1:2 to 4:5, which makes the dough far richer than what you find in most doughnuts. But this, I think, makes these doughnuts all the better--airy, delicate, meltingly tender. (I wouldn't have thought to do this myself. I came across the idea in Tartine Bread.) And the grapefruit jelly does help tame some of that richness.
You should make the jelly on the first day too, if not beforehand. It's a cinch and can be made well in advance (I made mine several weeks ago, when it was still legitimately grapefruit season)--just transfer it to a clean jar and store it in the freezer until you need it.
On the second day, gather your friends and put them to work (what else are friends for?). You should at least have one other person on hand. You'll have a much easier time with the deep-frying that way--maintaining the oil temperature, keeping track of the time, and turning the doughnuts in the oil are a lot for one person to do, given how quickly the doughnuts fry. And if you have more friends willing to help, all the better. Make yourselves a little assembly line. You'll definitely need a second set of hands when filling the doughnuts. (Try holding a pastry bag full of jelly and piercing a doughnut with the filling tip--no good can come of it.)
Doughnuts! Doughnuts
So, these doughnuts do call for a good deal of effort, and many of them will disappear into your friends' mouths seconds after you've put your pastry bag down. But I can think few better things to do with friends when you've got an afternoon.

Grapefruit Jelly Doughnuts
Adapted from the December 2011 Bon Appétit and Tartine Bread
Note: About the grapefruit jelly. The first time I cooked the jelly, it didn't set. I failed to note the importance of using a large saucepan. If this happens to you, just return the mixture to a large saucepan and bring to a boil. Let it boil for 3-4 minutes and pour it back into the shallow dish. You do not need to let the jelly reach 220 F while on the stove--it will set too hard if it reaches this temperature. If the jelly has set too hard, return it to a saucepan and cook over medium heat. Add up to 1/2 cup more of fresh grapefruit juice and whisk to incorporate. Bring it to a vigorous boil and then pour it back into the shallow dish to cool and set. And if you find yourself with extra jelly, it's wonderful on toast. About the brioche dough. I used Tartine Bread's brioche recipe for my doughnuts, which involves using sourdough starter and poolish for leavening. I'm pretty confident, however, that just about any brioche dough with a similar butter-to-flour ratio, 1:2, will produce good results. I like this Dorie Greenspan recipe. You might also consider using this brioche dough (but without all of the savouries, of course). Or, if you have Peter Reinhart's Bread Baker's Apprentice, you could also use his recipe for "middle-class" brioche. Whichever recipe you settle on, it will most certainly make more dough than you'll want for doughnuts. Scale the recipe and portion out the dough so that you have just as much as you need or bake a loaf of brioche with the extra like I did. Follow your chosen recipe's directions up to and including bulk fermentation (the first rise) and then chill the dough (for up to a day) until you're ready to follow the procedure below. About the safflower oil. Depending on the size of the pot in which you're deep-frying, you may need up to 1 quart of oil. Once you've finished the frying, you can let the oil cool and then filter it through a fine-mesh sieve or a coffee filter to get at least one more use out of it. Store it in the fridge until then.

GRAPEFRUIT JELLY
2 cups sugar
1 1/2 cups fresh grapefruit juice (from about two and a half grapefruits)
1/4 cup liquid pectin
1 vanilla bean, split lengthwise

DOUGHNUTS
700 g brioche dough, chilled (see note above)
Safflower oil for deep-frying
Powdered sugar for dusting

SPECIAL EQUIPMENT
Long-handled slotted spoon
Deep-fry/candy thermometer
Stand mixer
1 1/2-inch biscuit cutter
Pastry bag fitted with a Bismarck tip (no. 230)

Make the grapefruit jelly. Combine the sugar, grapefruit juice, and pectin in a large saucepan (the mixture tends to foam as it heats up--a larger saucepan will allow it to properly boil and release enough of its water content to set into a jelly). Scrape in the seeds from the vanilla bean and add the pod. Cook over medium heat, stirring, until the sugar dissolves. Increase the heat to high and whisk until mixture boils vigorously, about 6 minutes. Pour mixture into a shallow, heat-proof dish. Remove the vanilla bean pod. Let cool completely at room temperature. Cover and chill until set, at least 2 hours. The jelly should have a consistency similar to preserves--thick enough to cling to the end of a spoon. The jelly can be made up to a week in advance (or earlier if stored in the freezer in a clean jar).

Shape the doughnuts about 2 hours before serving. Lightly flour the dough and the work surface. There are two options for shaping the dough. (i) divide the dough into 3 equal portions and roll each portion into a cylinder about a 1/2 inch in diameter. If the dough feels as if it will not stretch further, let it rest for 10 minutes and continue rolling. Transfer the dough to a cutting board and set in a draft-free place or cover with a kitchen towel. Let rise until the dough looks soft and inflated, 1 to 2 hours. Cut the dough into on the diagonal into pieces about 2 inches long or as you prefer and then place near the stove. (ii) Roll the dough out to a thickness of 1/2 inch. Cut circles out the dough with a biscuit cutter. Transfer the circles to two lightly floured half-sheets and set in a draft-free place or cover with a kitchen towel. Let rise until doubled, 1 to 2 hours. Place near the stove.
Pour oil into a heavy, high-sided pan to a depth of 2 to 3 inches. Heat the oil over medium-high heat until it registers 375 degrees F on a deep-frying thermometer.
When deep-frying it's best to set up your prep area like an assembly line so you can work safely and efficiently. Set a rack near the stove and under it place a layer or two of papers towels.
Carefully slip four pieces of dough into the hot oil and fry until golden brown, about 1 minute. Using the slotted spoon, turn the dough and fry until brown on the second side, about 1 minute.
Carefully remove the doughnuts from the oil and transfer to the wire rack. Fry the remaining pieces of dough, checking the temperature of the oil intermittently. If necessary, allow a couple of minutes for the oil to return to 375 degrees F in between batches.
Transfer the grapefruit jelly to a pastry bag fitted with a Bismarck tip. Filling the doughnuts is a two-person job--you need one set of hands to hold the pastry bag upright and to pipe out the jelly and another set of hands to insert the Bismarck tip into the doughnuts. A squeeze bottle fitted with a 1/4-tip would also work. Fill each doughnut with about a 1 teaspoon of jelly. 
Dust the doughnuts with powdered sugar and serve immediately.
Makes 40-50 two-bite doughnuts.